Nginx部署前端项目
Posted 吹灭读书灯 一身都是月
tags:
篇首语:本文由小常识网(cha138.com)小编为大家整理,主要介绍了Nginx部署前端项目相关的知识,希望对你有一定的参考价值。
首先当然是检查nginx:
查看nginx的安装路径:whereis nginx
nginx: /usr/local/nginx
nginx常用命令:
cd /usr/local/nginx/sbin
./nginx
./nginx -s stop
./nginx -s quit 安全退出
./nginx -s reload 重新加载配置文件
ps aux | grep nginx
nginx展示图片:
        location /images {
             root /usr/local/nginx/data;
             autoindex on;
        }
        location /www {
             alias /usr/local/nginx/data/www;
             autoindex on;
        }
这样修改配置之后,就可以通过则访问的时候就是:http://ip:80/images/library.jpg
配置:
加上配置信息:
         location /carryshop {
            root   /usr/local/nginx/data;
            index  index.html;
        }
把前端项目打包:npm run build ;
然后会生成dist文件夹;
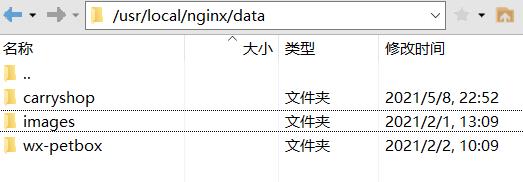
这里我先把文件夹重命名为carryshop,然后上传如图:

重启nginx;
只要文件对应成功,就是可以访问的啦!
附上nginx的配置:
#user  nobody;
worker_processes  1;

#error_log  logs/error.log;
#error_log  logs/error.log  notice;
#error_log  logs/error.log  info;

#pid        logs/nginx.pid;


events {
    worker_connections  1024;
}


http {
    include       mime.types;
    default_type  application/octet-stream;

    #log_format  main  '$remote_addr - $remote_user [$time_local] "$request" '
    #                  '$status $body_bytes_sent "$http_referer" '
    #                  '"$http_user_agent" "$http_x_forwarded_for"';

    #access_log  logs/access.log  main;

    sendfile        on;
    #tcp_nopush     on;

    #keepalive_timeout  0;
    keepalive_timeout  65;

    gzip on;
    #设置压缩最小单位,小于不压缩
        gzip_min_length 1k;
    #gzip_disable "msie6";

    # gzip_vary on;
    # gzip_proxied any;
    gzip_comp_level 4; # 压缩比
    gzip_buffers 4 16k;
    gzip_http_version 1.1;
    gzip_types text/plain text/css application/json application/javascript text/xml application/xml application/xml+rss text/javascript; # 压缩内容

    server {
        listen       80;
        server_name  localhost;

        #charset koi8-r;

        #access_log  logs/host.access.log  main;

        location / {
            root   html;
            index  index.html index.htm;
        }

        location /wx-petbox {
	     root /usr/local/nginx/data;
	   }
         location /carryshop {
            root   /usr/local/nginx/data;
            index  index.html;
        }

	location /www {
             alias /usr/local/nginx/data/www;
             autoindex on;
        }
        #error_page  404              /404.html;

        # redirect server error pages to the static page /50x.html
        #
        error_page   500 502 503 504  /50x.html;
        location = /50x.html {
            root   html;
        }

        # proxy the php scripts to Apache listening on 127.0.0.1:80
        #
        #location ~ \\.php$ {
        #    proxy_pass   http://127.0.0.1;
        #}

        # pass the PHP scripts to FastCGI server listening on 127.0.0.1:9000
        #
        #location ~ \\.php$ {
        #    root           html;
        #    fastcgi_pass   127.0.0.1:9000;
        #    fastcgi_index  index.php;
        #    fastcgi_param  SCRIPT_FILENAME  /scripts$fastcgi_script_name;
        #    include        fastcgi_params;
        #}

        # deny access to .htaccess files, if Apache's document root
        # concurs with nginx's one
        #
        #location ~ /\\.ht {
        #    deny  all;
        #}
    }


    # another virtual host using mix of IP-, name-, and port-based configuration
    #
    #server {
    #    listen       8000;
    #    listen       somename:8080;
    #    server_name  somename  alias  another.alias;

    #    location / {
    #        root   html;
    #        index  index.html index.htm;
    #    }
    #}


    # HTTPS server
    #
    #server {
    #    listen       443 ssl;
    #    server_name  localhost;

    #    ssl_certificate      cert.pem;
    #    ssl_certificate_key  cert.key;

    #    ssl_session_cache    shared:SSL:1m;
    #    ssl_session_timeout  5m;

    #    ssl_ciphers  HIGH:!aNULL:!MD5;
    #    ssl_prefer_server_ciphers  on;

    #    location / {
    #        root   html;
    #        index  index.html index.htm;
    #    }
    #}

}
nginx 配置 https
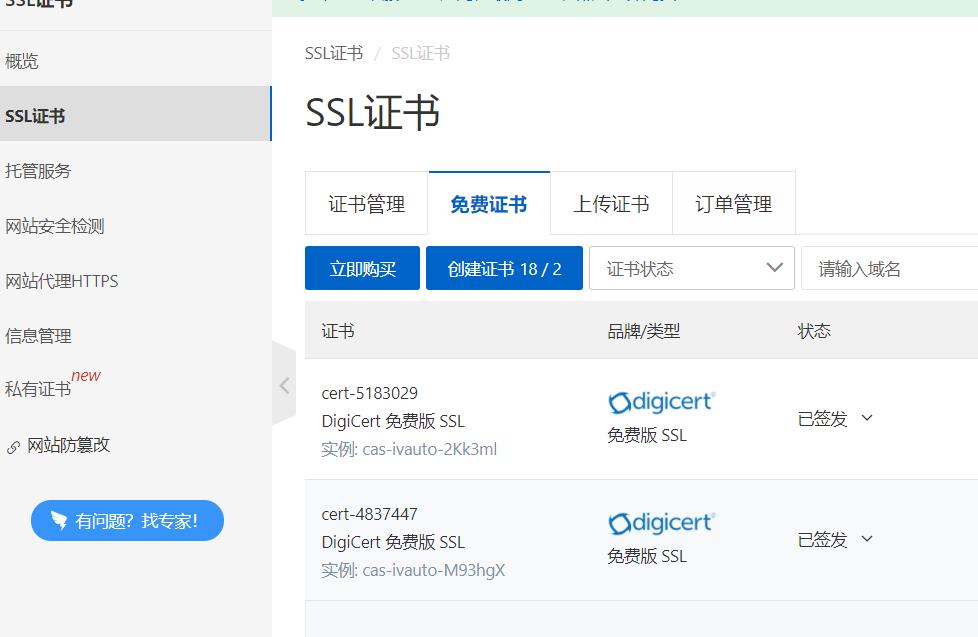
首先要在阿里云上下载证书:《SSL证书》

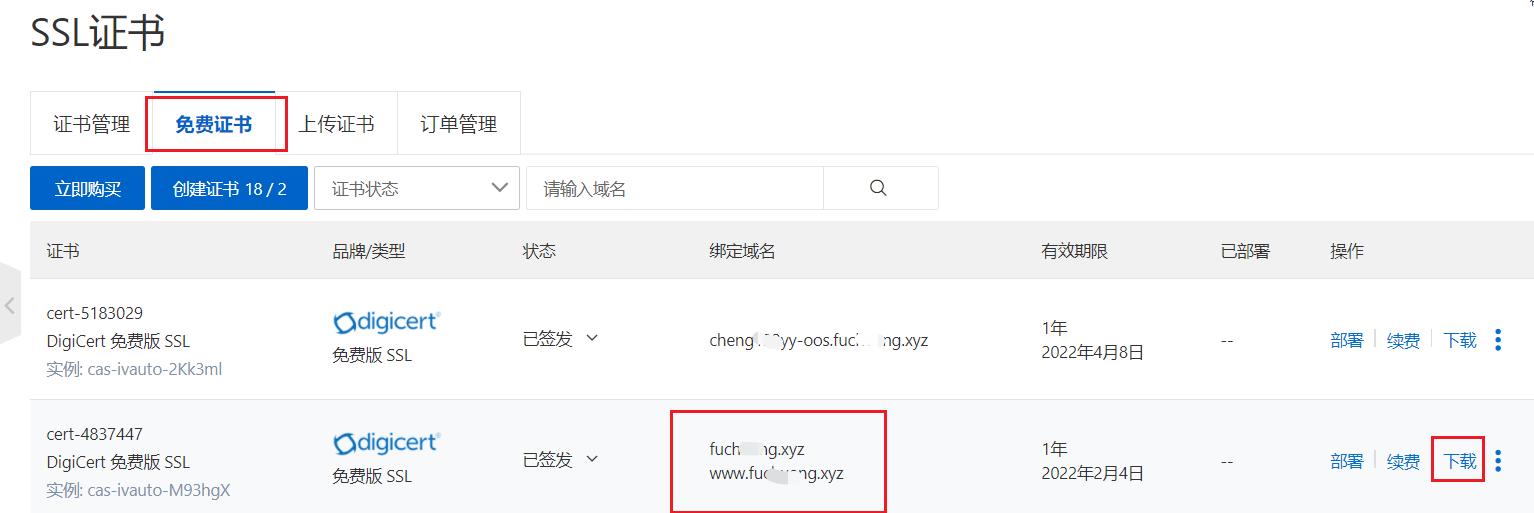
然后点击免费证书,找到自己对应域名的的免费证书,进行下载。
如图:把自己的.pem文件和.key文件放在/usr/local/nginx/conf目录下:

开始编写nginx的配置文件nginx.conf:
报了错:
nginx: [emerg] the “ssl” parameter requires ngx_http_ssl_module in /usr/local/nginx/conf/nginx.conf:117
您需要重新编译Nginx并在编译安装的时候加上–with-http_ssl_module配置。
找到nginx-1.18.0文件夹,执行命令`./configure --prefix=/usr/local/nginx --with-http_stub_status_module --with-http_ssl_module
可以参考 : https://www.cnblogs.com/ghjbk/p/6744131.html
注意在执行cp指令的时候要输入y , 我就是因为每次执行到那一步的时候,直接使用了回车,导致每次都失败了。
最后附上我的nginx.conf:
#user  nobody;
worker_processes  1;

#error_log  logs/error.log;
#error_log  logs/error.log  notice;
#error_log  logs/error.log  info;

#pid        logs/nginx.pid;


events {
    worker_connections  1024;
}


http {
    include       mime.types;
    default_type  application/octet-stream;

    #log_format  main  '$remote_addr - $remote_user [$time_local] "$request" '
    #                  '$status $body_bytes_sent "$http_referer" '
    #                  '"$http_user_agent" "$http_x_forwarded_for"';

    #access_log  logs/access.log  main;

    sendfile        on;
    #tcp_nopush     on;

    #keepalive_timeout  0;
    keepalive_timeout  65;

    #gzip  on;

        gzip on;
        gzip_min_length 1k;
    #gzip_disable "msie6";

    # gzip_vary on;
    # gzip_proxied any;
    gzip_comp_level 4;
    gzip_buffers 4 16k;
    gzip_http_version 1.1;
    gzip_types text/plain text/css application/json application/javascript text/xml application/xml application/xml+rss text/javascript;

    server {
        listen       80;
        server_name  www.自己的域名;
        location / {
            root   html;
            index  index.html index.htm;
        }
        rewrite ^(.*)$ https://$host$1;    #  把http强制跳到https
        location /wx-petbox {
	     root /usr/local/nginx/data;
	    }
         location /carryshop {
            root   /usr/local/nginx/data;
            index  index.html;
        }

        location /star {
            root /usr/local/nginx/data;
            index  index.html;
        }

        #error_page  404              /404.html;

        # redirect server error pages to the static page /50x.html
        #
        error_page   500 502 503 504  /50x.html;
        location = /50x.html {
            root   html;
        }

        # proxy the PHP scripts to Apache listening on 127.0.0.1:80
        #
        #location ~ \\.php$ {
        #    proxy_pass   http://127.0.0.1;
        #}

        # pass the PHP scripts to FastCGI server listening on 127.0.0.1:9000
        #
        #location ~ \\.php$ {
        #    root           html;
        #    fastcgi_pass   127.0.0.1:9000;
        #    fastcgi_index  index.php;
        #    fastcgi_param  SCRIPT_FILENAME  /scripts$fastcgi_script_name;
        #    include        fastcgi_params;
        #}

        # deny access to .htaccess files, if Apache's document root
        # concurs with nginx's one
        #
        #location ~ /\\.ht {
        #    deny  all;
        #}
    }


    # another virtual host using mix of IP-, name-, and port-based configuration
    #
    #server {
    #    listen       8000;
    #    listen       somename:8080;
    #    server_name  somename  alias  another.alias;

    #    location / {
    #        root   html;
    #        index  index.html index.htm;
    #    }
    #}


    # HTTPS server

    server {
        listen       443 ssl;
        server_name  www.自己的域名;
    root html;
    index index.html index.htm;
    ssl_certificate cert/你的证书.pem;
    ssl_certificate_key cert/你的证书.xyz.key;
    ssl_session_timeout 5m;
    ssl_ciphers ECDHE-RSA-AES128-GCM-SHA256:ECDHE:ECDH:AES:HIGH:!NULL:!aNULL:!MD5:!ADH:!RC4;
    ssl_protocols TLSv1 TLSv1.1 TLSv1.2; #表示使用的TLS协议的类型。
    ssl_prefer_server_ciphers on;
    location / {
        root html;  #站点目录。
        index index.html index.htm;
    }

#  这里使用了NGINX的反向代理。
    # 跳转到的后台地址
    location /carryshopApi {
            proxy_set_header X-Forwarded-For $proxy_add_x_forwarded_for;
            proxy_set_header Host $http_host;
            proxy_set_header X-Forwarded-Proto https;

            proxy_set_header X-Forwarded-Host $host;
            proxy_set_header X-Forwarded-Server $host;

            proxy_redirect off;
            proxy_connect_timeout      240;
            proxy_send_timeout         240;
            proxy_read_timeout         240;
            # note, there is not SSL here! plain HTTP is used
            proxy_pass  http://127.0.0.1:8081/;
#后端的接口地址   这前端跳转时候的路径就是https://你的域名/carryshopApi  (注意不要端口号了!这里的端口号就是443)
        }

      location /wx-petbox {
         root /usr/local/nginx/data;
       }

        location /carryshop {
            root   /usr/local/nginx/data;
            index  index.html;
        }

         location /star {
            root /usr/local/nginx/data;
            index  index.html;
        }
}
}
本来还以为要配置springboot的https请求的,不然前后端对接时会有这种错误:

大概的意思就是前端是用哪个了https访问的页面,但是请求的后端地址是http请求的,因此就无法访问正常。解决方法就是可以使用nginx的反向代理,用代理跳转到springboot后端的请求。
以上是关于Nginx部署前端项目的主要内容,如果未能解决你的问题,请参考以下文章
