vue_cli组件通信个人总结--完整代码
Posted 码妈
tags:
篇首语:本文由小常识网(cha138.com)小编为大家整理,主要介绍了vue_cli组件通信个人总结--完整代码相关的知识,希望对你有一定的参考价值。
父传子
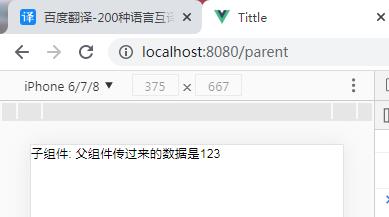
在父组件中,通过给子组件加上自定义属性将数据传递给子组件。
在子组件中,通过props来接收子组件传递的数据。
在父组件中:
<template>
  <div class="parent">
    <!-- 在父组件中,通过给子组件加上自定义属性将数据传递给子组件 -->
    <ChildrenA :myData="123"></ChildrenA>
  </div>
</template>
<script>
import ChildrenA from './ChildrenA'
export default {
  name: 'Parent',
  components: {
    ChildrenA
  },
  data () {
    return {
      myData: 123456
    }
  }
}
</script>
在子组件中:
<template>
  <div class="childrenA">
    <div>子组件: 父组件传过来的数据是{{myData}}</div>
  </div>
</template>
<script>
export default {
  // 在子组件中,通过props来接收子组件传递的数据
  props: ['myData'],
  name: 'ChildrenA'
}
</script>
结果:
子传父
在子组件中,通过 this.$emit(‘自定义事件’, 要传递的数据) 的方式将数据传给父组件。
在父组件中,通过自定义事件接收。
父组件:
<template>
  <div class="parent">
    <!-- 在父组件中,通过自定义事件接收 -->
    <ChildrenA @test="test"></ChildrenA>
    <div>父组件: 子组件传递过来的数据是{{myData}}</div>
  </div>
</template>
<script>
import ChildrenA from './ChildrenA'
export default {
  name: 'Parent',
  components: {
    ChildrenA
  },
  data () {
    return {
      myData: '' // 用变量接住子组件传过来的数据
    }
  },
  methods: {
    // 用自定义的事件将传过来的数据保存在变量里
    test (data) { // 这个data就是子组件传过来的数据
      this.myData = data
    }
  }
}
</script>
子组件
<template>
  <div class="childrenA">
    <div>子组件: 传给父组件的数据是{{myData}}</div>
  </div>
</template>
<script>
export default {
  name: 'ChildrenA',
  data () {
    return {
      myData: 123456 // 要传给父组件的数据
    }
  },
  methods: {
    demo () {
    //       '自定义事件', 要传的数据
      this.$emit('test', this.myData)
    }
  },
  mounted () {
    this.demo() // 调用方法触发传递
  }
}
</script>
结果:

兄弟传
- 新建一个js文件,创建Vue示例。
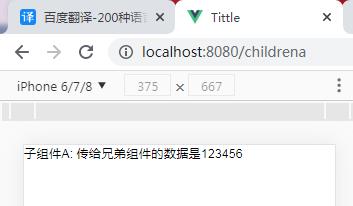
- 在子组件A中,引入eventBus, 再通过eventBus.emit(‘自定义事件’, 要传递的数据) 将数据传给子组件B。
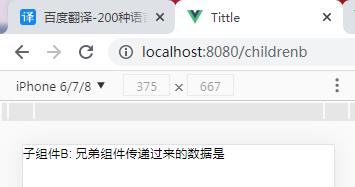
- 在子组件B中,引入eventBus, 再通过eventBus.$on(‘自定义事件’, (接收的数据) => {将接收的数据保存在data变量中})。
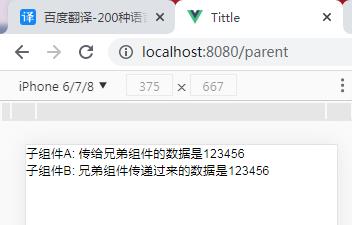
- 在父组件中,引入子组件A和子组件B观察效果。
新建js文件eventBus
import Vue from 'vue'

// 创建一个Vue实例
export default new Vue()
子组件A 如果需要路由跳转传递数据,就在beforeDestroy里调用demo()
<template>
  <div class="childrenA">
    <div>子组件A: 传给兄弟组件的数据是{{myData}}</div>
  <!-- <router-link to="childrenB" @click="demo">点我跳转到 子组件B 并且传递数据</router-link> -->

  </div>
</template>
<script>
import eventBus from '../../assets/eventBridge/index.js'
export default {
  name: 'ChildrenA',
  data () {
    return {
      myData: 123456 // 要传给兄弟组件的数据
    }
  },
  methods: {
    demo () {
    //         '自定义事件', 要传的数据
      eventBus.$emit('test', this.myData)
    }
  },
  mounted () {
    this.demo() // 调用方法触发传递
  },
  beforeDestroy () {
  // this.demo()
  }

}
</script>
子组件B:
<template>
  <div class="childrenB">
    <div>子组件B: 兄弟组件传递过来的数据是{{myData}}</div>
  </div>
</template>
<script>
import eventBus from '../../assets/eventBridge/index.js'
export default {
  name: 'ChildrenB',
  data () {
    return {
      myData: '' // 用变量接住兄弟组件传过来的数据
    }
  },
  methods: {
    demo () {
      const that = this // 这个this是vue的实例,用that区分eventBus中vue实例的this
      //       '自定义事件', 要传的数据
      eventBus.$on('test', (val) => {
        that.myData = val
      })
    }
  },
  created () {
    this.demo() // 调用方法触发接收
  },
  beforeDestroy () {
    eventBus.$off('test') // 在当前页面销毁前手动关闭eventBus.$on。可以认为,on和off必须成对出现。
  }
}
</script>
父组件:
<template>
  <div class="parent">
    <!-- 引入子组件A -->
    <ChildrenA></ChildrenA>
    <!-- 引入子组件B -->
    <ChildrenB></ChildrenB>
  </div>
</template>
<script>
import ChildrenA from './ChildrenA'
import ChildrenB from './ChildrenB'
export default {
  name: 'Parent',
  components: {
    ChildrenA,
    ChildrenB
  }
}
</script>
结果:
| 父组件 | 子组件A | 子组件B |
|---|---|---|
 |  |  |
vuex
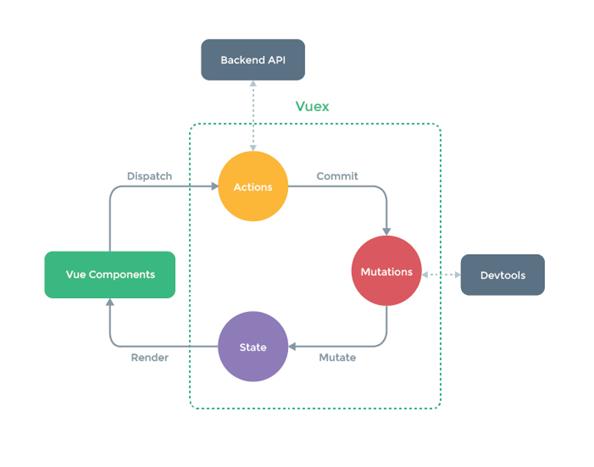
• state 存放状态
• mutations state成员操作
• getters 加工state成员给外界
• actions 异步操作
• modules 模块化状态管理
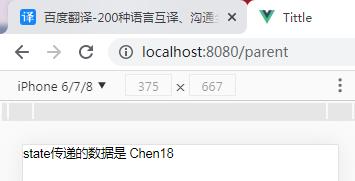
state存放状态:
state: {
  uname: 'Chen',
  age: 18
}
在组件中,引入、解构、使用
<template>
  <div class="parent">
    <div>state传递的数据是 {{uname}}{{age}}</div>
  </div>
</template>
<script>
import { mapState } from 'vuex'
export default {
  name: 'Parent',
  computed: {
    ...mapState(['uname', 'age'])
  }
}
</script>
结果:
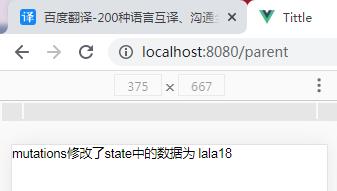
mutations 操作state成员
mutations: {
  setUname (state, newName) {
    state.uname = newName
  }
}
在组件中
<template>
  <div class="parent">
    <div>mutations修改了state中的数据为 {{uname}}{{age}}</div>
  </div>
</template>
<script>
import { mapState, mapMutations } from 'vuex'
export default {
  name: 'Parent',
  computed: {
    ...mapState(['uname', 'age'])
  },
  methods: {
    ...mapMutations(['setUname'])
  },
  created () {
    this.setUname('lala')
  }
}
</script>
结果
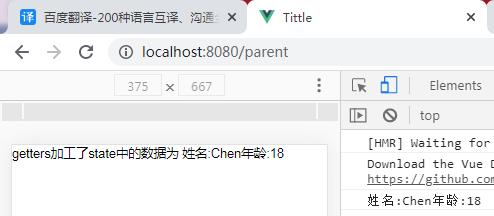
getters 加工state成员并return给外界
getters: {
  infoUname (state) {
    return '姓名:' + state.uname
  },
  setInfo (state, getters) {
    return getters.infoUname + '年龄:' + state.age
  }
}
在组件中
<template>
  <div class="parent">
    <div>getters加工了state中的数据为 {{setInfo()}}</div>
  </div>
</template>
<script>
import { mapState, mapGetters } from 'vuex'
export default {
  name: 'Parent',
  computed: {
    ...mapState(['uname', 'age'])
  },
  methods: {
    ...mapGetters(['setInfo'])
  },
  created () {
    this.setInfo()
    console.log(this.setInfo())
  }
}
</script>
结果
actions 处理异步操作
Actions中的方法有两个默认参数
• context 上下文(相当于箭头函数中的this)对象
• payload 挂载参数
state: {
    uname: 'Chen',
    age: 18
  },
  mutations: {
    setUname (state, newName) {
      state.uname = newName
    }
  },
  actions: {
    myLogin (context, newUser) {
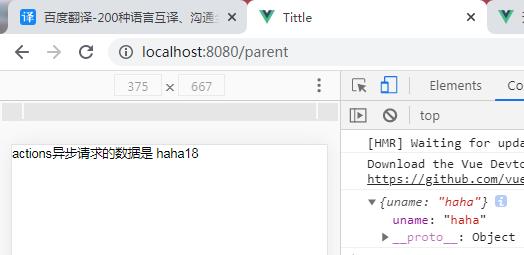
      console.log(newUser) // 返回的是uname: "haha"
      setTimeout(() => {
        //       mutations中的方法名,访问得到的uname的属性值
        context.commit('setUname', newUser.uname) // 通过mutations修改state的uname为newUser.uname
      }, 2000) // 模拟异步请求,两秒后页面显示haha
    }
  },
  getters: {
  }
})
在组件中
<template>
  <div class="parent">
    <div>actions异步请求的数据是 {{uname}}{{age}}</div>
  </div>
</template>
<script>
import { mapState, mapMutations, mapActions } from 'vuex'
export default {
  name: 'Parent',
  computed: {
    ...mapState(['uname', 'age'])
  },
  methods: {
    ...mapMutations(['setUname']),
    ...mapActions(['myLogin'])
  },
  created () {
    this.setUname('lala')
    //             actions中的方法名,要修改state中的uname的值为haha
    this.$store.dispatch('myLogin', { uname: 'haha' })
  }
}
</script>
结果
vuex续
- getters得到state中的数据,
- 在组件中通过dispatch方法触发actions,
- actions用于触发mutations中的方法,
- mutations用于修改state中的数据,
- state用于存储数据
在store文件夹的index.js中
import Vue from 'vue'
import Vuex from 'vuex'

Vue.use(Vuex)

export default new Vuex.Store({
  state: {
    isShow: false
  },
  // mutations用于修改state中的数据
  mutations: {
    setShow (state, newShow) {
      state.isShow = newShow
    }
  },
  // actions用于触发mutations中的方法
  actions: {
    aShow ({ commit }, newShow) {
      // 触发mutations中的方法
      //         ↓
      commit('setShow', newShow)
    }
  },
  // getters得到state中的数据
  getters: {
    gShow (state) {
      return state.isShow
    }
  }
})
在组件中
<template>
  <div class="parent">
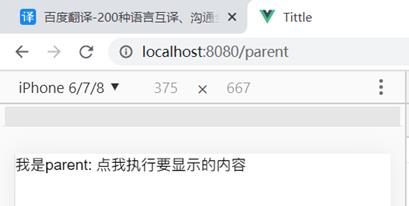
    <div @click="clickShow">我是parent: 点我显示子组件</div>
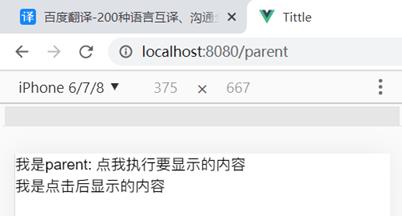
    <div v-show="this.gShow()">我是点击后显示的内容</div>
  </div>
</template>
<script>
import { mapState, mapMutations, mapActions, mapGetters } from 'vuex'
export default {
  name: 'Parent',
  computed: {
    ...mapState(['isShow'])
  },
  methods: {
    ...mapMutations(['setShow']),
    ...mapActions(['aShow']),
    ...mapGetters(['gShow']),
    clickShow () {
      console.log('click...')
      //             触发 actions中的aShow方法,   传递值为true
      this.$store.dispatch('aShow', true)
    }
  }
}
</script>
结果
| 点击前 | 点击后 |
|---|---|
 |  |
以上是关于vue_cli组件通信个人总结--完整代码的主要内容,如果未能解决你的问题,请参考以下文章