IntelliJ IDEA 运行 Main 或 Test 时不自动打包
Posted 笑虾
tags:
篇首语:本文由小常识网(cha138.com)小编为大家整理,主要介绍了IntelliJ IDEA 运行 Main 或 Test 时不自动打包相关的知识,希望对你有一定的参考价值。
IntelliJ IDEA 运行 Main 或 Test 时不自动打包
1. 确认依赖添加正确
	<dependencies>
        <dependency>
            <groupId>org.springframework.boot</groupId>
            <artifactId>spring-boot-starter-test</artifactId>
            <scope>test</scope>
            <exclusions>
                <exclusion>
                    <groupId>org.junit.vintage</groupId>
                    <artifactId>junit-vintage-engine</artifactId>
                </exclusion>
            </exclusions>
        </dependency>
        <dependency>
            <groupId>junit</groupId>
            <artifactId>junit</artifactId>
            <scope>test</scope>
        </dependency>
	</dependencies>
2. 确保测试启动类正确
com.jerry.ApplicationTest
@RunWith(SpringRunner.class)
@SpringBootTest(classes = ApplicationTest.class)
public class ApplicationTest
    public static void main(String[] args)
        SpringApplication.run(ApplicationTest.class, args);
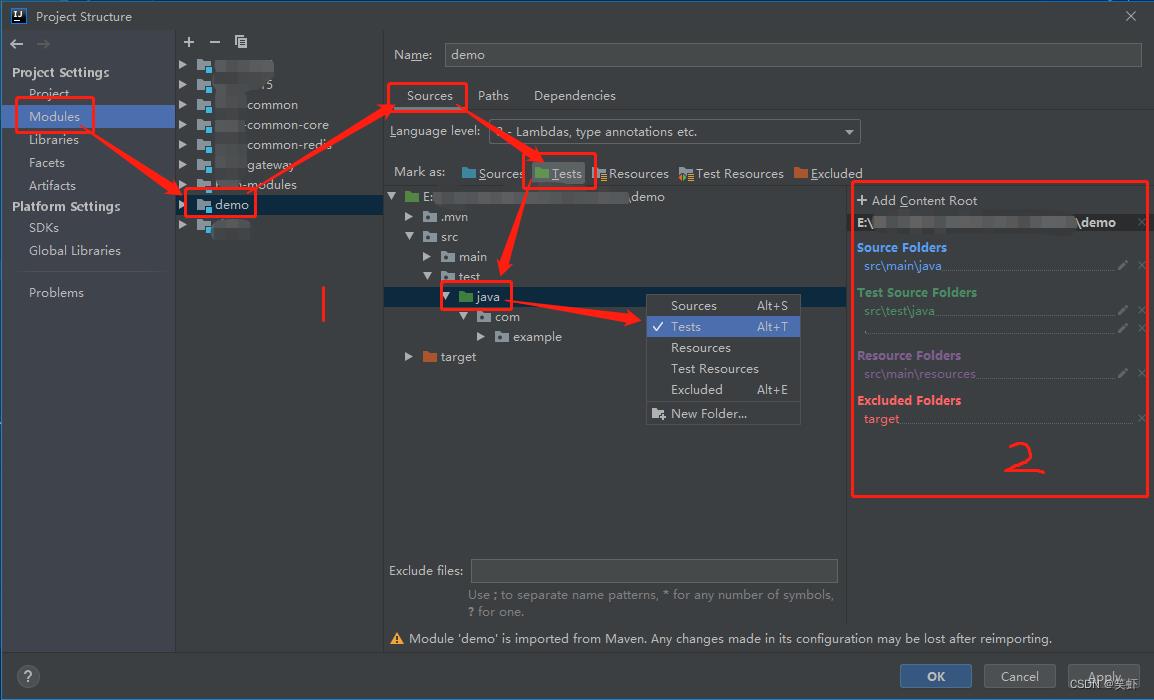
2.1. 测试资源文件夹设置

Ctrl + Shift + Alt + s打开项目设置
Modules > 选中当前模块 > Sources > Tests >src.test.java右键设为 Test- 可以查看当前项目的资源目录设置情况,可以看到
Test Source Folders中已经添加成功了。 - 也可以在项目树形窗口中,选中
src.test.java直接右键Mark Directory as设置。
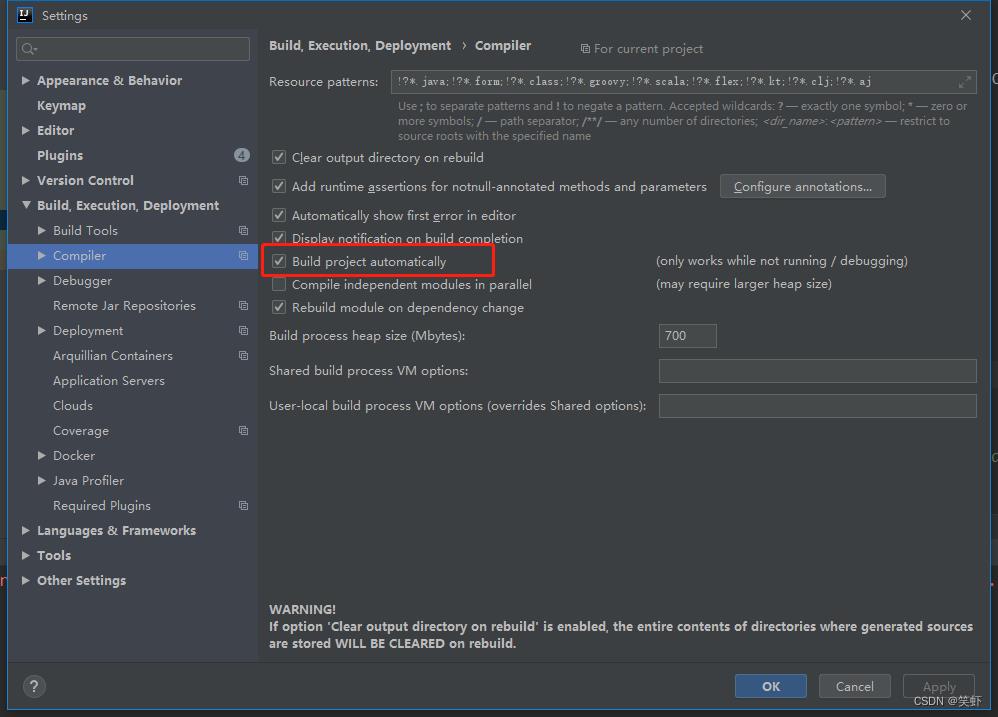
3. IDEA 配置正确


以上是关于IntelliJ IDEA 运行 Main 或 Test 时不自动打包的主要内容,如果未能解决你的问题,请参考以下文章
IntelliJ IDEA 运行 Main 或 Test 时不自动打包
IntelliJ IDEA 找不到或无法加载主类 com.company.Main到底怎么弄