Micropython 8266AP模式下通过HTTP网页获取GPIO引脚状态
Posted perseverance52
tags:
篇首语:本文由小常识网(cha138.com)小编为大家整理,主要介绍了Micropython 8266AP模式下通过HTTP网页获取GPIO引脚状态相关的知识,希望对你有一定的参考价值。
【Micropython 8266】AP模式下通过HTTP网页获取GPIO引脚状态
- ✨本案例基于
Thonny平台开发。✨
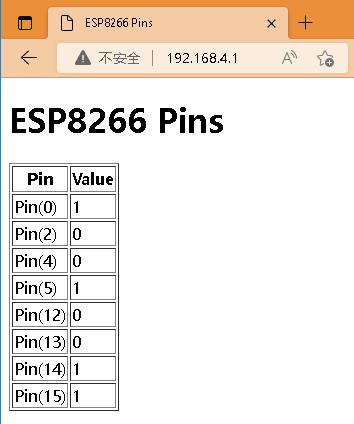
-📌通过 访问页面获取ESP8266引脚状态信息

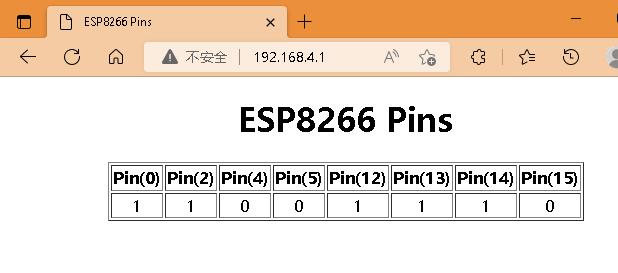
- 🌿横向排版显示

⛳连接和访问
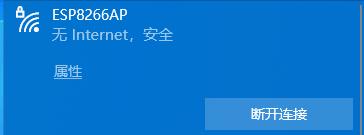
- 📍程序运行后,通过电脑或手机连接micropython设备的WiFi。

- 📌Shell调试窗口将打印被连接上的设备IP地址.

📝示例代码
from machine import Pin
import network
# 设置要读取的GPIO引脚,并设置为输入模式
pins = [Pin(i, Pin.IN) for i in (0, 2, 4, 5, 12, 13, 14, 15)]

# 访问端返回的信息
html = """<!DOCTYPE html>
<html>
    <head> <title>ESP8266 Pins</title> </head>
    <body> <h1>ESP8266 Pins</h1>
        <table border="1"> <tr><th>Pin</th><th>Value</th></tr> %s </table>
    </body>
</html>
"""
# 设置Ap模式下的WiFi信息
ap_ssid = "ESP8266AP"
ap_password = "12345678"
ap_authmode = 3  # 加密方式:WPA2

wlan_ap = network.WLAN(network.AP_IF)
wlan_ap.active(True)
wlan_ap.config(essid=ap_ssid, password=ap_password, authmode=ap_authmode)

import socket
addr = socket.getaddrinfo('192.168.4.1', 80)[0][-1]

s = socket.socket()
s.bind(addr)
s.listen(1)

print('listening on', addr)

while True:
    cl, addr = s.accept()
    print('client connected from', addr)
    cl_file = cl.makefile('rwb', 0)
    while True:
        line = cl_file.readline()
        if not line or line == b'\\r\\n':
            break
    rows = ['<tr><td>%s</td><td>%d</td></tr>' % (str(p), p.value()) for p in pins]
    response = html % '\\n'.join(rows)
    cl.send('HTTP/1.0 200 OK\\r\\nContent-type: text/html\\r\\n\\r\\n')
    cl.send(response)
    cl.close()
⛳横向排版显示代码
from machine import Pin
import network
# 设置要读取的GPIO引脚,并设置为输入模式
pins = [Pin(i, Pin.IN) for i in (0, 2, 4, 5, 12, 13, 14, 15)]

# 访问端返回的信息
html = """<!DOCTYPE html>
<html>
    <head> <title>ESP8266 Pins</title> </head>
    <style>
		body text-align: center; table margin: auto;
	</style>
    <body> <h1>ESP8266 Pins</h1>
        <table border="1" align="center"><tr> %s </table>
    </body>
</html>
"""
# 设置Ap模式下的WiFi信息
ap_ssid = "ESP8266AP"
ap_password = "12345678"
ap_authmode = 3  # 加密方式:WPA2

wlan_ap = network.WLAN(network.AP_IF)
wlan_ap.active(True)
wlan_ap.config(essid=ap_ssid, password=ap_password, authmode=ap_authmode)

import socket
addr = socket.getaddrinfo('192.168.4.1', 80)[0][-1]
#s = socket.socket(socket.AF_INET, socket.SOCK_STREAM)
s = socket.socket()
s.bind(addr)

s.listen(1)

print('listening on', addr)

while True:
    cl, addr = s.accept()
    print('client connected from', addr)
    cl_file = cl.makefile('rwb', 0)
    while True:
        line = cl_file.readline()
        if not line or line == b'\\r\\n':
            break
    rows = ['<th>%s</th>' % str(p) for p in pins]
    str1 ="""</tr><tr>"""
    rows_Value = ['<td>%d</td>' %p.value() for p in pins]
#    rows=rows_Pin.extend(rows_Value)
    rows.append(str1)
    rows.extend(rows_Value)
    rows.append("""</tr>""")
    print(rows)
    response = html % '\\n'.join(rows)
    cl.send('HTTP/1.0 200 OK\\r\\nContent-type: text/html\\r\\n\\r\\n')
    cl.send(response)
    cl.close()
以上是关于Micropython 8266AP模式下通过HTTP网页获取GPIO引脚状态的主要内容,如果未能解决你的问题,请参考以下文章
Micropython esp32/8266AP模式下网页点灯控制示例
Micropython esp32/8266AP模式下网页点灯控制示例+自定义GPIO状态显示
micropython(esp8266)adc采集通过tcp发送采集的数据