小程序怎么自定义导航栏,导航栏放图片设置高度
Posted Counter-Strike大牛
tags:
篇首语:本文由小常识网(cha138.com)小编为大家整理,主要介绍了小程序怎么自定义导航栏,导航栏放图片设置高度相关的知识,希望对你有一定的参考价值。
今天来说一下小程序的自定义导航栏。
1、设置导航栏style为custom:
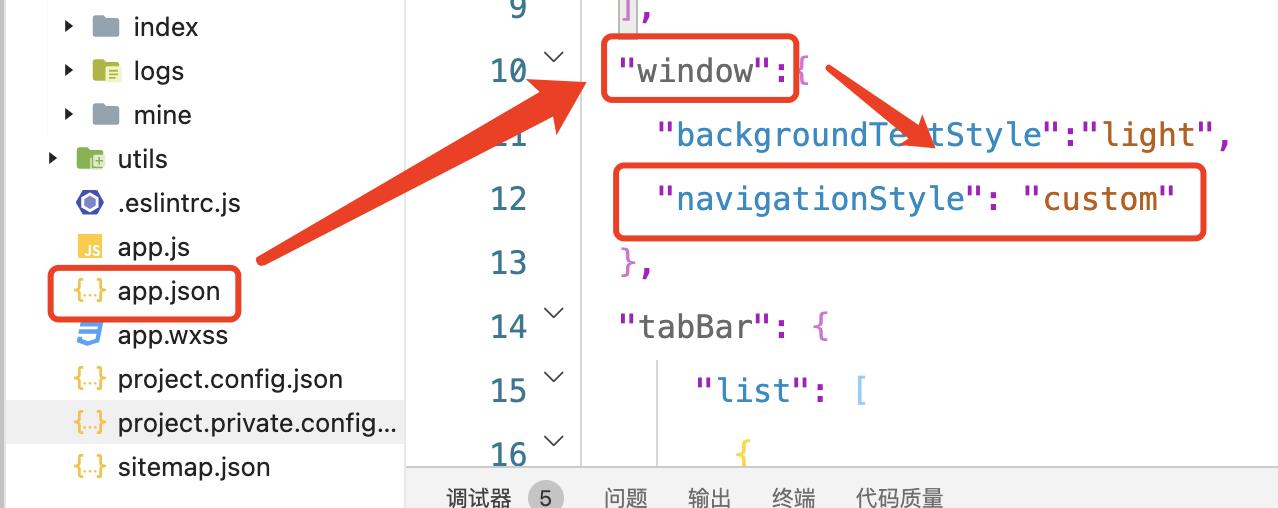
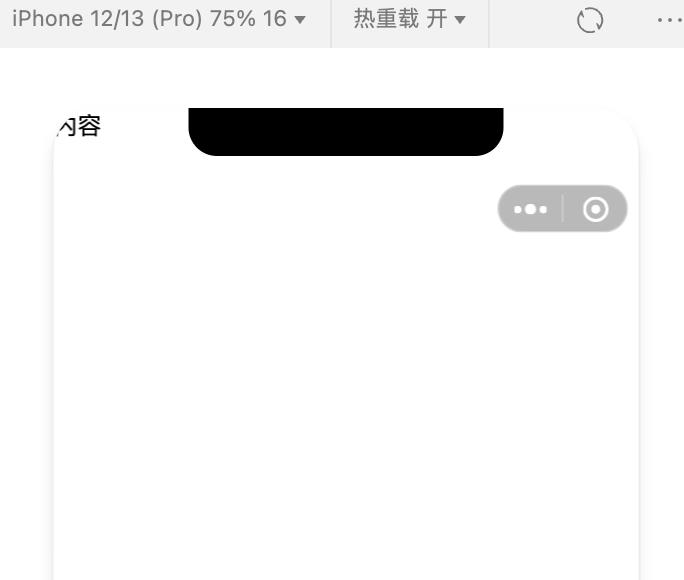
2、这是刷新页面,页面的内容就跑到了页面的顶端,不留丝毫间隙:
3、然后定义一个components,就是我们自定义的导航栏组件:
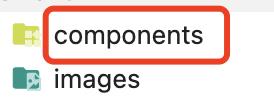
(1)先在项目根目录创建一个components文件夹,这个文件夹的名称是固定的,就是components:
(2)文件夹内创建一个导航栏组件的文件夹:
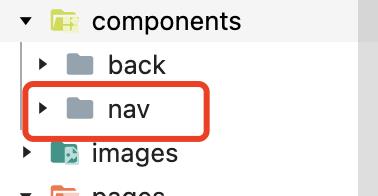
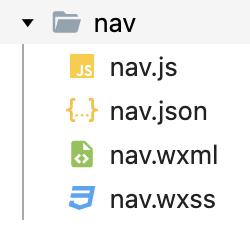
(3)右击创建的“nav”文件夹,点击“新建Component”,会自动在该文件夹下生成四个我们常用的文件:

(4)下面是代码时间(后端开发写的前端代码,将就看吧):
nav.js:
# data中增加barHeight参数
data:
    barHeight: wx.getSystemInfoSync().statusBarHeight
,
nav.wxml:
<view style="padding-top:barHeight + 40rpx; padding-bottom: 50rpx;">
    <view class="topView" bindtap="jumpToAbout">
        <image class="topImage" src="/images/logo.png" mode="aspectFill"></image>
        <text class="topText">自定义导航栏</text>
        <image class="topIcon" src="/images/right.png"></image>
    </view>
    <text class="topSubText">副标题可以写在这里</text>
</view>
nav.wxss:
.topView
    display: flex;


.topImage
    height: 60rpx;
    width: 130rpx;


.topText
    margin-left: 12rpx;
    font-size: larger;


.topIcon
    height: 40rpx;
    width: 40rpx;
    margin-top: 8rpx;


.topSubText
    color: #999;
4、导航栏组件就定义好了,然后把它引入页面:
(1)要引入的页面json配置文件中引用:
  "usingComponents":
      "nav":"../../components/nav/nav"
必须用相对路径。
(2)页面中引入组件:
<nav></nav>
<text>内容</text>
5、最后看效果:
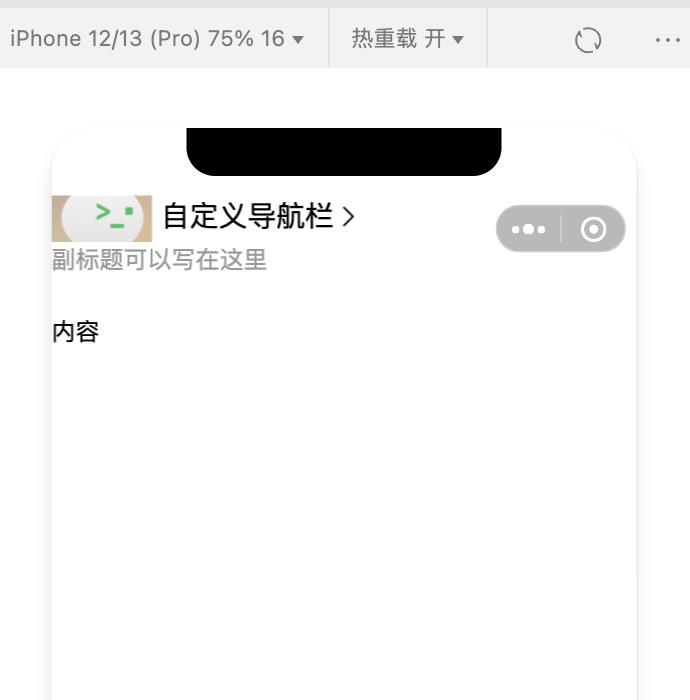
这样就搞定了,希望你们的logo比我的好看。
小程序自定义头部导航栏
首先先编写导航栏组件
写法一
1你要自定义导航栏首先你要知道导航栏的高度,导航栏由状态栏和胶囊按钮构成
通过Object wx.getMenuButtonBoundingClientRect()可以拿到胶囊按钮的信息,通过wx.getSystemInfo可以拿导航栏信息
通过Object wx.getMenuButtonBoundingClientRect()可以拿到胶囊按钮的信息,通过wx.getSystemInfo可以拿导航栏信息


还有一种写法是状态栏加上44px当做导航栏的高度
之前公司项目用的第二种所以我也用了这种
直接上代码,代码里面有注释
.wxml
<view class="tabbar" style="height:{{statusBarHeight+44}}px;padding-top:{{statusBarHeight}}px;font-size:{{fontSizeSetting}}px">
  <view class="back" wx:if="{{!hideBack}}" style="height:{{statusBarHeight+44}}px;padding-top:{{statusBarHeight}}px;">
    <navigator hover-class="none" url="{{url}}" open-type="reLaunch">
      <image src="../../images/back.png"></image>
    </navigator>
  </view>
  <view class="title">{{title}}</view>
</view>
<view style="height:{{statusBarHeight+44}}px"></view>
//.wxss
page{
    height:auto;
}
.tabbar{
    width:100%;
    display:flex;
    justify-content:center;
    align-items:center;
    box-sizing:border-box;
    background:#fff;
    position:fixed;
    z-index:9999;
}

.tabbar .back{
    position: absolute;
    top: 0;
    left: 0;
    width: 44px;
    cursor: pointer;
    display: flex;
    justify-content: center;
    align-items: center;
    box-sizing: border-box;
}
.tabbar image{
    width: 60rpx;
    height: 60rpx;
    vertical-align: middle;
  }
.tabbar .title{
    box-sizing: border-box;
    padding-left: 115px;
    padding-right: 115px;
    text-overflow: ellipsis;
    overflow: hidden;
    white-space: nowrap;
}
.js
Component({//自定义组件
    //定义属性
    properties:{//首先头部我主要是控制title提示和返回键所以我只要定义3个属性,1title2是否显示返回3返回的地址是什么就可以了
        title:{
            type:String,
            value:‘‘
        },
        hideBack:{
            type:Boolean,
            value:false
        },
        url:{
            type:String,
            value:‘‘
        }
    },
    data:{//私有数据  //你要自定义导航栏首先你要知道状态栏的高度
        statusBarHeight:‘‘,
        fontSizeSetting:‘‘
    },
    // 生命周期函数,可以为函数,或一个在methods段中定义的方法名
    attached: function () {
        this.getSystem();
    }, // 此处attached的声明会被lifetimes字段中的声明覆盖
    methods:{
        getSystem(){
            var That=this;
            wx.getSystemInfo({
                success(res){
                    console.log("d",res);
                    That.setData({
                        statusBarHeight:res.statusBarHeight,
                        fontSizeSetting:res.fontSizeSetting
                    })
                }
            })
        }
    }
})
{
    "component": true
}
.json 里面一定要加上面这个
由于全局只用直接在app.json里面配置的时候注册
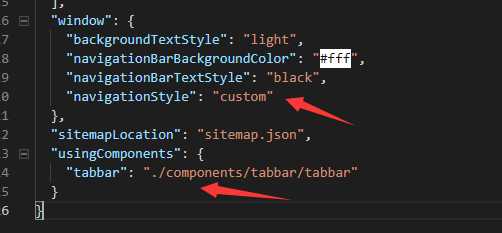

使用如下
<tabbar title="正在加载中..." hideBack="true"></tabbar> 这是不要返回的
<tabbar title="标题" url="跳转地址"></tabbar>
然后就结束了
以上是关于小程序怎么自定义导航栏,导航栏放图片设置高度的主要内容,如果未能解决你的问题,请参考以下文章