Sharding-Proxy之读写分离
Posted 爱上口袋的天空
tags:
篇首语:本文由小常识网(cha138.com)小编为大家整理,主要介绍了Sharding-Proxy之读写分离相关的知识,希望对你有一定的参考价值。
一、简介以及环境准备
Sharding-Proxy与Sharding-JDBC一样,并不会进行主从复制,主从复制依然是有mysql自己完成。
mysql读写分离服务器如下:
Master(192.168.56.20)、slave(192.168.56.21)、数据库是user_db
二、Sharding-Proxy 配置
1、修改server.yaml 文件
rules:
  - !AUTHORITY
    users:
      - dhapp@%:Tz@202011
      - sharding@:sharding
    provider:
      type: ALL_PRIVILEGES_PERMITTED
  - !TRANSACTION
    defaultType: XA #支持 XA 事务
    providerType: Atomikos #默认的事务管理器为 Atomikos

props:
  max-connections-size-per-query: 1
  kernel-executor-size: 16  # Infinite by default.
  proxy-frontend-flush-threshold: 128  # The default value is 128.
  proxy-opentracing-enabled: false
  proxy-hint-enabled: false
  sql-show: false
  check-table-metadata-enabled: false
  show-process-list-enabled: false
    # Proxy backend query fetch size. A larger value may increase the memory usage of ShardingSphere Proxy.
    # The default value is -1, which means set the minimum value for different JDBC drivers.
  proxy-backend-query-fetch-size: -1
  check-duplicate-table-enabled: false
  sql-comment-parse-enabled: false
  proxy-frontend-executor-size: 0 # Proxy frontend executor size. The default value is 0, which means let Netty decide.
    # Available options of proxy backend executor suitable: OLAP(default), OLTP. The OLTP option may reduce time cost of writing packets to client, but it may increase the latency of SQL execution
    # if client connections are more than proxy-frontend-netty-executor-size, especially executing slow SQL.
  proxy-backend-executor-suitable: OLAP
  proxy-frontend-max-connections: 0 # Less than or equal to 0 means no limitation.
  sql-federation-enabled: false
2、修改 config-readwrite-splitting.yaml 文件(此文件为读写分离的配置)
schemaName: readwrite_splitting_db

dataSources:
  write_ds:
    url: jdbc:mysql://192.168.56.20:3306/user_db?allowPublicKeyRetrieval=true&useUnicode=true&characterEncoding=utf-8&useSSL=false&serverTimezone=Asia/Shanghai
    username: dhapp
    password: Tz@202011
    connectionTimeoutMilliseconds: 30000
    idleTimeoutMilliseconds: 60000
    maxLifetimeMilliseconds: 1800000
    maxPoolSize: 50
    minPoolSize: 1
  read_ds_0:
    url: jdbc:mysql://192.168.56.21:3306/user_db?allowPublicKeyRetrieval=true&useUnicode=true&characterEncoding=utf-8&useSSL=false&serverTimezone=Asia/Shanghai
    username: dhapp
    password: Tz@202011
    connectionTimeoutMilliseconds: 30000
    idleTimeoutMilliseconds: 60000
    maxLifetimeMilliseconds: 1800000
    maxPoolSize: 50
    minPoolSize: 1

rules:
- !READWRITE_SPLITTING
  dataSources:
    pr_ds:
      writeDataSourceName: write_ds
      readDataSourceNames:
        - read_ds_0
三、测试
1、启动Sharding-Proxy 服务
./start.sh
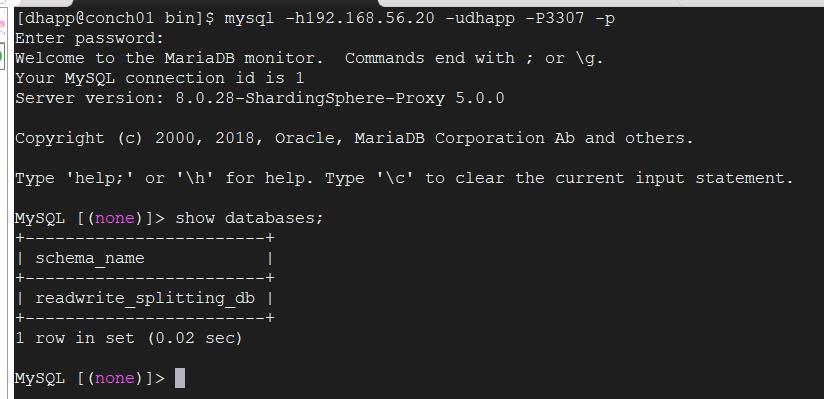
2、连接sharding-proxy3、创建数据表
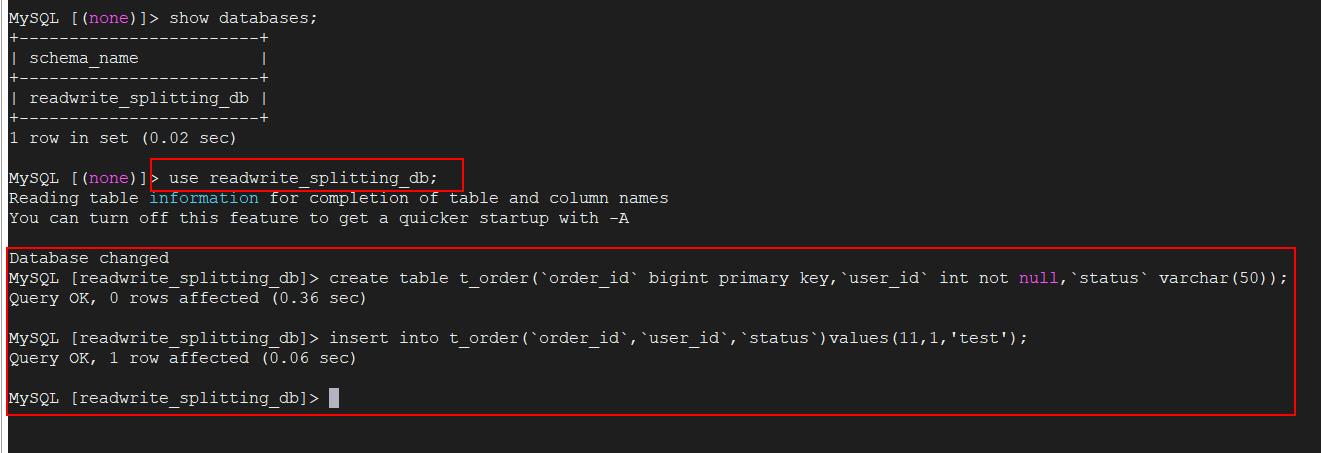
use readwrite_splitting_db;

create table t_order(`order_id` bigint primary key,`user_id` int not null,`status` varchar(50));

insert into t_order(`order_id`,`user_id`,`status`)values(11,1,'test');
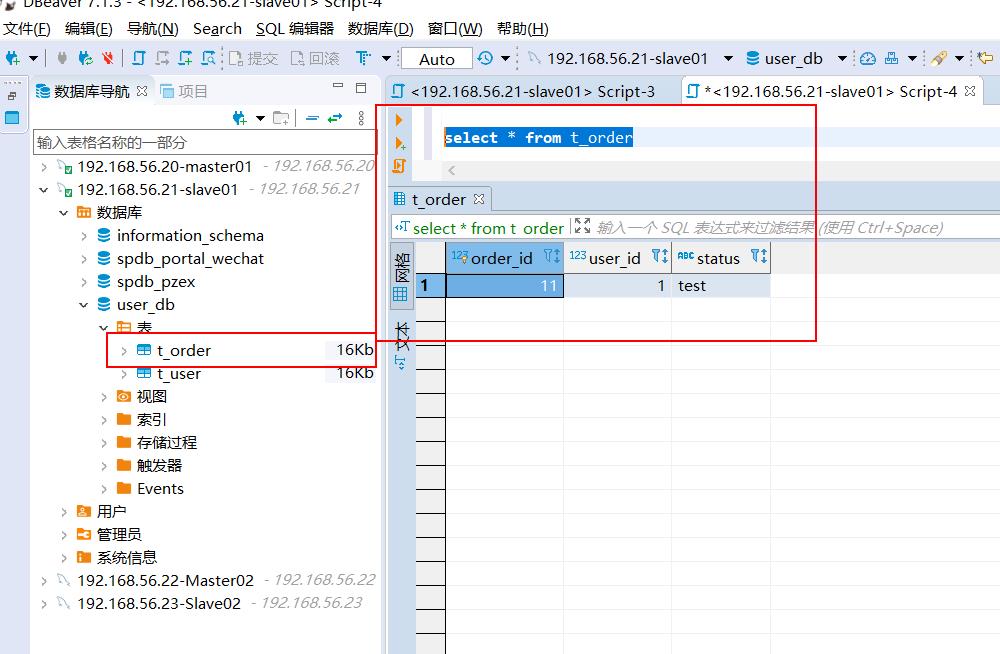
到主从库中查询:
master:
slave:
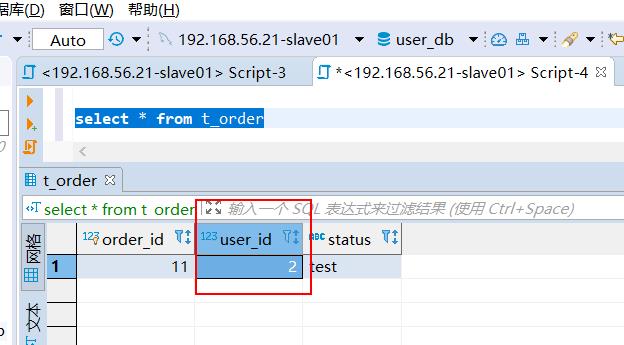
4、只修改slave中的数据(手动修改的)
通过sharding-proxy去查询,看一下是否读写分离,查的是否是slave的数据
由上可以,实现了读写分离的功能
以上是关于Sharding-Proxy之读写分离的主要内容,如果未能解决你的问题,请参考以下文章


