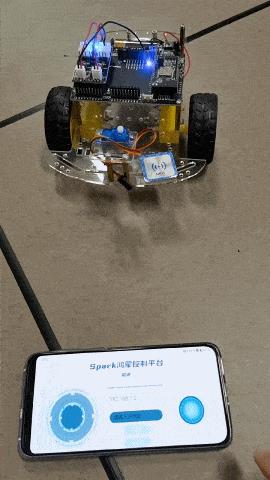
#盲盒+码# FFH为Wifi-lot小车做一个遥控器应用
Posted
tags:
篇首语:本文由小常识网(cha138.com)小编为大家整理,主要介绍了#盲盒+码# FFH为Wifi-lot小车做一个遥控器应用相关的知识,希望对你有一定的参考价值。
0.效果演示
1.设计思路
运行环境:HarmonyOS3.0,OpenHarmony3.2

1.1 按键说明
①转向控制:左右滑动摇杆,实现转向,上下滑动摇杆,实现速度控制。 ②动力控制:上下滑动摇杆,实现前进后退。 ③本机IP地址展示 ④对端IP地址输入 ⑤链接,断开按键,主动进行TCP连接请求与断开。
1.2 控制指令
本遥控器以状态指令为驱动,每触发一种状态仅发送一次指令,对端在未接收到新指令的情况下一直保持当前指令状态。
- 前进状态:"1"
- 后退状态:"2"
- 左转状态:"3"
- 右转状态: "4"
- 停止状态: "0"
2.页面设计
在摇杆的拖动设计中,主要运用ontouchmove,ontouchend,ontouchstart实现,通过手指坐标来确定摇杆组件的top和left值,通过设定方向阈值来判断是否开始发送指令,通过打印回调数据来设置参数。
2.1 hml
<div class="container">
    <div class="yaogan">
    </div>
    <div class="controller" style="top:x;left:y" ontouchstart="onMoveStart"on:touchend="onMoveEnd" on:touchmove="onMove" on:longpress="toSpeed_mode"   >

    </div>
    <image src="common/images/title.png" style="width: 60%;height:20%;object-fit: contain;">

    </image>

    <image src="common/images/ msg .png" style="width: 30%;height: 10%;object-fit: contain;">

    </image>
    <progress class="min-progress" type="horizontal" percent= " speed " secondarypercent="100" style="width: 30%;left: 30px;margin-top: 30px;"></progress>
    <text class="ip_local">

        local_ip
    </text>
    <input class="ip_input"  placeholder="请输入IP地址"   onchange="get_remote_ip">

    </input>
    <button class="btn" type="capsule"  onclick="onConnect">
        链接
    </button>
    <button class="btn" type="capsule"  onclick="onDisconnect">
        断开
    </button>
    <div  class="forward" >
        <image src="common/ forward_image .png" style="width: 100%;height: 100%;top: forward_x;" on:touchmove="onForward" on:touchend="onForwardend" on:touchstart="onForwardstart" >
        </image>
    </div>
</div>
2.2 CSS
.container
    display: flex;
    flex-direction: column;
    justify-content: center;
    align-items: center;
    left: 0px;
    top: 0px;
    width: 100%;
    height: 100%;


.title
    font-size: 40px;
    text-align: center;
    width: 100%;
    height: 40%;
    margin: 10px;


.yaogan
    position: absolute;
    top: 100px;
    left: 50px;
    width: 200px;
    height: 200px;
    background-image: url("./common/RadialJoy_Area.png");
    background-size: 100%;
    background-repeat: no-repeat;
    z-index: -1;


.controller
    width: 100px;
    height: 100px;
    top: 150px;
    left: 100px;
    background-image:  url("./common/RadialJoy_Area.png");
    background-size: 100%;
    background-repeat: no-repeat;
    position: absolute;
    z-index: 1;

.forward
    position: absolute;
    left: 550px;
    width: 100px;
    height: 100px;
    background-size: 100%;
    z-index: -1;

.ip_input
    font-size: 18px;
    left: 30px;
    width: 200px;
    height: 50px;
    margin-top: 25px;
    background-color: #ff2c7a87;
/*    background-image:  url("./common/images/bg.png");*/
/*    background-size: 100%;*/
/*    background-repeat: no-repeat;*/

.btn
    width: 100px;
    height:30px;
    left: 30px;
    margin-top: 5px;
    background-color: #ff93f0fd;
/*    background-image:  url("./common/images/btn.png");*/
/*    background-size: 150%;*/
/*    background-repeat: no-repeat;*/

.ip_local
    font-size: 20px;
    width: 200px;
    height: 50px;
    left:30px;
    color: #ff3850ef;
    margin-top: 20px;
    background-image:  url("./common/images/bg2.png");
    background-size: 100%;
    background-repeat: no-repeat;
3.业务逻辑
3.1 参数调试
我们前面为摇杆组件设置了ontouch事件,那么如何设计Top或者left值来判断什么时候可以开始发送指令呢?摇杆既不可太过灵敏也不可以太过迟钝,我们可以通过打印触摸事件返回的参数来进行调参。
export default
  touchstartfunc(msg)
    console.info(`on touch start, point is: $msg.touches[0].globalX`);
    console.info(`on touch start, point is: $msg.touches[0].globalY`);
    console.info(`on touch start, data is: $msg.target.dataSet.a`);
3.1 触摸控制
根据前文提到的状态控制机制,我们应该在ontouchmove中进行判断,当上滑到某一阈值的时候开始发送前进指令,当松手时即ontouchend时我们应该立即发送停止指令。即滑动中判断并发送指令,停止则立马发送停止信息。具体的阈值参数根据个人考虑进行调试设置。
import prompt from @ohos.prompt;
import wifi from @ohos.wifi;
import socket from @ohos.net.socket;
import display from @ohos.display;
var promise ;
export default
    data:
        title: "",
        x:150,
        y:100,
        forward_x:150,
        msg:"forward",
        forward_image:"Button_normal",
        TGA:"YZJ",
        command:"1",
        local_ip:"",
        remote_ip:"",
        speed_mode:1,
        speed:10,
        tcp:socket.constructTCPSocketInstance(),
        pre_cmd:0,
        cur_cmd:0
    ,
    onInit()
        this.title = this.$t(strings.world);
        this.getIpAddress();
        this.creatScoket();


    ,
    send_cmd(cmd)
        if(cmd!=this.cur_cmd)
            this.cur_cmd=cmd;
            this.sendMessage(cmd);

    ,
    onMoveStart(e)
        console.info("开始移动"+JSON.stringify(e));
    ,
    toSpeed_mode()
        if(this.speed_mode==0)
        this.speed_mode=1;
        else if(this.speed_mode==1)
        this.speed_mode=0;

    ,
    onMove(e)
        //圆心是(100,250)
        if(this.speed_mode==0)
            console.info(JSON.stringify(e))
            let nx=e.touches[0].globalY-50;
            this.x=nx;

        else if(this.speed_mode==1)
            console.info(JSON.stringify(e))
            let ny=e.touches[0].globalX-50;
            this.y=ny;
            if(ny>=110)
                this.msg="trun_right"
                console.info("YZJ:正在向右转")
                this.command="4";
                this.send_cmd(this.command);


            else if(ny<=90)
                this.msg="trun_left"
                console.info("YZJ:正在向做左转")
                this.command="3";
                this.send_cmd(this.command);


    ,
    onMoveEnd()
        this.x=150;
        this.y=100;
        this.msg="stop"
        this.command=0;
        this.send_cmd(this.command);

    ,
    onForwardstart(e)
        this.forward_image="Button_active";
        this.forward_x=e.touches[0].globalY-50
    ,
    onForward(e)
        if( e.touches[0].globalY-50<=140)
            console.info("正在前进")
            this.msg="forward"
            this.command="1"
            this.send_cmd(this.command);

            if(e.touches[0].globalY-50<100)
                this.forward_x=100

            else
            this.forward_x=e.touches[0].globalY-50

        else if(e.touches[0].globalY-50>165)
            console.info("正在后退")
            this.msg="backoff"
            this.command="2"
            this.send_cmd(this.command);

            if(e.touches[0].globalY-50>200)
                this.forward_x=200

            else
            this.forward_x=e.touches[0].globalY-50


    ,
    onForwardend()
        this.forward_x=150;
        console.info("停止前进")
        this.msg="stop"
        this.forward_image="Button_normal"
        this.command="0"
        this.send_cmd(this.command);

    ,
    //创建udpSocket 默认端口10006
    creatScoket: async function()

        this.tcp.bind(address: this.local_ip, port: 8888,family: 1, err =>
                    if (err)
                        console.log(YZJ---bind fail);
                        return;

                    console.log(YZJ---bind success);
                )

        //监听收到的信息 打印到屏幕上
        this.tcp.on(message, value =>
            let buffer = value.message;
            let dataView = new DataView(buffer);
            let str = "";
            for (let i = 0;i < dataView.byteLength; ++i)
                str += String.fromCharCode(dataView.getUint8(i))

            this.title =str;
        );
    ,
    sendMessage: async function(cmd)
       //发送信息
//                let promise1 = this.tcp.connect( address: address: this.remote_ip, port: 10006, family: 1 , timeout: 6000);
        let promise2 = this.tcp.send(
            data:cmd
        );
        promise2.then(() =>
            console.log(YZJ---send success);
        ).catch(err =>
            console.log(YZJ---send fail);
        );


    ,
    onConnect: async function()
        promise = this.tcp.connect( address: address: "192.168.1.1", port: 8888, family: 1 , timeout: 6000);
        promise.then(() =>
            prompt.showToast(
                message: "连接成功!"
            )
            console.log(YZJ---connect success);
            this.tcp.setExtraOptions(
                keepAlive: true,
                OOBInline: true,
                TCPNoDelay: true,
                socketLinger:  on:true, linger:10 ,
                receiveBufferSize: 1000,
                sendBufferSize: 1000,
                reuseAddress: true,
                socketTimeout: 3000,
            ,err =>
                if (err)
                    console.log(YZJ---setExtraOptions fail);
                    return;

                console.log(YZJ---setExtraOptions success);
            );
        ).catch(err =>
            console.log(YZJ---connect fail);
            prompt.showToast(
                message: "连接失败!"
            )
        );
    ,
    onDisconnect()
        this.tcp.close()
        prompt.showToast(
            message: "断开链接!"
        )
    ,
    onDestroy()
        this.tcp.close()
        prompt.showToast(
            message: "断开链接!"
        )
    ,
    //获取本机ip地址
    getIpAddress()
        let ip=wifi.getIpInfo().ipAddress;
        this.local_ip = (ip >> 24 & 0xFF)+"."+ ((ip >> 16) & 0xFF)+"."+((ip >> 8) & 0xFF)+"."+(ip & 0xFF);
    ,
    get_remote_ip(e)
        this.remote_ip=e.value
3.2 TCP
-
通过输入框获取对端IP地址,点击链接按键时触发connect方法请求连接,连接成功弹出对话框"连接成功"。
-
展示本机IP地址。
-
应用或者页面销毁时应关闭连接,否则会占据对端该端口,导致下次连接失败。
-
根据状态驱动指令控制,由于ontouchmove是一直在触发的,也就是判断是一直在进行的,当我们保持摇杆前进状态的时候,注意要判断指令状态是否更新了?如果指令未变,那么就不再发送指令。只有指令变化的时候才会发送一次指令。
-
只有连接成功后,才能够发送信息。 ::: hljs-center
| 方法 | 描述 |
|---|---|
| creatScoket() | 绑定本机IP |
| sendMessage() | 发送指令 |
| onConnect() | 链接对端 |
| onDisconnect() | 断开链接 |
| getIpAddress() | 获取本机IP地址 |
:::
- tcp设置参数: |参数|描述| |-|-| |keepAlive|是否保持连接。默认为false。| |OOBInline|是否为OOB内联。默认为false。| |TCPNoDelay|TCPSocket连接是否无时延。默认为false。| |receiveBufferSize|接收缓冲区大小(单位:Byte)| |sendBufferSize|发送缓冲区大小(单位:Byte)| |reuseAddress|是否重用地址。默认为false| |socketTimeout|套接字超时时间,单位毫秒(ms)|
- 建议开启HarmonyOS工程,开发完毕后可同步安装到OpenHarmony设备,反之则会变得麻烦一些。
3.3 申请权限
  "reqPermissions": [


        "name": "ohos.permission.GET_WIFI_INFO"
      ,

        "name": "ohos.permission.GET_NETWORK_INFO"
      ,

        "name": "ohos.permission.INTERNET"
      ,

        "name": "ohos.permission.SET_NETWORK_INFO"
      ,

        "name": "ohos.permission.ACCELEROMETER"

    ]
4. 结语
本次分享的应用需要南北向开发配合食用,同时需要HarmonyOS3.0设备或者OpenHarmony3.2设备。HarmonyOS2.0设备可考虑采用JS/JAVA混合开发,JAVA侧实现Socket通信,可参考我往期博客。下一期,我将会分享如何配置HarmonyOS3.0设备的碰一碰拉起应用配置。
本文作者:龙眼Litchi
https://ost.51cto.com/#bkwz
以上是关于#盲盒+码# FFH为Wifi-lot小车做一个遥控器应用的主要内容,如果未能解决你的问题,请参考以下文章
#盲盒+码# FFH Harmony3.0如何实现NFC碰一碰配置
#盲盒+码#FFH学习设备开发之Hi3861-TCPclient-开关灯
#盲盒+码##跟着小白一起学鸿蒙# [番外三]一起学做Tetris(上)