iOS开发-UIScrollView原理
Posted 瑾瑜
tags:
篇首语:本文由小常识网(cha138.com)小编为大家整理,主要介绍了iOS开发-UIScrollView原理相关的知识,希望对你有一定的参考价值。
转载:http://www.cnblogs.com/xiaofeixiang/p/5144256.html
UIScrollView 在开发中是不可避免,关于UIScrollView都有自己一定的理解。滚动视图有两个需要理解的属性,frame和bounds,frame是定义了视 图在窗口的大小和位置,bounds表示视图在其自身坐标系中的位置和大小,frame影响视图在窗口位置,bounds会影响子视图的位置。
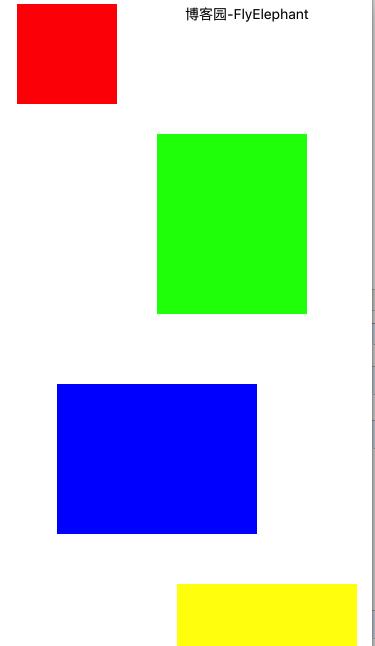
先来看一张图片:

我们用一个父View将整个窗口铺满,然后添加子视图:
    UIView *redView = [[UIView alloc] initWithFrame:CGRectMake(20, 20, 100, 100)];
    redView.backgroundColor = [UIColor redColor];

    UIView *greenView = [[UIView alloc] initWithFrame:CGRectMake(160, 150, 150, 180)];
    greenView.backgroundColor = [UIColor greenColor];

    UIView *blueView = [[UIView alloc] initWithFrame:CGRectMake(60, 400, 200, 150)];
    blueView.backgroundColor = [UIColor blueColor];

    UIView *yellowView = [[UIView alloc] initWithFrame:CGRectMake(180, 600, 180, 200)];
    yellowView.backgroundColor = [UIColor yellowColor];

    [self.container addSubview:redView];
    [self.container addSubview:greenView];
    [self.container addSubview:blueView];
    [self.container addSubview:yellowView];
    UILabel *desc=[[UILabel alloc]initWithFrame:CGRectMake(150, 20, 200, 20)];
    [desc setText:@"博客园-FlyElephant"];
    [desc setFont:[UIFont systemFontOfSize:14]];
    [desc setTextAlignment:NSTextAlignmentCenter];
    [self.container addSubview:desc];
     [self.view addSubview:self.container];
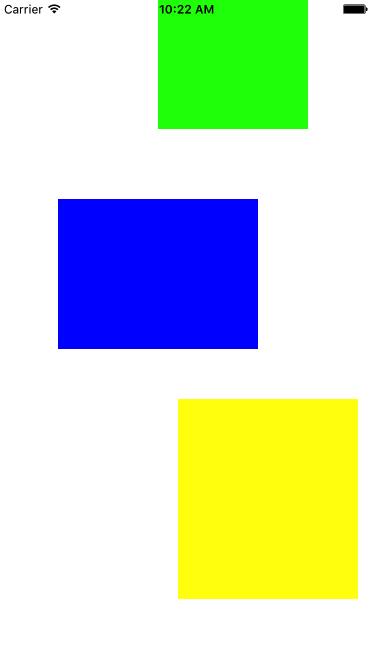
重新设置Bounds:
    CGRect bounds=self.container.bounds;
    bounds.origin=CGPointMake(0, 200);
    self.container.bounds=bounds;
效果如下:

通过设置Bounds可以让视图向上移动,那么我可以通过手势简单的定义UIScrollView:
@interface  FEScrollView()

@property (assign,nonatomic) CGSize contentSize;

@end

@implementation FEScrollView

-(instancetype)initWithFrame:(CGRect)frame{
    self=[super initWithFrame:frame];
    if (self) {
        UIPanGestureRecognizer *panGesture=[[UIPanGestureRecognizer alloc]initWithTarget:self action:@selector(handlePanGesture:)];
        [self addGestureRecognizer:panGesture];
    }
    return self;
}

-(void)handlePanGesture:(UIPanGestureRecognizer *)panGestureRecongnizer{
    CGPoint translation = [panGestureRecongnizer translationInView:self];
    CGRect bounds = self.bounds;

    CGFloat newBoundsOriginY = bounds.origin.y - translation.y;
    bounds.origin.y=newBoundsOriginY;
    self.bounds = bounds;

    [panGestureRecongnizer setTranslation:CGPointZero inView:self];
}
@end
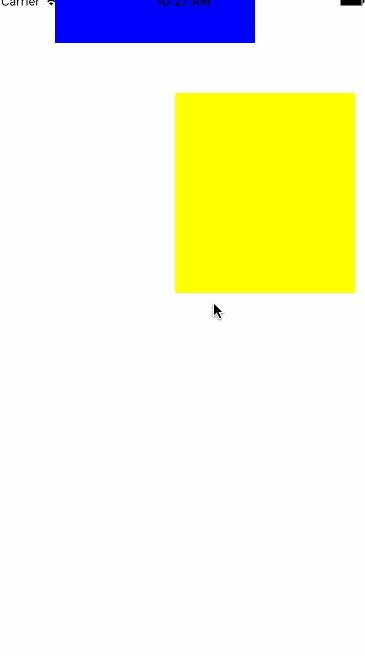
效果如下:

UIScrollView是可以设置ConteSize的,我们也可以设置,并控制滑动的范围:
-(void)handlePanGesture:(UIPanGestureRecognizer *)panGestureRecongnizer{
    CGPoint translation = [panGestureRecongnizer translationInView:self];
    CGRect bounds = self.bounds;

    //需要设置contentsize
    CGFloat newBoundsOriginX = bounds.origin.x - translation.x;
    CGFloat minBoundsOriginX = 0.0;
    CGFloat maxBoundsOriginX = self.contentSize.width - bounds.size.width;
    bounds.origin.x = fmax(minBoundsOriginX, fmin(newBoundsOriginX, maxBoundsOriginX));

    CGFloat newBoundsOriginY = bounds.origin.y - translation.y;
    CGFloat minBoundsOriginY = 0.0;
    CGFloat maxBoundsOriginY = self.contentSize.height - bounds.size.height;
    bounds.origin.y = fmax(minBoundsOriginY, fmin(newBoundsOriginY, maxBoundsOriginY));

    self.bounds = bounds;
    [panGestureRecongnizer setTranslation:CGPointZero inView:self];
}
UIScrollView实际上比我们实现的要复杂很多反弹效果,动量滚动,放大试图以及涉及到的代理方法,本文就是简单介绍一下原理,实际开发中如非特殊的必要,没必要继承UIView去实现UIScrollView。如果对UIScrollView有特殊需求,倒是可以继承UIScrollView实现自己的功能~
以上是关于iOS开发-UIScrollView原理的主要内容,如果未能解决你的问题,请参考以下文章