React Native开发之FlexBox代码+图解
Posted 黄文臣
tags:
篇首语:本文由小常识网(cha138.com)小编为大家整理,主要介绍了React Native开发之FlexBox代码+图解相关的知识,希望对你有一定的参考价值。
来自Leo的原创博客,转载请著名出处
我的stackoverflow
前言
FlexBox布局是React Native的布局核心,鉴于自己对FlexBox还有很多概念不太清楚,这篇文章就当成是总结,并且分享出来给大家。
FlexBox布局能够帮助你更好的帮助你控制控件的大小和位置,Flexbox非常适合Mobile端的适配,我想这也是FaceBook为什么选择FlexBox作为React Native布局的原因吧。
本文参考文章如下
当然,React Native官网也有FlexBox相关的文档,不过讲解的内容不多。
!!!!React Native的迭代更新很快,所以如果有读者发现了本文代码不适配新版本了,欢迎评论,我会及时修改。
Getting Start
react-native init LearnFlexBox运行
cd LearnFlexBox/
react-native run-ios
会看到默认的截图
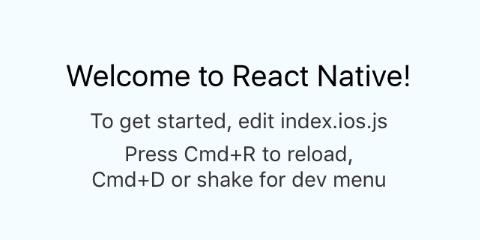
由于模拟器截图实在太宽,所以本文把Demo范围限定在一个小的范围内
重写Render方法
  render() {
    return (
      <View style={styles.container}>
        <View style={styles.exampleContainer}>

        </View>
      </View>
    );
  }
这里的exampleContainer风格如下
  exampleContainer:{
    width:320,
    height:200,
    backgroundColor:'gray'
  }
Container和Item
- Container就是容器,有些属性是设置到Container上的例如alignItems。设置到Container上的属性决定了如何布局内部的Item
- Item, 在容器中的子视图。设置到Item上的属性,决定了自己在Container中的位置大小
有过iOS或者安卓原生开发的同学应该能有个更清楚的认识,很像View和Subview的关系
flexDirection
这个Container属性决定了按照哪个方向来布局Item,默认从上到下
添加一个style
  exampleItem:{
    width:30,
    height:30,
    backgroundColor:'#27E6E2'
  }
然后,在添加三个子视图
<View style={styles.exampleContainer}>
  <View style={styles.exampleItem}></View>
  <View style={styles.exampleItem}></View>
  <View style={styles.exampleItem}></View>
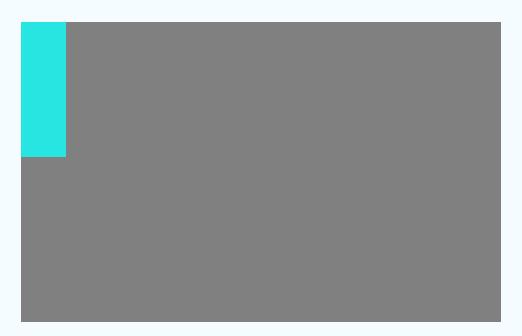
</View>然后,修改exampleContainer,添加一个属性flexDirection
  exampleContainer:{
    width:320,
    height:200,
    backgroundColor:'gray',
    flexDirection:'column'
},当flexDirection设置为column的时候效果
当flexDirection设置为row的时候

注意:React Native的Flexbox目前不支持row-reverse和column-reverse
alignItems-垂直轴上的位置关系
有四个值
'flex-start', 'flex-end', 'center', 'stretch'示例代码如下
<View style={{width:320,height:200,backgroundColor:'gray',alignItems:'stretch',flexDirection:'row'}}>
  <View style={{width:50,backgroundColor:'green'}}></View>
  <View style={{width:50,backgroundColor:'blue'}}></View>
  <View style={{width:50,height:50,backgroundColor:'red'}}></View>
  <View style={{width:50,height:60,backgroundColor:'orange'}}></View>
</View>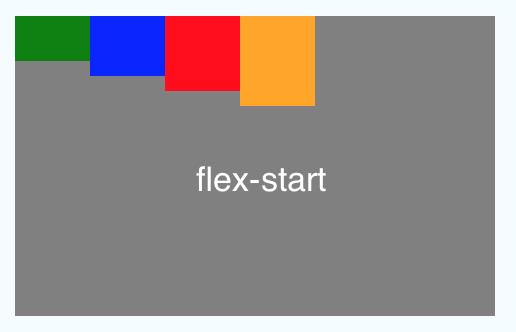
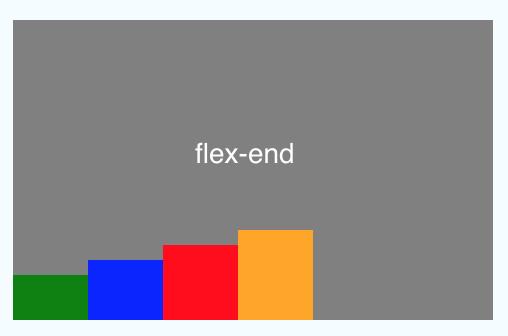

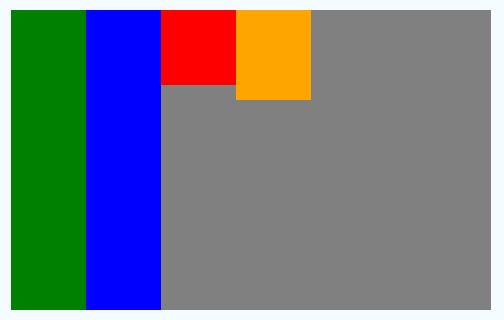
还有一种stretch表示拉伸,拉伸的时候不需要完整的设置高度宽度,比如
<View style={{width:320,height:200,backgroundColor:'gray',alignItems:'stretch',flexDirection:'row'}}>
  <View style={{width:50,backgroundColor:'green'}}></View>
  <View style={{width:50,backgroundColor:'blue'}}></View>
  <View style={{width:50,height:50,backgroundColor:'red'}}></View>
  <View style={{width:50,height:60,backgroundColor:'orange'}}></View>
</View>
效果
alignSelf
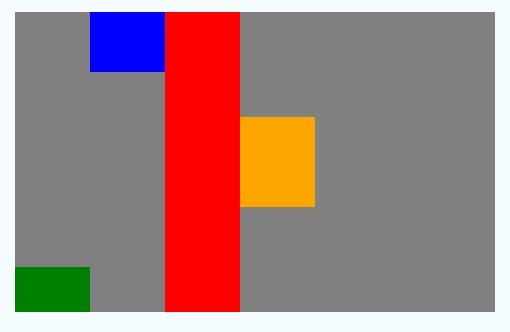
五个值,当Item有这个属性的时候,会优先读取item的alignSelf来布局,也就是说会覆盖Container的alignItems。例如
<View style={{width:320,height:200,backgroundColor:'gray',alignItems:'center',flexDirection:'row'}}>
  <View style={{width:50,height:30,backgroundColor:'green',alignSelf:'flex-end'}}></View>
  <View style={{width:50,height:40,backgroundColor:'blue',alignSelf:'flex-start'}}></View>
  <View style={{width:50,alignSelf:'stretch',backgroundColor:'red'}}></View>
  <View style={{width:50,alignSelf:'auto',height:60,backgroundColor:'orange'}}></View>
</View>
效果
justifyContent-水平轴上的位置关系
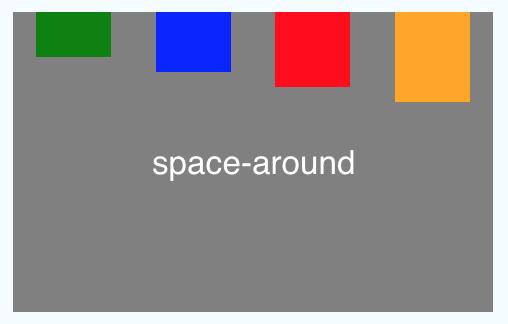
五个值
'flex-start','flex-end', 'center', 'space-between', 'space-around'同样,我们还是举个例子,来看看实际效果
代码如下
<View style={{width:320,height:200,backgroundColor:'gray',justifyContent:'space-around',flexDirection:'row'}}>
  <View style={{width:50,height:30,backgroundColor:'green'}}></View>
  <View style={{width:50,height:40,backgroundColor:'blue'}}></View>
  <View style={{width:50,height:50,backgroundColor:'red'}}></View>
  <View style={{width:50,height:60,backgroundColor:'orange'}}></View>
</View>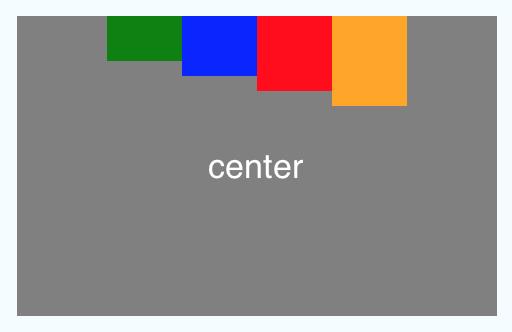


flex-占据剩余空间的权重
例如,如下,不设置宽度,高度一样,三个item,flex都是1,那么每个item的宽度占据1/3
<View style={{width:320,height:200,backgroundColor:'gray',flexDirection:'row'}}>
<View style={{flex:1,height:30,backgroundColor:'green'}}></View>
<View style={{flex:1,height:30,backgroundColor:'blue'}}></View>
<View style={{flex:1,height:30,backgroundColor:'red'}}></View>
</View>效果

当我们固定中间宽度为50,然后两边flex都是1的时候

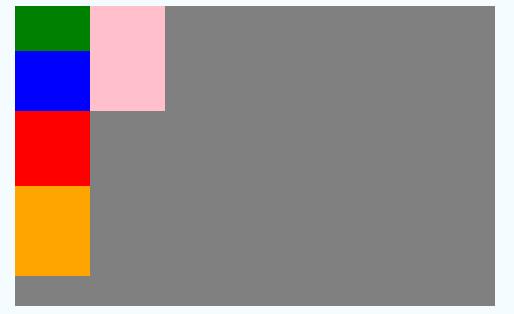
flexWrap-决定在flex的方向上填满后是否换行
两个值,默认不换行
'wrap', 'nowrap'代码
<View style={{width:320,height:200,backgroundColor:'gray',flexDirection:'column',flexWrap:'wrap'}}>
  <View style={{width:50,height:30,backgroundColor:'green'}}></View>
  <View style={{width:50,height:40,backgroundColor:'blue'}}></View>
  <View style={{width:50,height:50,backgroundColor:'red'}}></View>
  <View style={{width:50,height:60,backgroundColor:'orange'}}></View>
  <View style={{width:50,height:70,backgroundColor:'pink'}}></View>
</View>
换行效果
不换行效果

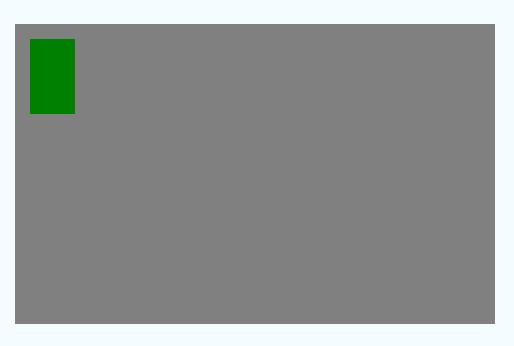
top/bottom/left/right
这个比较直观,距离上下左右的距离
例如,距离top:10,left:10
<View style={{width:320,height:200,backgroundColor:'gray',flexDirection:'row'}}>
  <View style={{top:10,left:10,width:30,height:50,backgroundColor:'green'}}></View>
</View>
效果
padding相关
与Padding相关的一共有以下几个
- padding
- paddingBottom
- paddingLeft
- paddingRight
- paddingTop
- paddingVertical
- paddingHorizontal
例如,一个100*100View在没有padding的时候
<View style={{width:320,height:200,backgroundColor:'gray',alignItems:'flex-start',paddingLeft:20,paddingTop:10}}>
  <View style={{width:100,height:100,backgroundColor:'pink'}}></View>
</View>
效果

设置padding
<View style={{width:320,height:200,backgroundColor:'gray',alignItems:'flex-start',paddingLeft:20,paddingTop:10}}>
  <View style={{width:100,height:100,backgroundColor:'pink'}}></View>
</View>
效果

Border相关
几个相关的属性
- borderWidth
- borderTopWidth
- borderRightWidth
- borderLeftWidth
- borderBottomWidth
举个例子
<View style={{width:320,height:200,backgroundColor:'gray',alignItems:'center',justifyContent:'center'}}>
  <View style={{width:50,height:50,backgroundColor:'pink',borderBottomWidth:3,borderColor:'white'}}></View>
</View>
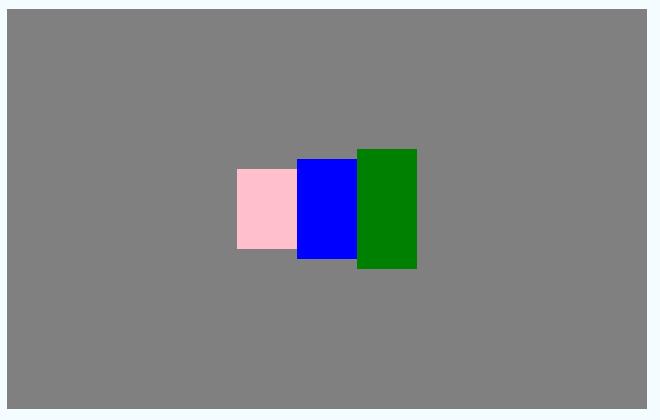
margin相关
于margin相关的一共有以下几个属性
- margin
- marginBottom
- marginHorizontal
- marginLeft
- marginRight
- marginTop
- marginVertical
在不设置margin的情况下
<View style={{width:320,height:200,backgroundColor:'gray',alignItems:'center',justifyContent:'center',flexDirection:'row'}}>
  <View style={{width:30,height:40,backgroundColor:'pink' }}></View>
  <View style={{width:30,height:50,backgroundColor:'blue'}}></View>
  <View style={{width:30,height:60,backgroundColor:'green'}}></View>
</View>
效果
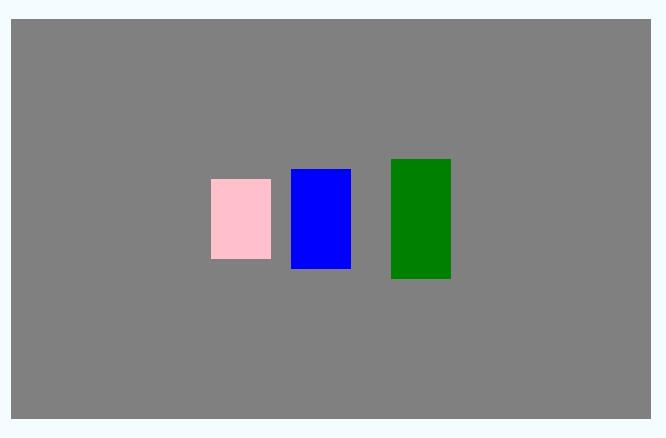
设置margin的时候
<View style={{width:320,height:200,backgroundColor:'gray',alignItems:'center',justifyContent:'center',flexDirection:'row'}}>
  <View style={{width:30,height:40,backgroundColor:'pink' }}></View>
  <View style={{width:30,height:50,backgroundColor:'blue',marginLeft:10,marginRight:20}}></View>
  <View style={{width:30,height:60,backgroundColor:'green'}}></View>
</View>
效果
后续
由于没有Web的开发经验,所以React Native的博客更新较慢,这个系列应该会一直更新下去。如果发现问题,欢迎评论,我会及时修正。
以上是关于React Native开发之FlexBox代码+图解的主要内容,如果未能解决你的问题,请参考以下文章
