基于LNMP实现动静分离,PHP+Memcached实现会话保持
Posted
tags:
篇首语:本文由小常识网(cha138.com)小编为大家整理,主要介绍了基于LNMP实现动静分离,PHP+Memcached实现会话保持相关的知识,希望对你有一定的参考价值。
基于LNMP实现动静分离,PHP+Memcached实现会话保持
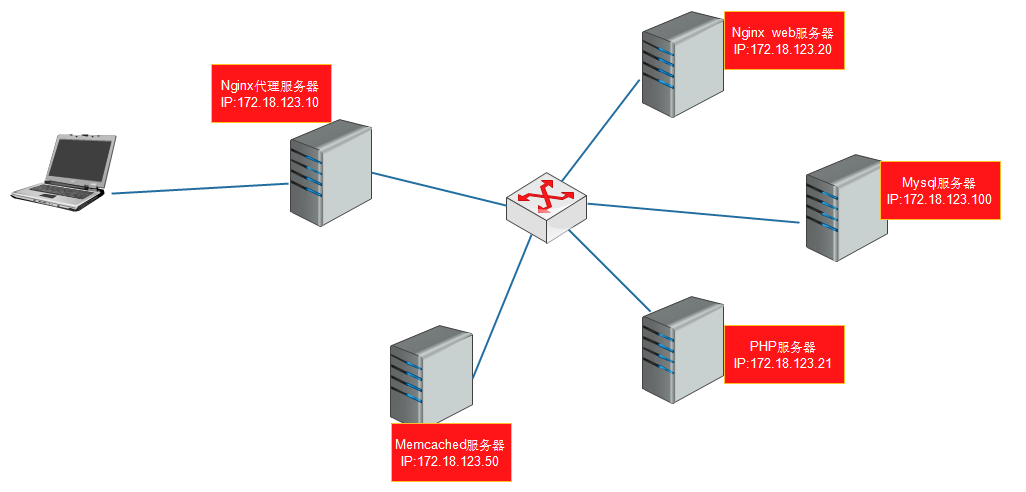
拓扑图:
环境搭建:
Nginx代理:172.18.123.10 nginx-1.8.0
Memcached:172.18.123.50 memcached-1.4.15
Nginx web:172.18.123.20 nginx-1.8.0
PHP: 172.18.123.21 php-5.4.26 xcache-3.2.0 php扩展memcache-3.0.8
Mysql: 172.18.123.100 mariadb-10.1.8
二、编译安装
1.Nginx代理服务器:172.18.123.10 编译安装Nginx
1)安装开发环境及解决依赖关系
[[email protected] ~]# yum groupinstall -y "Development Tools" "Development Libraries"
[[email protected] ~]# yum install -y pcre-devel opensll-devel
2)安装
添加nginx用户及组,管理nginx服务进程
[[email protected] ~]# groupadd -r nginx
[[email protected] ~]# useradd -r -g nginx nginx
下载软件包
[[email protected] ~]# wget http://nginx.org/download/nginx-1.8.0.tar.gz
[[email protected] ~]# tar xf nginx-1.8.0.tar.gz
[[email protected] ~]# cd nginx-1.8.0/
[[email protected] nginx-1.8.0]# ./configure \
--prefix=/usr/local/nginx \
--sbin-path=/usr/local/nginx/sbin/nginx \
--conf-path=/etc/nginx/nginx.conf \
--error-log-path=/var/log/nginx/error.log \
--http-log-path=/var/log/nginx/access.log \
--pid-path=/var/run/nginx/nginx.pid \
--lock-path=/var/lock/nginx.lock \
--user=nginx \
--group=nginx \
--with-http_ssl_module \
--with-http_flv_module \
--with-http_stub_status_module \
--with-http_gzip_static_module \
--http-client-body-temp-path=/var/tmp/nginx/client/ \
--http-proxy-temp-path=/var/tmp/nginx/proxy/ \
--http-fastcgi-temp-path=/var/tmp/nginx/fcgi/ \
--http-uwsgi-temp-path=/var/tmp/nginx/uwsgi \
--http-scgi-temp-path=/var/tmp/nginx/scgi \
--with-pcre
[[email protected] nginx-1.8.0]# make && make install
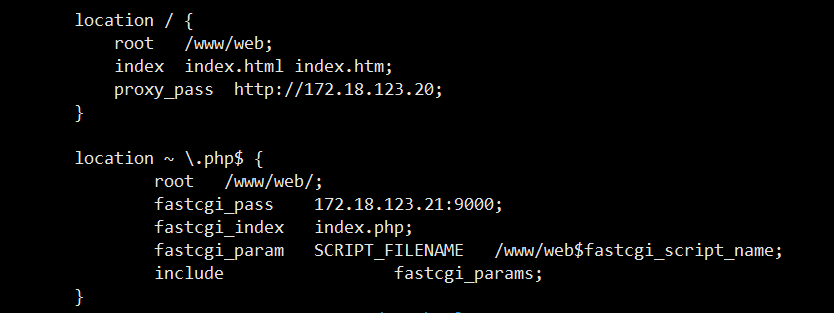
配置nginx.conf
设置环境变量
[[email protected] ~]# vim /etc/profile.d/nginx.sh 添加如下行
export PATH=$PATH:/usr/local/nginx/sbin/
[[email protected] ~]# source /etc/profile.d/nginx.sh
启动服务,查看端口是否启用
2.Memcached服务器:172.18.123.50
1)下载依赖包libevent,编译安装。
[[email protected]~]#wget https://cloud.github.com/downloads/libevent/libevent/libevent-2.0.21-stable.tar.gz
[[email protected] ~]# tar xf libevent-2.0.21-stable.tar.gz
[[email protected] ~]# cd libevent-2.0.21-stable/
[[email protected] libevent-2.0.21-stable]# ./configure --prefix=/usr/local/libevent
[[email protected] libevent-2.0.21-stable]# make &&make install
2)下载memcached
[[email protected] ~]# tar xf memcached-1.4.15.tar.gz
[[email protected] ~]# cd memcached-1.4.15/
[[email protected]]#./configure --prefix=/usr/local/memcached --with-libevent=/usr/local/libevent
[[email protected] memcached-1.4.15]# make && make install
3)启动memcached
[[email protected] memcached-1.4.15]# /usr/local/memcached/bin/memcached -d -u root -P /tmp/memcached.pid
查看端口
3.Nginx web服务器上,编译安装nginx,修改配置文件,启动Nginx
1)创建主页目录,设置主页目录
mkdir /www/web -pv
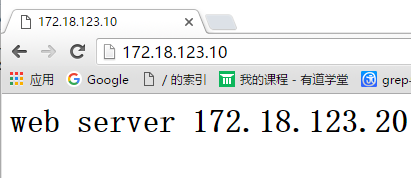
echo “<h1> web server 172.18.123.20 </h1> > /www/web/index.html
4.PHP:172.18.123.21 编译安装
# yum groupinstall "Development Tools" "Server Platform Development"
# yum install -y libmcrypt-devel libxml2-devel bzip2-devel openssl-devel
# yum install -y php-mysql
1)下载 php-5.4.26.tar.bz2 源码包
[[email protected] ~]# tar xf php-5.4.26.tar.bz2
[[email protected] ~]# cd php-5.4.26/
[[email protected]]# ./configure --prefix=/usr/local/php --with-config-file-path=/etc --with-config-scan-dir=/etc/php.d --with-libxml-dir=/usr --with-openssl --with-zlib --with-bz2 --with-jpeg-dir --with-png-dir --with-freetype-dir --enable-fpm --enable-mbstring --with-mcrypt --enable-sockets --with-mysql=mysqlnd --with-mysqli=mysqlnd --with-pdo-mysql=mysqlnd
[[email protected] ~]# make && make install
2)php配置文件
#cp php.ini.production /etc/php.ini
为php-fpm配置一个启动脚本
#cp sapi/fpm/init.d.php-pfm /etc/rc.d/init.d/php-fpm
加入到系统服务
#chkconfig --add php-fpm
#chkconfig php-fpm on
#chkconfig --list php-fpm
配置php-fpm
#cd /usr/local/php/etc
#cp php-fpm.conf.default php-fpm.conf
更改配置文件
#vim php-fpm.conf
定位到listen,ip地址更改为别人可以访问的地址
启动服务,查看相应端口
建立一个目录作为虚拟主机的目录:
# mkdir -pv /www/web
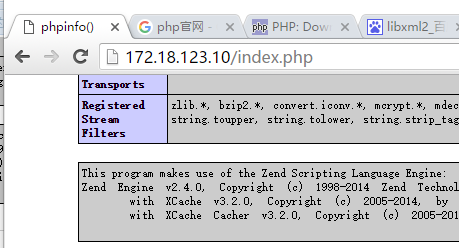
3)安装xcache加速php
下载xcache-3.2.0.tar.bz2源码包
[[email protected] ~]# tar xf xcache-3.2.0.tar.bz2
[[email protected] ~]# cd xcache-3.2.0/
[[email protected] ~]# phpize
[[email protected] ~]# ./configure --enable-xcache --with-php-config=/usr/local/php/bin/php-config
[[email protected] ~]# make && make install
安装完成会有如下信息:
配置php
[[email protected] ~]#vim /etc/php.ini
找到extension开头的行,修改为如下行:
extension = /usr/local/php/lib/php/extensions/no-debug-non-zts-20100525/xcache.so
重启php-fpm,
4)安装php-memcached扩展,
下载memcache-3.0.8.tgz,编译安装
[[email protected] ~]# tar xf memcache-3.0.8.tgz
[[email protected] ~]# cd memcache-3.0.8/
[[email protected] memcache-3.0.8]# phpize123
[[email protected] memcache-3.0.8]# ./configure --enable-memcache --with-php-config=/usr/local/php/bin/php-config
[[email protected] memcache-3.0.8]# make && make install
同样会生成以下信息
配置php
[[email protected]lhost ~]#vim /etc/php.ini
找到extension开头的行,修改为如下行:
extension = /usr/local/php/lib/php/extensions/no-debug-non-zts-20100525/memcache.so
定位到seession.save添加下列两行:
session.save_handler = memcache
session.save_path = "tcp://172.18.123.50:11211?persisent=1&weight=1&timeout=1&retry_interval=15"
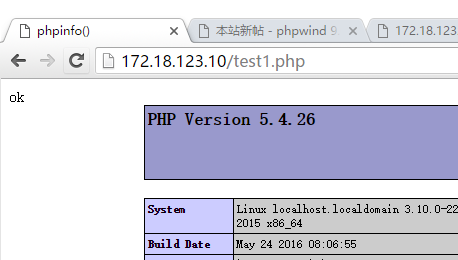
5)编写测试脚本测试:
[[email protected] ~]# vim /www/web/test.php
#www.magedu.com
<?php
$mem = new Memcache;
$mem->connect("172.18.123.50", 11211) or die("Could not connect");
$version = $mem->getVersion();
echo "Server‘s version: ".$version."<br/>\n";
$mem->set(‘hellokey‘, ‘Hello World‘, 0, 600) or die("Failed to save data at the memcached server");
echo "Store data in the cache (data will expire in 600 seconds)<br/>\n";
$get_result = $mem->get(‘hellokey‘);
echo "$get_result is from memcached server.";
?>
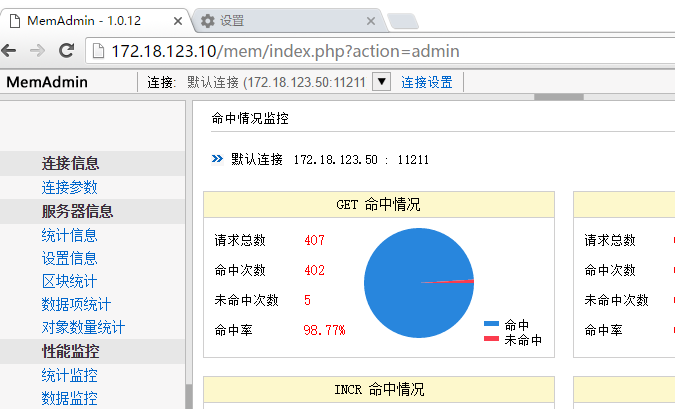
下载memadmin-1.0.12.tar.gz,解压到/www/web/目录下,复制同样一份到Nginx web服务器/www/web/目录下
[[email protected] ~]# useradd -r www
5.Mysql:172.18.123.100,二进制包安装
1)安装
下载mariadb-5.5.46-linux-x86_64.tar.gz
[[email protected] ~]# groupadd -r -g 306 mysql
[[email protected] ~]# useradd -r -g mysql mysql
[[email protected] ~]# mkdir /mydata/data -pv
[[email protected] ~]# chown -R mysql.mysql /mydata/data
[[email protected] ~]# tar xf mariadb-5.5.46-linux-x86_64.tar.gz -C /usr/local/
[[email protected] ~]# cd /usr/local
[[email protected] local]# ln -sv mariadb-5.5.46-linux-x86_64 mysql
[[email protected] local]# cd /mysql
[[email protected] mysql]# chown -R root:mysql ./*
[[email protected] mysql]# mkdir -pv /etc/mysql
[[email protected] mysql]# cp support-files/my-large.cnf /etc/mysql/my.cnf
[[email protected] mysql]# vim /etc/my.cnf
[[email protected] mysql]# cp support-files/mysql.server /etc/init.d/mysqld
[[email protected] mysql]# scripts/mysql_install_db --user=mysql --datadir=/mydata/data
[[email protected] mysql]# chkconfig --add mysqld
[[email protected] mysql]# service mysqld start
Starting MySQL... SUCCESS!
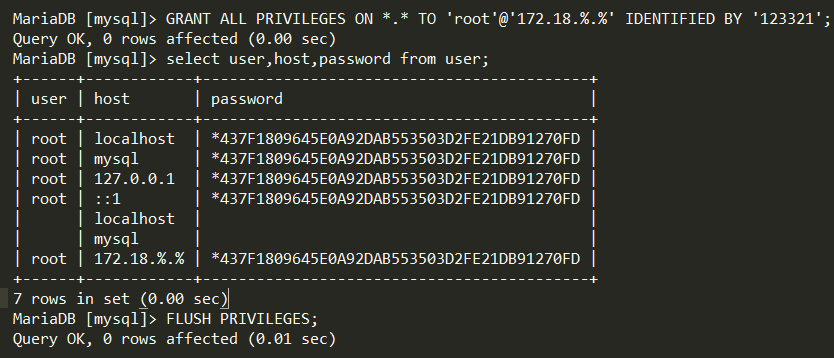
2)授权用户
3)测试数据
6.部署应用
在PHP主机上
下载phpMyAdmin-4.0.5-all-languages.zip
解压到/www/web/目录下,同样的文件复制一份到Nginx web服务器/www/web下
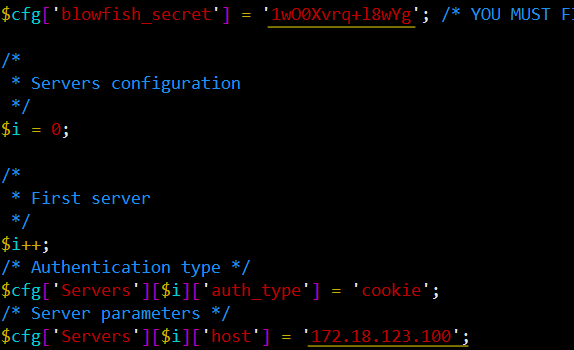
修改配置文件
# cp config.sample.inc.php config.inc.php
# vim config.inc.php
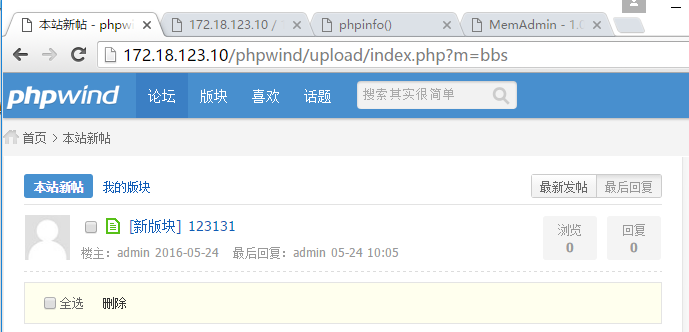
同理部署phpwind
以上是关于基于LNMP实现动静分离,PHP+Memcached实现会话保持的主要内容,如果未能解决你的问题,请参考以下文章
