使用KindEditor完成图片上传
Posted jepson6669
tags:
篇首语:本文由小常识网(cha138.com)小编为大家整理,主要介绍了使用KindEditor完成图片上传相关的知识,希望对你有一定的参考价值。
前端使用KindEditor,后台使用Springmvc
1 拷贝KindEditor相关文件到项目中
拷贝KindEditor相关文件到项目中

2 准备一个jsp页面
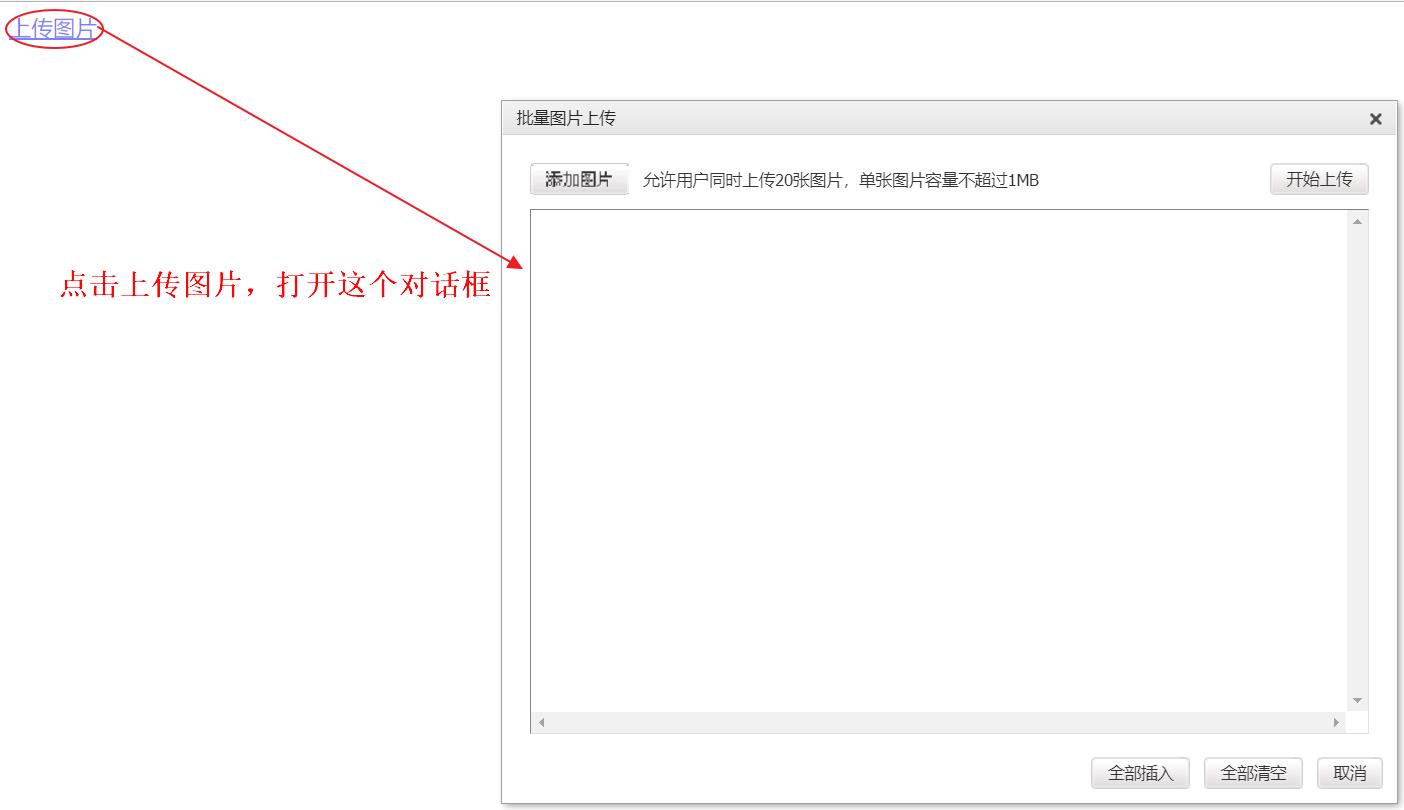
页面中我准备了一个超链接,点击就可以打开KindEditor批量图片上传对话框
1.jsp页面中需要引入KindEditor相关的css和js文件。
<%@ page language="java" contentType="text/html; charset=UTF-8"
    pageEncoding="UTF-8"%>
<!DOCTYPE html PUBLIC "-//W3C//DTD HTML 4.01 Transitional//EN" "http://www.w3.org/TR/html4/loose.dtd">
<html>
<head>
<meta http-equiv="Content-Type" content="text/html; charset=UTF-8">
<title>KindEditor UploadDemo</title>

<!-- 引入kindeditor的css文件 -->
<link href="/js/kindeditor-4.1.10/themes/default/default.css" type="text/css" rel="stylesheet">


<!-- 引入kindeditor的js文件 -->
<script type="text/javascript" charset="utf-8"  src="/js/kindeditor-4.1.10/kindeditor-all-min.js"></script>
<script type="text/javascript" charset="utf-8"  src="/js/kindeditor-4.1.10/lang/zh_CN.js"></script>

<script type="text/javascript">
    //点击上传图片,打开一个KindEditor上传图片的对话框。
    function uploadFileFunction() {
        KindEditor.editor({
            //指定上传文件参数名称
            filePostName : "uploadFile",
            //指定上传文件请求的url。
            uploadJson : \'/pic/upload\',
            //上传类型,分别为image、flash、media、file
            dir : "image"
        }).loadPlugin(\'multiimage\', function() {
            var editor = this;
            editor.plugin.multiImageDialog({

            });
        });
    }
</script>
</head>
<body>
    <a href="javascript:uploadFileFunction()">上传图片</a>
</body>
</html>
页面效果如下:
3 后台PictureController
KindEditor的批量上传图片功能,实际上也是一个也给上传,多个图片,每个图片
都会执行下面的方法。需要把commons-io\\fileupload的jar包添加到工程中。
maven工程中添加下面的依赖:

下面代码中的图片是上传到了图片服务器里面,当然也可以修改传到其它地方。
package cn.e3mall.controller;

import java.util.HashMap;
import java.util.Map;

import org.springframework.beans.factory.annotation.Value;
import org.springframework.http.MediaType;
import org.springframework.stereotype.Controller;
import org.springframework.web.bind.annotation.RequestMapping;
import org.springframework.web.bind.annotation.ResponseBody;
import org.springframework.web.multipart.MultipartFile;

import cn.e3mall.common.utils.FastDFSClient;
import cn.e3mall.common.utils.JsonUtils;

/**
 * @title:PictureController
 * @description:
 * @author jepson
 * @date 2018年5月30日 下午4:20:36
 * @version 1.0
 */
@Controller
public class PictureController {


    @Value("${IMAGE_SERVER_URL}")
    private String IMAGE_SERVER_URL;

    @RequestMapping(value = "/pic/upload",produces=MediaType.TEXT_PLAIN_VALUE+";charset=utf-8")
    @ResponseBody
    @SuppressWarnings("all")
    public String uploadFile(MultipartFile uploadFile) {

        try {
            // 1、取文件的扩展名
            String originalFilename = uploadFile.getOriginalFilename();
            String extName = originalFilename.substring(originalFilename.lastIndexOf(".") + 1);

            // 2、创建一个FastDFS的客户端
            FastDFSClient client = new FastDFSClient("classpath:conf/client.conf");

            // 3、执行上传处理
            String path = client.uploadFile(uploadFile.getBytes(), extName);

            // 4、拼接返回的url和ip地址,拼装成完整的url
            String url = IMAGE_SERVER_URL + path;

            // 5、返回map
            Map result = new HashMap<>();
            result.put("error", 0);
            result.put("url", url);

            //把java对象转换成json字符串
            String json = JsonUtils.objectToJson(result);
            return json;

        } catch (Exception e) {
            e.printStackTrace();
            // 5、返回map
            Map result = new HashMap<>();
            result.put("error", 1);
            result.put("message", "图片上传失败");

            //把java对象转换成json字符串
            String json = JsonUtils.objectToJson(result);
            return json;
        }
    }
}
JsonUtils工具类代码

package cn.e3mall.common.utils;

import java.util.List;

import com.fasterxml.jackson.core.JsonProcessingException;
import com.fasterxml.jackson.databind.JavaType;
import com.fasterxml.jackson.databind.JsonNode;
import com.fasterxml.jackson.databind.ObjectMapper;

/**
 *
 * @title:JsonUtils
 * @description:json转换工具类,使用的是jackson
 * @author jepson
 * @date 2018年5月29日 下午9:16:16
 * @version 1.0
 */
public class JsonUtils {

    // 定义jackson对象
    private static final ObjectMapper MAPPER = new ObjectMapper();

    /**
     * 将对象转换成json字符串。
     * <p>Title: pojoToJson</p>
     * <p>Description: </p>
     * @param data
     * @return
     */
    public static String objectToJson(Object data) {
        try {
            String string = MAPPER.writeValueAsString(data);
            return string;
        } catch (JsonProcessingException e) {
            e.printStackTrace();
        }
        return null;
    }

    /**
     * 将json结果集转化为对象
     *
     * @param jsonData json数据
     * @param clazz 对象中的object类型
     * @return
     */
    public static <T> T jsonToPojo(String jsonData, Class<T> beanType) {
        try {
            T t = MAPPER.readValue(jsonData, beanType);
            return t;
        } catch (Exception e) {
            e.printStackTrace();
        }
        return null;
    }

    /**
     * 将json数据转换成pojo对象list
     * <p>Title: jsonToList</p>
     * <p>Description: </p>
     * @param jsonData
     * @param beanType
     * @return
     */
    public static <T>List<T> jsonToList(String jsonData, Class<T> beanType) {
        JavaType javaType = MAPPER.getTypeFactory().constructParametricType(List.class, beanType);
        try {
            List<T> list = MAPPER.readValue(jsonData, javaType);
            return list;
        } catch (Exception e) {
            e.printStackTrace();
        }

        return null;
    }

}
FastDFSClient工具类代码

package cn.e3mall.common.utils;

import org.csource.common.NameValuePair;
import org.csource.fastdfs.ClientGlobal;
import org.csource.fastdfs.StorageClient1;
import org.csource.fastdfs.StorageServer;
import org.csource.fastdfs.TrackerClient;
import org.csource.fastdfs.TrackerServer;

public class FastDFSClient {

    private TrackerClient trackerClient = null;
    private TrackerServer trackerServer = null;
    private StorageServer storageServer = null;
    private StorageClient1 storageClient = null;

    public FastDFSClient(String conf) throws Exception {
        if (conf.contains("classpath:")) {
            conf = conf.replace("classpath:", this.getClass().getResource("/").getPath());
        }
        ClientGlobal.init(conf);
        trackerClient = new TrackerClient();
        trackerServer = trackerClient.getConnection();
        storageServer = null;
        storageClient = new StorageClient1(trackerServer, storageServer);
    }

    /**
     * 上传文件方法
     * <p>Title: uploadFile</p>
     * <p>Description: </p>
     * @param fileName 文件全路径
     * @param extName 文件扩展名,不包含(.)
     * @param metas 文件扩展信息
     * @return
     * @throws Exception
     */
    public String uploadFile(String fileName, String extName, NameValuePair[] metas) throws Exception {
        String result = storageClient.upload_file1(fileName, extName, metas);
        return result;
    }

    public String uploadFile(String fileName) throws Exception {
        return uploadFile(fileName, null, null);
    }

    public String uploadFile(String fileName, String extName) throws Exception {
        return uploadFile(fileName, extName, null);
    }

    /**
     * 上传文件方法
     * <p>Title: uploadFile</p>
     * <p>Description: </p>
     * @param fileContent 文件的内容,字节数组
     * @param extName 文件扩展名
     * @param metas 文件扩展信息
     * @return
     * @throws Exception
     */
    public String uploadFile(byte[] fileContent, String extName, NameValuePair[] metas) throws Exception {

        String result = storageClient.upload_file1(fileContent, extName, metas);
        return result;
    }

    public String uploadFile(byte[] fileContent) throws Exception {
        return uploadFile(fileContent, null, null);
    }

    public String uploadFile(byte[] fileContent, String extName) throws Exception {
        return uploadFile(fileContent, extName, null);
    }
}
client.conf配置文件
tracker_server=192.168.25.133:22122
resources.properties配置文件
# 图片服务器地址
IMAGE_SERVER_URL=http://192.168.25.133/
4 springmvc中配置文件上传解析器
<!-- 定义文件上传解析器 -->
    <bean id="multipartResolver"
        class="org.springframework.web.multipart.commons.CommonsMultipartResolver">
        <!-- 设定默认编码 -->
        <property name="defaultEncoding" value="UTF-8"></property>
        <!-- 设定文件上传的最大值5MB,5*1024*1024 -->
        <property name="maxUploadSize" value="5242880"></property>
    </bean>
5 测试
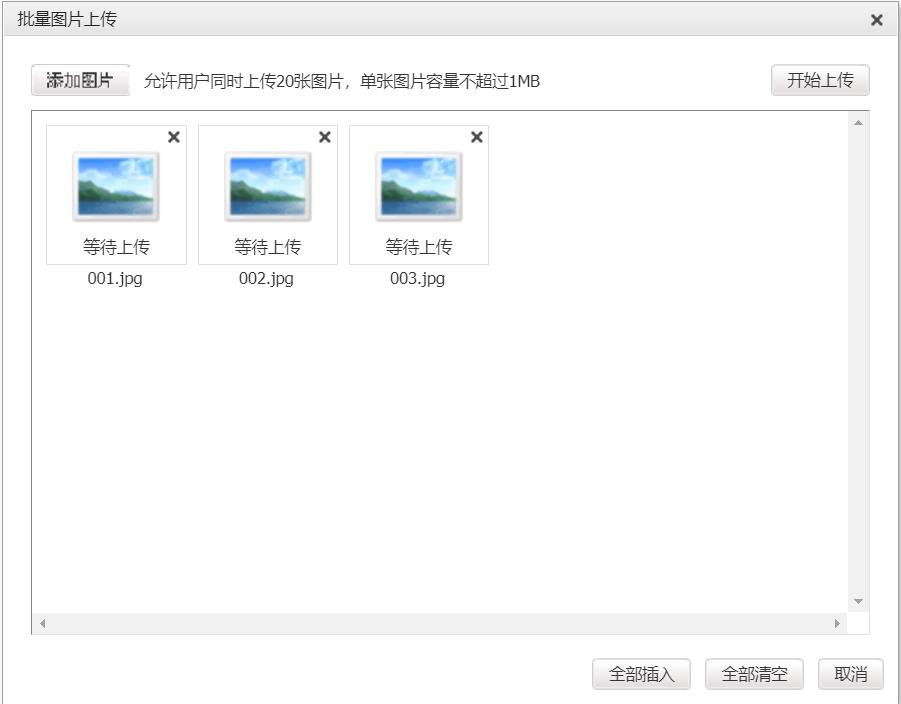
1 点击对话框中的添加图片按钮选择需要上传的图片
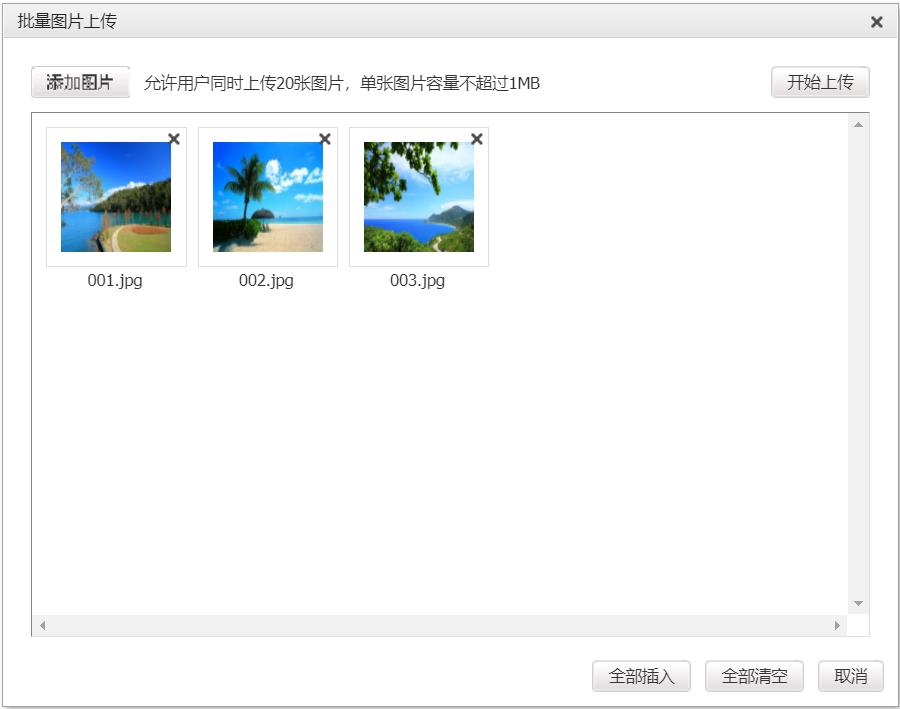
2 点击开始上传
能够回显说明图片已经上传成功了,演示中的图片是上传到图片服务器的。
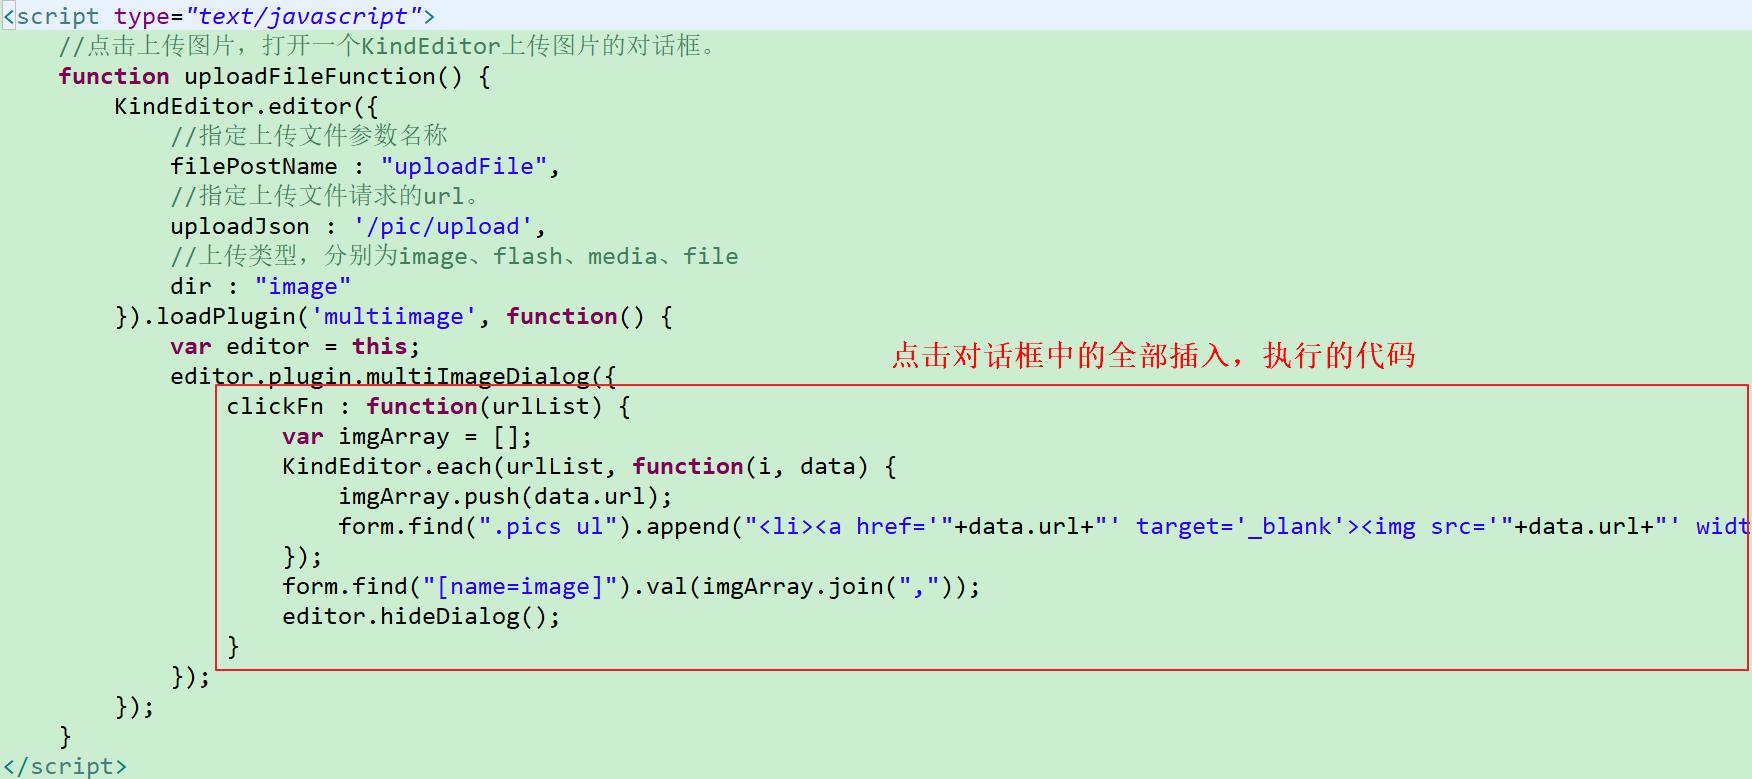
3 如果希望点击“全部插入”之后有另外的逻辑的话,可以在对话框中加入点击事件
下面随便给一个演示:
PictureController中使用ftpClient上传到ftp服务器
package cn.e3mall.controller;

import java.util.HashMap;
import java.util.Map;

import org.joda.time.DateTime;
import org.springframework.beans.factory.annotation.Value;
import org.springframework.http.MediaType;
import org.springframework.stereotype.Controller;
import org.springframework.web.bind.annotation.RequestMapping;
import org.springframework.web.bind.annotation.ResponseBody;
import org.springframework.web.multipart.MultipartFile;

import cn.e3mall.common.utils.FtpUtils;
import cn.e3mall.common.utils.IDUtils;
import cn.e3mall.common.utils.JsonUtils;

/**
 * @title:PictureController
 * @description:
 * @author jepson
 * @date 2018年5月30日 下午4:20:36
 * @version 1.0
 */
@Controller
public class PictureController {

    /**
     * 使用ftp上传图片
     */
    @Value("${FTP_ADDRESS}")
    private String FTP_ADDRESS; //服务器地址

    @Value("${FTP_PORT}")
    private Integer FTP_PORT;  //端口

    @Value("${FTP_USERNAME}")
    private String FTP_USERNAME;  //连接ftp服务器用户名

    @Value("${FTP_PASSWORD}")
    private String FTP_PASSWORD;  //密码

    @Value("${FTP_BASE_PATH}")
    private String FTP_BASE_PATH;  //基本路径

    @Value("${FTP_IMAGE_BASE_URL}")
    private String FTP_IMAGE_BASE_URL;  //服务器图片的基本地址


    @RequestMapping(value = "/pic/upload",produces=MediaType.TEXT_PLAIN_VALUE+";charset=utf-8")
    @ResponseBody
    @SuppressWarnings("all")
    public String uploadFile(MultipartFile uploadFile) {
        Map resultMap = new HashMap<>();
        try {
            //生成一个新的文件名
            //取原始文件名
            String oldName = uploadFile.getOriginalFilename();
            //生成新文件名
            //UUID.randomUUID();
            String newName = IDUtils.genImageName();
            newName = newName + oldName.substring(oldName.lastIndexOf("."));
            //图片上传
            String imagePath = new DateTime().toString("/yyyy/MM/dd");
            boolean result = FtpUtils.uploadFile(FTP_ADDRESS, FTP_PORT, FTP_USERNAME, FTP_PASSWORD,
                    FTP_BASE_PATH, imagePath, newName, uploadFile.getInputStream());
            //返回结果
            if(!result) {
                resultMap.put("error", 1);
                resultMap.put("message", "文件上传失败");
                //为了保证功能的兼容性,需要把Result转换成json格式的字符串。
                String json = JsonUtils.objectToJson(resultMap);
                return json;
            }
            resultMap.put("error", 0);
            resultMap.put("url", FTP_IMAGE_BASE_URL + imagePath + "/" + newName);
            //为了保证功能的兼容性,需要把Result转换成json格式的字符串。
            String json = JsonUtils.objectToJson(resultMap);
            return json;

        } catch (Exception e) {
            resultMap.put("error", 1);
            resultMap.put("message", "文件上传发生异常");
            //为了保证功能的兼容性,需要把Result转换成json格式的字符串。
            String json = JsonUtils.objectToJson(resultMap);
            return json;
        }
    }


    /**
     * 使用fastdfs服务器
     */
    /*
    @Value("${IMAGE_SERVER_URL}")
    private String IMAGE_SERVER_URL;

    @RequestMapping(value = "/pic/upload",produces=MediaType.TEXT_PLAIN_VALUE+";charset=utf-8")
    @ResponseBody
    @SuppressWarnings("all")
    public String uploadFile(MultipartFile uploadFile) {
        try {
            // 1、取文件的扩展名
            String originalFilename = uploadFile.getOriginalFilename();
            String extName = originalFilename.substring(originalFilename.lastIndexOf(".") + 1);

            // 2、创建一个FastDFS的客户端
            FastDFSClient client = new FastDFSClient("classpath:conf/client.conf");

            // 3、执行上传处理
            String path = client.uploadFile(uploadFile.getBytes(), extName);

            // 4、拼接返回的url和ip地址,拼装成完整的url
            String url = IMAGE_SERVER_URL + path;

            // 5、返回map
            Map result = new HashMap<>();
            result.put("error", 0);
            result.put("url", url);

            //把java对象转换成json字符串
            String json = JsonUtils.objectToJson(result);
            return json;

        } catch (Exception e) {
            e.printStackTrace();
            // 5、返回map
            Map result = new HashMap<>();
            result.put("error", 1);
            result.put("message", "图片上传失败");

            //把java对象转换成json字符串
            String json = JsonUtils.objectToJson(result);
            return json;
        }
    }
    */
}
FtpUtils工具类
package cn.e3mall.common.utils;

import java.io.File;
import java.io.FileInputStream;
import java.io.FileNotFoundException;
import java.io.FileOutputStream;
import java.io.IOException;
import java.io.InputStream;
import java.io.OutputStream;

import org.apache.commons.net.ftp.FTP;
import org.apache.commons.net.ftp.FTPClient;
import org.apache.commons.net.ftp.FTPFile;
import org.apache.commons.net.ftp.FTPReply;

/**
 * ftp文件传输工具栏
 * @title:FtpUtil
 * @description:
 * @author jepson
 * @date 2018年6月2日 下午4:59:27
 * @version 1.0
 */
public class FtpUtils {

    /**
     * Description: 向FTP服务器上传文件
     * @param host FTP服务器hostname
     * @param port FTP服务器端口
     * @param username FTP登录账号
     * @param password FTP登录密码
     * @param basePath FTP服务器基础目录
     * @param filePath FTP服务器文件存放路径。例如分日期存放:/2015/01/01。文件的路径为basePath+filePath
     * @param filename 上传到FTP服务器上的文件名
     * @param input 输入流
     * @return 成功返回true,否则返回false
     */
    public static boolean uploadFile(String host, int port, String username, String password, String basePath,
            String filePath, String filename, InputStream input) {
        boolean result = false;
        FTPClient ftp = new FTPClient();
        try {
            int reply;
            ftp.connect(host, port);// 连接FTP服务器
            // 如果采用默认端口,可以使用ftp.connect(host)的方式直接连接FTP服务器
            ftp.login(username, password);// 登录
            reply = ftp.getReplyCode();
            if (!FTPReply.isPositiveCompletion(reply)) {
                ftp.disconnect();
                return result;
            }
            //切换到上传目录
            if (!ftp.changeWorkingDirectory(basePath+filePath)) {
                //如果目录不存在创建目录
                String[] dirs = filePath.split("/");
                String tempPath = basePath;
                for (String dir : dirs) {
                    if (null == dir || "".equals(dir)) continue;
                    tempPath += "/" + dir;
                    if (!ftp.changeWorkingDirectory(tempPath)) {
                        if (!ftp.makeDirectory(tempPath)) {
                            return result;
                        } else {
                            ftp.changeWorkingDirectory(tempPath);
                        }
                    }
                }
            }
            //设置上传文件的类型为二进制类型
            ftp.setFileType(FTP.BINARY_FILE_TYPE);
            ftp.setBufferSize(2048); //设置缓存大小2M
            //设置传输使用被动模式
            ftp.enterLocalPassiveMode();
            //上传文件
            if (!ftp.storeFile(filename, input)) {
                return result;
            }
            input.close();
            ftp.logout();
            result = true;
        } catch (IOException e) {
            e.printStackTrace();
        } finally {
            if (ftp.isConnected()) {
                try {
                    ftp.disconnect();
                } catch (IOException ioe) {
                }
            }
        }
        return result;
    }

    /**
     * Description: 从FTP服务器下载文件
     * @param host FTP服务器hostname
     * @param port FTP服务器端口
     * @param username FTP登录账号
     * @param password FTP登录密码
     * @param remotePath FTP服务器上的相对路径
     * @param fileName 要下载的文件名
     * @param localPath 下载后保存到本地的路径
     * @return
     */
    public static boolean downloadFile(String host, int port, String username, String password, String remotePath,
            String fileName, String localPath) {
        boolean result = false;
        FTPClient ftp = new FTPClient();
        try {
            int reply;
            ftp.connect(host, port);
            // 如果采用默认端口,可以使用ftp.connect(host)的方式直接连接FTP服务器
            ftp.login(username, password);// 登录
            reply = ftp.getReplyCode();
            if (!FTPReply.isPositiveCompletion(reply)) {
                ftp.disconnect();
                return result;
            }
            ftp.changeWorkingDirectory(remotePath);// 转移到FTP服务器目录
            FTPFile[] fs = ftp.listFiles();
            for (FTPFile ff : fs) {
                if (ff.getName().equals(fileName)) {
                    File localFile = new File(localPath + "/" + ff.getName());

                    OutputStream is = new FileOutputStream(localFile);
                    ftp.retrieveFile(ff.getName(), is);
                    is.close();
                }
            }

            ftp.logout();
            result = true;
        } catch (IOException e) {
            e.printStackTrace();
        } finally {
            if (ftp.isConnected()) {
                try {
                    ftp.disconnect();
                } catch (IOException ioe) {
                }
            }
        }
        return result;
    }

    public static void main(String[] args) {
        try {
            FileInputStream in=new FileInputStream(new File("C:/Users/jepson/Pictures/download/ad/ID1/ertong.jpg"));
            boolean flag = uploadFile("192.168.25.128", 21, "root", "264778", "/var/ftp/images","/2018/06/02", "yo.jpg", in);
            System.out.println(flag);
        } catch (FileNotFoundException e) {
            e.printStackTrace();
        }
    }
}
以上是关于使用KindEditor完成图片上传的主要内容,如果未能解决你的问题,请参考以下文章
