企业项目开发--分布式缓存Redis
Posted
tags:
篇首语:本文由小常识网(cha138.com)小编为大家整理,主要介绍了企业项目开发--分布式缓存Redis相关的知识,希望对你有一定的参考价值。
注意:本章代码将会建立在上一章的代码基础上,上一章链接《第八章 企业项目开发--分布式缓存memcached》
1、为什么用Redis
1.1、为什么用分布式缓存(或者说本地缓存存在的问题)?
1.2、有了memcached,为什么还要用redis?
- 见《第一章 常用的缓存技术》
2、代码实现
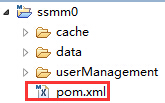
2.1、ssmm0

pom.xml
只在dev环境下添加了以下代码:

                <!--
                    redis:多台服务器支架用什么符号隔开无所谓,只要在程序中用相应的符号去分隔就好。
                    这里只配置了一个redis.servers,如果系统特别大的时候,可以为每一种业务或某几种业务配置一个redis.xxx.servers
                -->
                <redis.servers><![CDATA[127.0.0.1:6379]]></redis.servers>
                <!--
                    下边各个参数的含义在RedisFactory.java中有介绍,
                    当我们三种环境(dev/rc/prod)下的一些参数都相同时,可以将这些参数直接设置到cache_conf.properties文件中去
                -->
                <redis.timeout>2000</redis.timeout><!-- 操作超时时间:2s,单位:ms -->
                <redis.conf.lifo>true</redis.conf.lifo>
                <redis.conf.maxTotal>64</redis.conf.maxTotal>
                <redis.conf.blockWhenExhausted>true</redis.conf.blockWhenExhausted>
                <redis.conf.maxWaitMillis>-1</redis.conf.maxWaitMillis>

                <redis.conf.testOnBorrow>false</redis.conf.testOnBorrow>
                <redis.conf.testOnReturn>false</redis.conf.testOnReturn>

                <!-- 空闲连接相关 -->
                <redis.conf.maxIdle>8</redis.conf.maxIdle>
                <redis.conf.minIdle>0</redis.conf.minIdle>
                <redis.conf.testWhileIdle>true</redis.conf.testWhileIdle>
                <redis.conf.timeBetweenEvictionRunsMillis>30000</redis.conf.timeBetweenEvictionRunsMillis><!-- 30s -->
                <redis.conf.numTestsPerEvictionRun>8</redis.conf.numTestsPerEvictionRun>
                <redis.conf.minEvictableIdleTimeMillis>60000</redis.conf.minEvictableIdleTimeMillis><!-- 60s -->
注意:看注释。
完整版的根pom.xml

<?xml version="1.0" encoding="UTF-8"?> <project xmlns="http://maven.apache.org/POM/4.0.0" xmlns:xsi="http://www.w3.org/2001/XMLSchema-instance" xsi:schemaLocation="http://maven.apache.org/POM/4.0.0 http://maven.apache.org/maven-v4_0_0.xsd"> <modelVersion>4.0.0</modelVersion> <groupId>com.xxx</groupId> <artifactId>ssmm0</artifactId> <version>1.0-SNAPSHOT</version> <name>ssmm0</name> <packaging>pom</packaging><!-- 父模块 --> <!-- 管理子模块 --> <modules> <module>userManagement</module><!-- 具体业务1-人员管理系统 --> <module>data</module><!-- 封装数据操作 --> <module>cache</module><!-- 缓存模块 --> </modules> <properties> <project.build.sourceEncoding>UTF-8</project.build.sourceEncoding> <project.reporting.outputEncoding>UTF-8</project.reporting.outputEncoding> </properties> <!-- dependencyManagement不会引入实际的依赖,只是作为一个依赖池,供其和其子类使用 --> <dependencyManagement> <dependencies> <!-- json --> <dependency> <groupId>com.alibaba</groupId> <artifactId>fastjson</artifactId> <version>1.1.39</version> </dependency> <!-- servlet --> <dependency> <groupId>javax.servlet</groupId> <artifactId>javax.servlet-api</artifactId> <version>3.0.1</version> <scope>provided</scope> </dependency> <!-- spring --> <dependency> <groupId>org.springframework</groupId> <artifactId>spring-core</artifactId> <version>3.2.6.RELEASE</version> </dependency> <dependency> <groupId>org.springframework</groupId> <artifactId>spring-beans</artifactId> <version>3.2.6.RELEASE</version> </dependency> <dependency> <groupId>org.springframework</groupId> <artifactId>spring-context</artifactId> <version>3.2.6.RELEASE</version> </dependency> <dependency> <groupId>org.springframework</groupId> <artifactId>spring-web</artifactId> <version>3.2.6.RELEASE</version> </dependency> <dependency> <groupId>org.springframework</groupId> <artifactId>spring-webmvc</artifactId> <version>3.2.6.RELEASE</version> </dependency> <!-- 这个是使用velocity的必备包 --> <dependency> <groupId>org.springframework</groupId> <artifactId>spring-context-support</artifactId> <version>3.2.6.RELEASE</version> </dependency> <!-- mysql --> <dependency> <groupId>mysql</groupId> <artifactId>mysql-connector-java</artifactId> <version>5.1.27</version> <scope>runtime</scope> </dependency> <!-- 数据源 --> <dependency> <groupId>org.apache.tomcat</groupId> <artifactId>tomcat-jdbc</artifactId> <version>7.0.47</version> </dependency> <!-- mybatis --> <dependency> <groupId>org.mybatis</groupId> <artifactId>mybatis</artifactId> <version>3.1.1</version> </dependency> <dependency> <groupId>org.mybatis</groupId> <artifactId>mybatis-spring</artifactId> <version>1.1.1</version> </dependency> <!-- velocity --> <dependency> <groupId>org.apache.velocity</groupId> <artifactId>velocity</artifactId> <version>1.5</version> </dependency> <dependency> <groupId>velocity-tools</groupId> <artifactId>velocity-tools-generic</artifactId> <version>1.2</version> </dependency> <!-- 用于加解密 --> <dependency> <groupId>commons-codec</groupId> <artifactId>commons-codec</artifactId> <version>1.7</version> </dependency> <dependency> <groupId>org.bouncycastle</groupId> <artifactId>bcprov-jdk15on</artifactId> <version>1.47</version> </dependency> <!-- 集合工具类 --> <dependency> <groupId>org.apache.commons</groupId> <artifactId>commons-collections4</artifactId> <version>4.0</version> </dependency> <!-- 字符串处理类 --> <dependency> <groupId>org.apache.commons</groupId> <artifactId>commons-lang3</artifactId> <version>3.4</version> </dependency> <!-- http --> <dependency> <groupId>org.apache.httpcomponents</groupId> <artifactId>httpclient</artifactId> <version>4.2.6</version> </dependency> </dependencies> </dependencyManagement> <!-- 引入实际依赖 --> <dependencies> <!-- json --> <dependency> <groupId>com.alibaba</groupId> <artifactId>fastjson</artifactId> </dependency> <!-- spring --> <dependency> <groupId>org.springframework</groupId> <artifactId>spring-core</artifactId> </dependency> <dependency> <groupId>org.springframework</groupId> <artifactId>spring-beans</artifactId> </dependency> <dependency> <groupId>org.springframework</groupId> <artifactId>spring-context</artifactId> </dependency> <!-- 集合工具类 --> <dependency> <groupId>org.apache.commons</groupId> <artifactId>commons-collections4</artifactId> </dependency> <!-- 字符串处理类 --> <dependency> <groupId>org.apache.commons</groupId> <artifactId>commons-lang3</artifactId> </dependency> </dependencies> <build> <resources> <!-- 这里配置了这一块儿true,才可以让指定文件(这里是src/main/resources/spring-data.xml)读到pom.xml中的配置信息 , 值得注意的是,如果src/main/resources下还有其他文件,而你不想让其读pom.xml, 你还必须得把src/main/resources下的其余文件再配置一遍,配置为false(不可读pom.xml), 如下边的注释那样,否则,会报这些文件找不到的错误 --> <resource> <directory>src/main/resources</directory> <filtering>true</filtering> <includes> <include>*.xml</include> <include>*.properties</include> </includes> </resource> <!-- <resource> <directory>src/main/resources</directory> <filtering>false</filtering> <includes> <include>*.properties</include> </includes> </resource> --> <resource> <directory>src/main/resources</directory> <filtering>false</filtering> <includes> <!-- 这里如果不加这一条,那么在spring-data.xml中配置的xml将找不到classpath:mapper/admin/AdminMapper.xml --> <include>mapper/**/*.xml</include> </includes> </resource> </resources> </build> <!-- profiles可以定义多个profile,然后每个profile对应不同的激活条件和配置信息,从而达到不同环境使用不同配置信息的效果 注意两点: 1)<activeByDefault>true</activeByDefault>这种情况表示服务器启动的时候就采用这一套env(在这里,就是prod) 2)当我们启动服务器后,想采用开发模式,需切换maven的env为dev,如果env的配置本身就是dev,需要将env换成rc或prod,点击apply,然后再将env切换成dev,点击apply才行 --> <profiles> <!-- 开发env --> <profile> <id>dev</id> <activation> <!-- 这里为了测试方便,改为了true,在上线的时候一定要改成false,否则线上使用的就是这一套dev的环境了 --> <activeByDefault>true</activeByDefault> <property> <name>env</name> <value>dev</value> </property> </activation> <properties> <env>dev</env> <jdbc.driverClassName>com.mysql.jdbc.Driver</jdbc.driverClassName> <!-- 对于jdbc.url中内容的配置,如果需要配置 &时,有两种方法: 1)如下边这样,使用<![CDATA[XXX]]>包起来 2)使用jdbc.properties文件来读取此pom.xml,然后spring.xml再读取jdbc.properties文件 显然,前者更方便,而且还省了一个jdbc.properties的文件,但是,有的时候,还是会用后者的; 在使用后者的时候,注意三点: 1)需要修改上边的build中的内容 2)需要在spring.xml中配置<context:property-placeholder location="classpath:jdbc.properties"/> 3)将jdbc.properties放在ssmm0-data项目中,之后需要将ssmm0-data项目的env配置为dev --> <jdbc.url><![CDATA[jdbc:mysql://127.0.0.1:3306/blog?zeroDateTimeBehavior=convertToNull&useUnicode=true&characterEncoding=utf-8]]></jdbc.url> <jdbc.username>root</jdbc.username> <jdbc.password>123456</jdbc.password> <!-- memcache,多台服务器之间需要使用空格隔开,而不要使用英文逗号隔开,因为Xmemcached的AddrUtil源码是根据空格隔开的 --> <memcached.servers><![CDATA[127.0.0.1:11211]]></memcached.servers> <memcached.max.client>10</memcached.max.client><!-- 最多的客户端数 --> <memcached.expiretime>900</memcached.expiretime><!-- 过期时间900s --> <memcached.hash.consistent>true</memcached.hash.consistent><!-- 是否使用一致性hash算法 --> <memcached.connection.poolsize>1</memcached.connection.poolsize><!-- 每个客户端池子的连接数 --> <memcached.op.timeout>2000</memcached.op.timeout><!-- 操作超时时间 --> <!-- redis:多台服务器支架用什么符号隔开无所谓,只要在程序中用相应的符号去分隔就好。 这里只配置了一个redis.servers,如果系统特别大的时候,可以为每一种业务或某几种业务配置一个redis.xxx.servers --> <redis.servers><![CDATA[127.0.0.1:6379]]></redis.servers> <!-- 下边各个参数的含义在RedisFactory.java中有介绍, 当我们三种环境(dev/rc/prod)下的一些参数都相同时,可以将这些参数直接设置到cache_conf.properties文件中去 --> <redis.timeout>2000</redis.timeout><!-- 操作超时时间:2s,单位:ms --> <redis.conf.lifo>true</redis.conf.lifo> <redis.conf.maxTotal>64</redis.conf.maxTotal> <redis.conf.blockWhenExhausted>true</redis.conf.blockWhenExhausted> <redis.conf.maxWaitMillis>-1</redis.conf.maxWaitMillis> <redis.conf.testOnBorrow>false</redis.conf.testOnBorrow> <redis.conf.testOnReturn>false</redis.conf.testOnReturn> <!-- 空闲连接相关 --> <redis.conf.maxIdle>8</redis.conf.maxIdle> <redis.conf.minIdle>0</redis.conf.minIdle> <redis.conf.testWhileIdle>true</redis.conf.testWhileIdle> <redis.conf.timeBetweenEvictionRunsMillis>30000</redis.conf.timeBetweenEvictionRunsMillis><!-- 30s --> <redis.conf.numTestsPerEvictionRun>8</redis.conf.numTestsPerEvictionRun> <redis.conf.minEvictableIdleTimeMillis>60000</redis.conf.minEvictableIdleTimeMillis><!-- 60s --> </properties> </profile> <!-- 预上线env --> <profile> <id>rc</id> <activation> <activeByDefault>false</activeByDefault> <property> <name>env</name> <企业项目开发--分布式缓存Redis
