Projectsimage_match3图像特征匹配调试记录
Posted Good Good Study~
tags:
篇首语:本文由小常识网(cha138.com)小编为大家整理,主要介绍了Projectsimage_match3图像特征匹配调试记录相关的知识,希望对你有一定的参考价值。
D:\\文件及下载相关\\文档\\Visual Studio 2010\\Projects\\image_match3\\image_match

#include "opencv2/core/core.hpp"
#include "highgui.h"
#include "opencv2/imgproc/imgproc.hpp"
#include "opencv2/features2d/features2d.hpp"
#include "opencv2/nonfree/nonfree.hpp"
#include "opencv2/legacy/legacy.hpp"

using namespace cv;
using namespace std;

int main(int argc, char** argv)
{
   //待匹配的两幅图像,其中img1包括img2,也就是要从img1中识别出img2
   //Mat img1 = imread("book_in_scene.png");
   //Mat img2 = imread("book2.png");
   Mat img1 = imread("003.png");
   Mat img2 = imread("004.png");

   Mat image01;
   Mat image02;
   cvtColor(img1,image01,CV_RGB2GRAY);
   cvtColor(img2,image02,CV_RGB2GRAY);
   SIFT sift1, sift2;

   vector<KeyPoint> key_points1, key_points2;

   Mat descriptors1, descriptors2, mascara;

   sift1(img1,mascara,key_points1,descriptors1);
   sift2(img2,mascara,key_points2,descriptors2);

   //实例化暴力匹配器——BruteForceMatcher
   BruteForceMatcher<L2<float>> matcher;
   //定义匹配器算子
   vector<DMatch>matches;
   //实现描述符之间的匹配,得到算子matches
   matcher.match(descriptors1,descriptors2,matches);

   //提取出前3个最佳匹配结果
   nth_element(matches.begin(),     //匹配器算子的初始位置
       matches.begin()+9,     // 排序的数量
       matches.end());       // 结束位置
   //剔除掉其余的匹配结果
   matches.erase(matches.begin()+10, matches.end());

   namedWindow("SIFT_matches");
   Mat img_matches;
   //在输出图像中绘制匹配结果
   drawMatches(img1,key_points1,         //第一幅图像和它的特征点
       img2,key_points2,      //第二幅图像和它的特征点
       matches,       //匹配器算子
       img_matches,      //匹配输出图像
       Scalar(255,255,255));     //用白色直线连接两幅图像中的特征点
   imshow("SIFT_matches",img_matches);

    vector<Point2f> imagePoints1,imagePoints2;
    for(int i=0;i<10;i++)
    {
        imagePoints1.push_back(key_points1[matches[i].queryIdx].pt);
        imagePoints2.push_back(key_points2[matches[i].trainIdx].pt);
    }

   Mat homo=findHomography(imagePoints1,imagePoints2,CV_RANSAC);
   ////也可以使用getPerspectiveTransform方法获得透视变换矩阵,不过要求只能有4个点,效果稍差
   //Mat homo=getPerspectiveTransform(imagePoints1,imagePoints2);
   cout<<"变换矩阵为:\\n"<<homo<<endl<<endl;//输出映射矩阵
   //图像配准
   Mat imageTransform1,imageTransform2;
   warpPerspective(image01,imageTransform1,homo,Size(image02.cols,image02.rows));
   imshow("经过透视矩阵变换后",imageTransform1);
   waitKey(0);

   return 0;
}

 Mat img1 = imread("003.png");
 Mat img2 = imread("004.png");
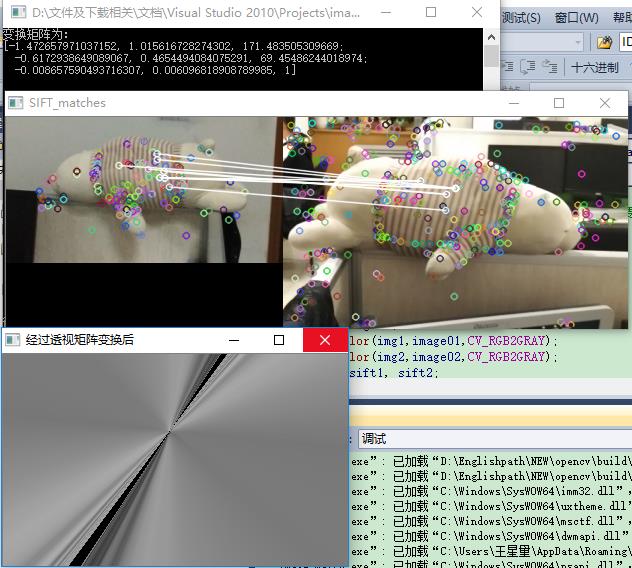
测试两个方向拍摄的熊娃娃:


对海面舰船目标的MUSIC高精度定位方法研究(图文) - 期刊论文网 http://www.pinjiao.com/lunwenqikan/kejixiaolunwen/lunwen21906.html
以上是关于Projectsimage_match3图像特征匹配调试记录的主要内容,如果未能解决你的问题,请参考以下文章
