高可用集群中fence的配置
Posted
tags:
篇首语:本文由小常识网(cha138.com)小编为大家整理,主要介绍了高可用集群中fence的配置相关的知识,希望对你有一定的参考价值。
通过上一节我们已经知道了如何在集群中添加资源,下面我们来看下如何配置fence设备(也称为stonith)。
先了解什么是fence
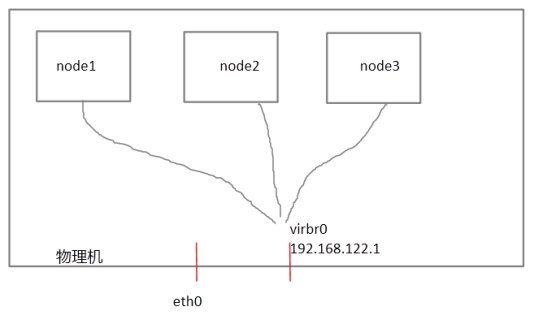
每个节点之间互相发送探测包进行判断节点的存活性。一般会有专门的线路进行探测,这条线路称为“心跳线”(上图直接使用eth0线路作为心跳线)。假设node1的心跳线出问题,则node2和node3会认为node1出问题,然后就会把资源调度在node2或者node3上运行,但node1会认为自己没问题不让node2或者node3抢占资源,此时就出现了脑裂(split brain)。
此时如果在整个环境里有一种设备直接把node1断电,则可以避免脑裂的发生,这种设备叫做fence或者stonith(Shoot The Other Node In The Head爆头哥)。
在物理机里virsh是通过串口线管理guestos的,比如virsh destroy nodeX,这里我们把物理机当成fence设备。
配置fence设备
在物理机上
[[email protected] ~]# mkdir /etc/cluster
[[email protected] ~]# dd if=/dev/zero of=/etc/cluster/fence_xvm.key bs=1K count=4
记录了4+0 的读入
记录了4+0 的写出
4096字节(4.1 kB)已复制,0.00021345 秒,19.2 MB/秒
[[email protected] ~]#
在三台节点上创建/etc/cluster
[[email protected]1 ~]# mkdir /etc/cluster
[[email protected]2 ~]# mkdir /etc/cluster
[[email protected]3 ~]# mkdir /etc/cluster
把物理机上创建的/etc/cluster/fence_xvm.key同步到三台节点
[[email protected] ~]# for i in 1 2 3
> do
> scp /etc/cluster/fence_xvm.key node${i}:/etc/cluster/
> done
[email protected]'s password: redhat
fence_xvm.key 100% 4096 4.0KB/s 00:00
[email protected]'s password: redhat
fence_xvm.key 100% 4096 4.0KB/s 00:00
[email protected]'s password: redhat
fence_xvm.key 100% 4096 4.0KB/s 00:00
[[email protected] ~]#
在物理机上安装fence-virtd
[[email protected] ~]# yum install fence-virt* -y
已加载插件:langpacks, product-id, subscription-manager
This system is not registered to Red Hat Subscription Management. You can use subscription-manager to register.
base | 4.1 kB 00:00:00
base1 | 4.1 kB 00:00:00
base2 | 4.1 kB 00:00:00
正在解决依赖关系
–> 正在检查事务
…..
已安装:
fence-virtd.x86_64 0:0.3.2-1.el7 fence-virt.x86_64 0:0.3.2-1.el7 fence-virtd-libvirt.x86_64 0:0.3.2-1.el7 fence-virtd-multicast.x86_64 0:0.3.2-1.el7
fence-virtd-serial.x86_64 0:0.3.2-1.el7
完毕!
[[email protected] ~]#
执行
[[email protected] ~]# fence_virtd -c
Module search path [/usr/lib64/fence-virt]: 回车
Available backends:
libvirt 0.1
Available listeners:
multicast 1.2
serial 0.4
Listener modules are responsible for accepting requests
from fencing clients.
Listener module [multicast]: 回车
The multicast listener module is designed for use environments
where the guests and hosts may communicate over a network using
multicast.
The multicast address is the address that a client will use to
send fencing requests to fence_virtd.
Multicast IP Address [225.0.0.12]: 回车
Using ipv4 as family.
Multicast IP Port [1229]: 回车
Setting a preferred interface causes fence_virtd to listen only
on that interface. Normally, it listens on all interfaces.
In environments where the virtual machines are using the host
machine as a gateway, this *must* be set (typically to virbr0).
Set to 'none' for no interface.
Interface [virbr0]: 回车
The key file is the shared key information which is used to
authenticate fencing requests. The contents of this file must
be distributed to each physical host and virtual machine within
a cluster.
Key File [/etc/cluster/fence_xvm.key]: 回车
Backend modules are responsible for routing requests to
the appropriate hypervisor or management layer.
Backend module [libvirt]: 回车
Configuration complete.
….
=== End Configuration ===
Replace /etc/fence_virt.conf with the above [y/N]? y
[[email protected] ~]#
启动fence_virtd服务并设置开机自动启动
[[email protected] ~]# systemctl start fence_virtd
[[email protected] ~]# systemctl enable fence_virtd
ln -s '/usr/lib/systemd/system/fence_virtd.service' '/etc/systemd/system/multi-user.target.wants/fence_virtd.service'
[[email protected] ~]#
每个节点安装fence-virt*
[[email protected]X ~]# yum install fence-virt* -y
已加载插件:product-id, subscription-manager
This system is not registered to Red Hat Subscription Management. You can use subscription-manager to register.
base | 4.1 kB 00:00:00
base1 | 4.1 kB 00:00:00
base2 | 4.1 kB 00:00:00
正在解决依赖关系
–> 正在检查事务
….
nmap-ncat.x86_64 2:6.40-4.el7 numad.x86_64 0:0.5-14.20140620git.el7
qemu-img.x86_64 10:1.5.3-86.el7 radvd.x86_64 0:1.9.2-7.el7
rsyslog-mmjsonparse.x86_64 0:7.4.7-7.el7_0 unbound-libs.x86_64 0:1.4.20-19.el7 yajl.x86_64 0:2.0.4-4.el7
完毕!
[[email protected]X ~]#
因为我们在第一节已经关闭了stonith,这里先启用它:
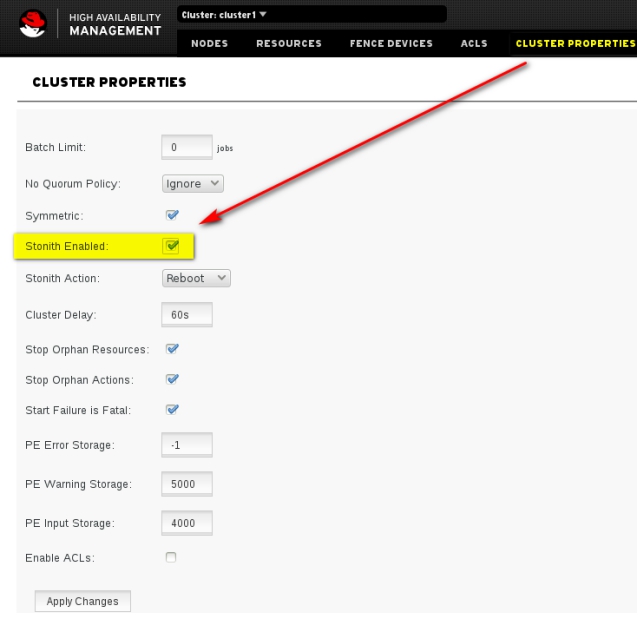
点击“Appliy Changes”
创建fence

Type选择fence_xvm
Fence Instance Name用于区分不同的fence设备,这里填写fence1
展开Advanced Arguments
pcmk_host_list处填写这个fence可以管理哪些节点,这里填写node1,node2,node3,用英文逗号隔开。
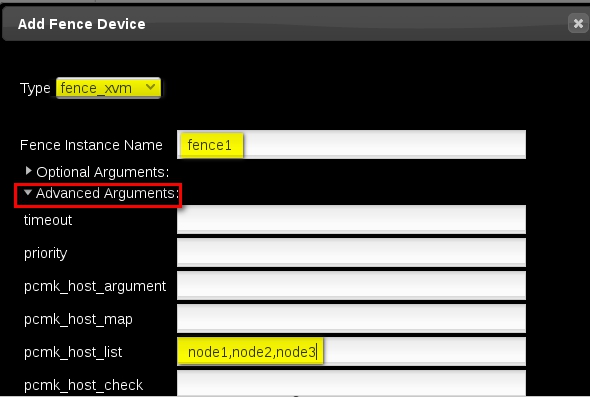
点击"Create Fance Instance"
等待一会即可看到fence正常运行
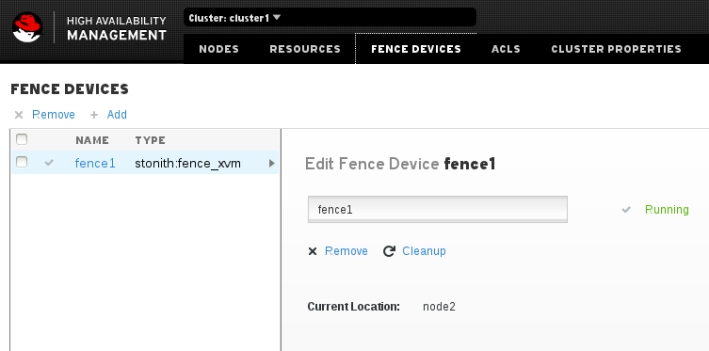
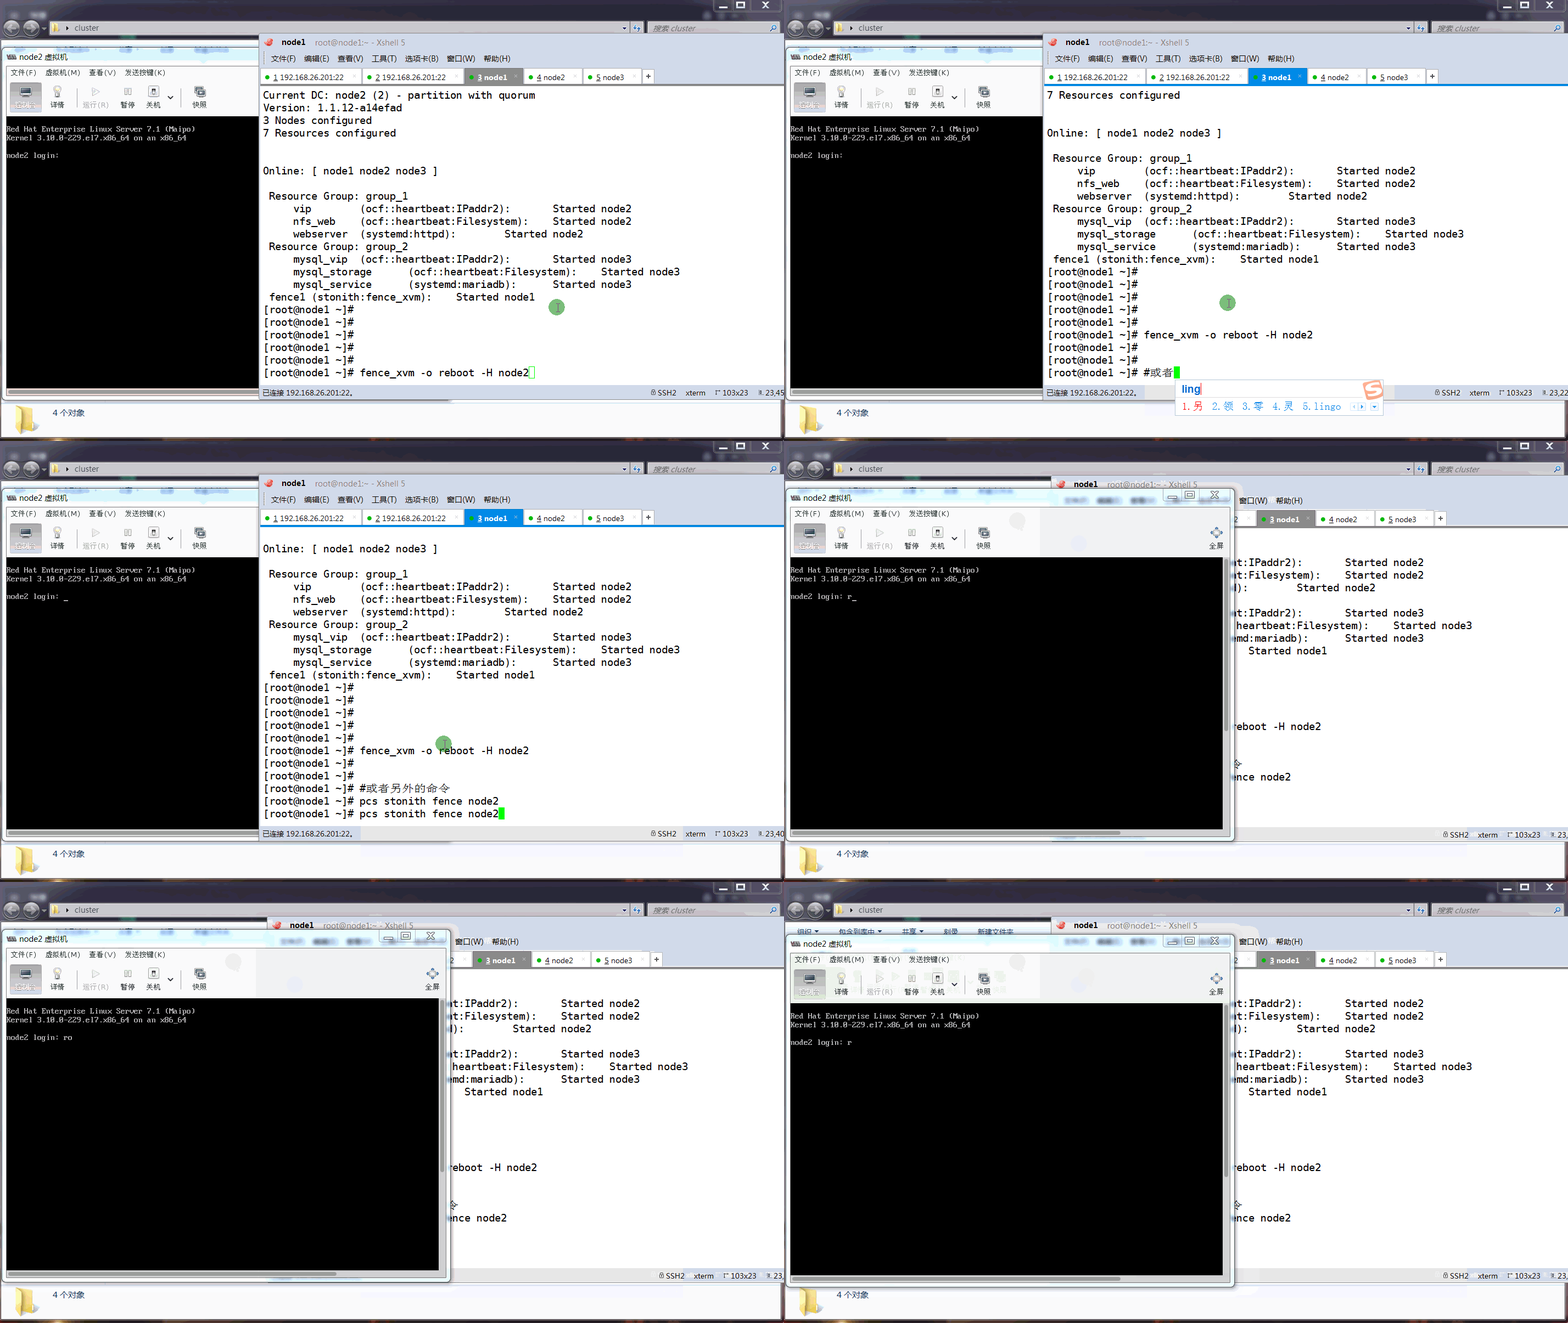
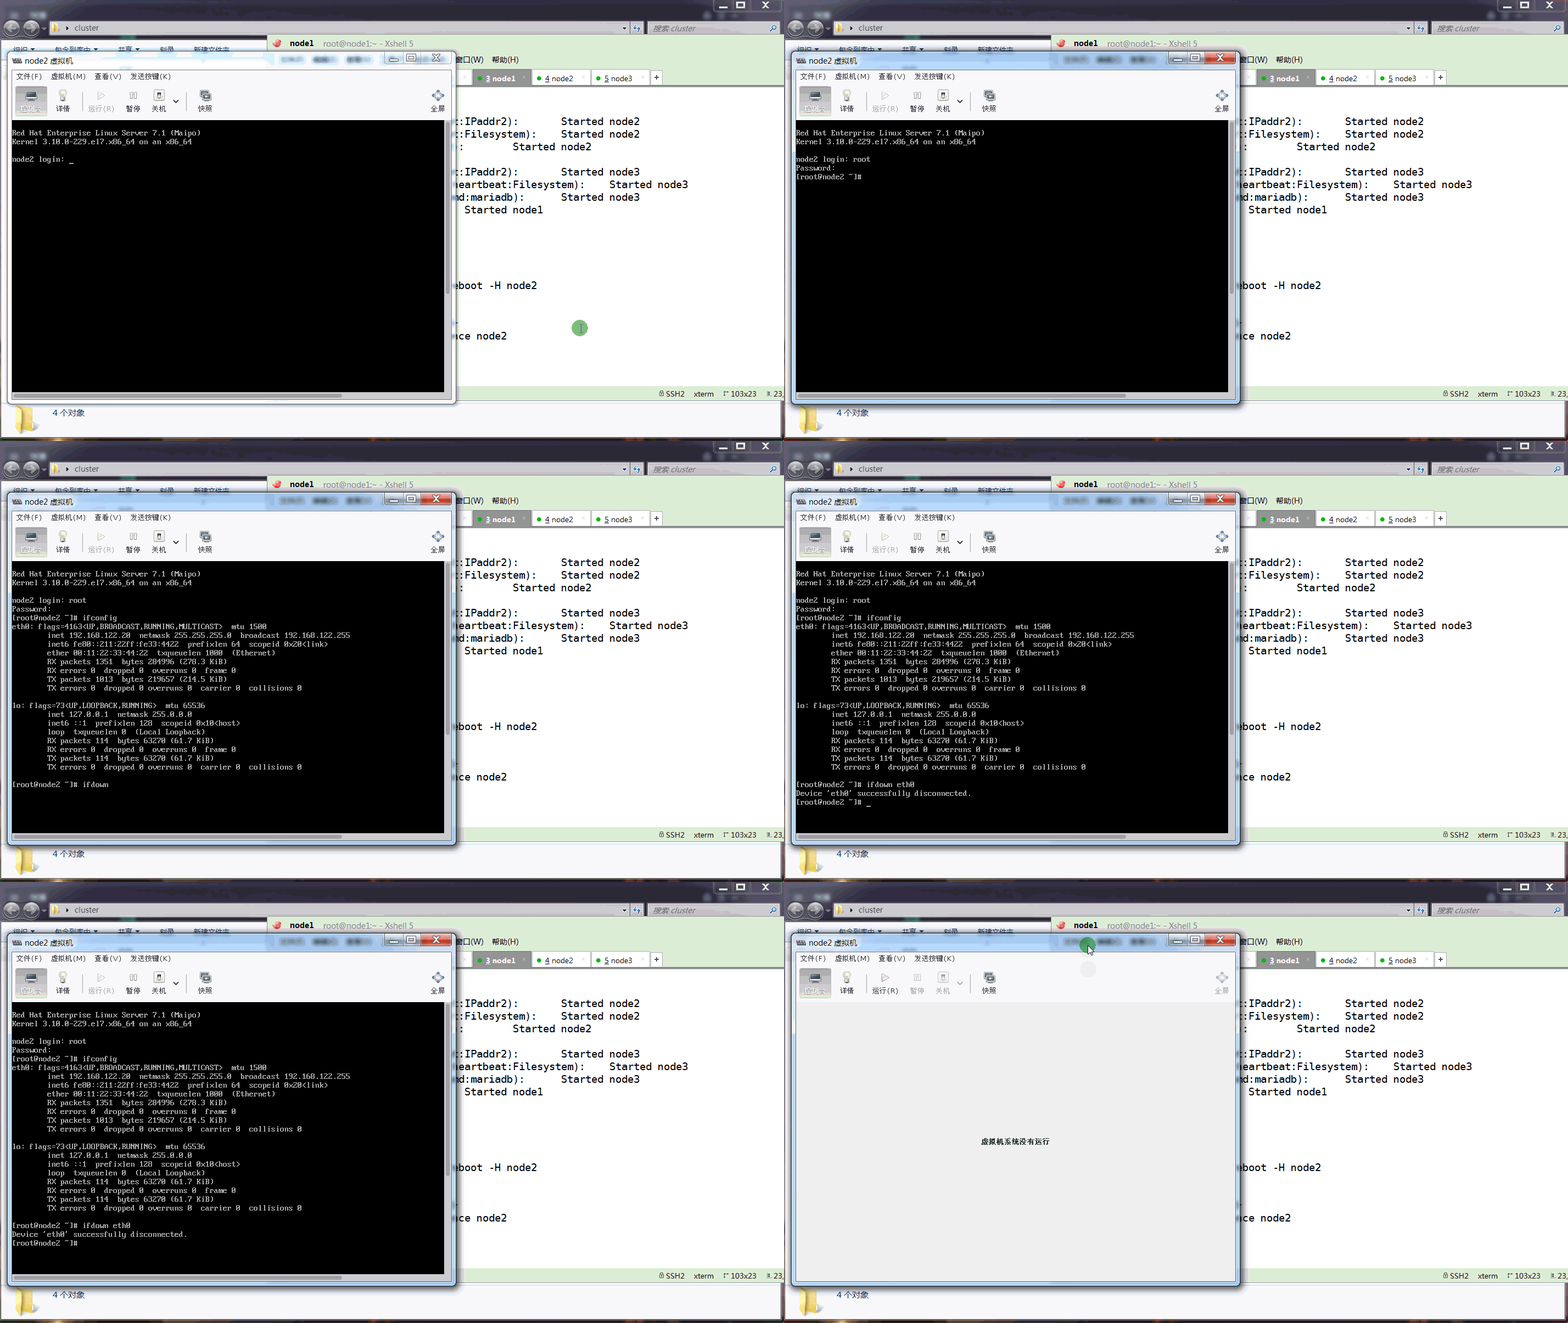
手动的fence掉某个节点
以上是关于高可用集群中fence的配置的主要内容,如果未能解决你的问题,请参考以下文章