Shiro入门到精通之shiro认证流程
Posted 溪山夜雨
tags:
篇首语:本文由小常识网(cha138.com)小编为大家整理,主要介绍了Shiro入门到精通之shiro认证流程相关的知识,希望对你有一定的参考价值。
我自己写的认证步骤:
1. 获取当前的 Subject. 调用 SecurityUtils.getSubject();
2. 测试当前的用户是否已经被认证. 即是否已经登录. 调用 Subject 的 isAuthenticated()
3. 若没有被认证, 则把用户名和密码封装为 UsernamePasswordToken 对象
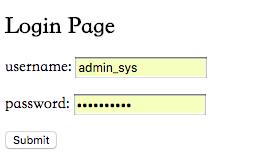
1). 创建一个表单页面
2). 把请求提交到 SpringMVC 的 Handler
3). 获取用户名和密码.
4. 执行登录: 调用 Subject 的 login(AuthenticationToken) 方法.
5. 自定义 Realm 的方法, 从数据库中获取对应的记录, 返回给 Shiro.
1). 实际上需要继承 org.apache.shiro.realm.AuthenticatingRealm 类
2). 实现 doGetAuthenticationInfo(AuthenticationToken) 方法.
6. 由 shiro 完成对密码的比对.
话不多说上代码,代码是在之前的基础上加的
- login.jsp
 1 <h2>Login Page</h2>
 2
 3         <form action="shiro/login" method="POST">
 4         username: <input type="text" name="username"/>
 5         <br><br>
 6
 7         password: <input type="password" name="password"/>
 8         <br><br>
 9
10         <input type="submit" value="Submit"/>
11     </form>
- ShiroHandler
 1 package com.spring.shiro.handler;
 2
 3 import org.apache.shiro.SecurityUtils;
 4 import org.apache.shiro.authc.AuthenticationException;
 5 import org.apache.shiro.authc.UsernamePasswordToken;
 6 import org.apache.shiro.subject.Subject;
 7 import org.springframework.stereotype.Controller;
 8 import org.springframework.web.bind.annotation.RequestMapping;
 9 import org.springframework.web.bind.annotation.RequestParam;
10
11 @Controller
12 @RequestMapping("/shiro")
13 public class ShiroHandler {
14
15     @RequestMapping("/login")
16     public   String login(@RequestParam("username") String username,@RequestParam("password") String password){
17
18         Subject  currentUser  =SecurityUtils.getSubject();
19         if (!currentUser.isAuthenticated()) {
20
21             UsernamePasswordToken  token  = new  UsernamePasswordToken(username, password);
22             token.setRememberMe(true);
23             try {
24                 currentUser.login(token);
25
26             } catch (AuthenticationException e) {
27                 System.out.println("登录失败:"+e.getMessage());
28             }
29
30         }
31
32         return "redirect:/list.jsp";
33     }
34
35 }
- 自定义Realm ShiroRealm1 将自定义realm配置更改为ShiroRealm1对应的类
package com.spring.shiro.realms;

import org.apache.shiro.authc.AuthenticationException;
import org.apache.shiro.authc.AuthenticationInfo;
import org.apache.shiro.authc.AuthenticationToken;
import org.apache.shiro.realm.AuthenticatingRealm;

public class ShiroRealm1  extends  AuthenticatingRealm{

    @Override
    protected AuthenticationInfo doGetAuthenticationInfo(AuthenticationToken token) throws AuthenticationException {
        System.out.println("doGetAuthenticationInfo"+token);
        return null;
    }

}

至此,启动tomcat 访问 http://localhost:8080/shiro-1/login.jsp

- 控制台输出

以上是关于Shiro入门到精通之shiro认证流程的主要内容,如果未能解决你的问题,请参考以下文章