003-unity3d 物理引擎-示例2 打箱子
Posted 木子旭
tags:
篇首语:本文由小常识网(cha138.com)小编为大家整理,主要介绍了003-unity3d 物理引擎-示例2 打箱子相关的知识,希望对你有一定的参考价值。
一、基础知识点
1、坐标、向量等
        if (Input.GetMouseButtonDown(0))
        {
            //1、将鼠标坐标 转化为 世界坐标 由于鼠标z轴 可能不存在,故自定义为3
            Vector3 targetPos = Camera.main.ScreenToWorldPoint(new Vector3(Input.mousePosition.x, Input.mousePosition.y, 3));
            //2、每个gameObject 均有transform.position位置。
            //3、向量 v2-v1 表示 v1指向v2的向量
            Vector3 dir = targetPos - Camera.main.transform.position;
            //4、添加一个力
            this.gameObject.GetComponent<Rigidbody>().AddForce(dir*3, ForceMode.Impulse);
        }
2、动态创建游戏对象
        //鼠标左键点击
        if (Input.GetMouseButtonDown(0))
        {
            GameObject goNew = GameObject.CreatePrimitive(PrimitiveType.Cube);
            goNew.transform.position = new Vector3(3, 3, 0);
            goNew.AddComponent<Rigidbody>();
            goNew.name = "testCube";
            go.GetComponent<Renderer>().material.color = Color.red;
        }
创建游戏对象:GameObject.CreatePrimitive(PrimitiveType.Cube)
添加游戏对象组件:goNew.AddComponent<Rigidbody>();
Rigidbody、脚本、以及所有Component菜单下的组件
3、销毁对象
GameObject goS = GameObject.Find("testCube");
Destroy(goS, 2);
二、示例-打箱子
1、创建一个新的项目
2、增加地面
3、添加一个C#脚本
自动销毁AutoDestory脚本

public class AutoDestory : MonoBehaviour
{

    // Use this for initialization
    void Start()
    {

    }

    // Update is called once per frame
    void Update()
    {

    }
    void OnBecameInvisible()
    {
        Destroy(this.gameObject);
    }
}
初始化Init.cs脚本

public class Init : MonoBehaviour {

    // Use this for initialization
    void Start()
    {
        for (int i = 0; i < 4; i++)
        {
            for (int j = 0; j < 4; j++)
            {
                GameObject go = GameObject.CreatePrimitive(PrimitiveType.Cube);
                go.transform.position = new Vector3(i, j, -1);
                if (j % 2 == 0) {
                    go.GetComponent<Renderer>().material.color = Color.red;
                }
                go.AddComponent<Rigidbody>();
                go.AddComponent<AutoDestory>();
            }
        }

    }

    // Update is called once per frame
    void Update()
    {
        if (Input.GetMouseButtonDown(0))
        {
            GameObject goNew = GameObject.CreatePrimitive(PrimitiveType.Sphere);
            goNew.transform.position = Camera.main.transform.position;
            goNew.AddComponent<Rigidbody>();
            goNew.AddComponent<AutoDestory>();

            Vector3 targetPos = Camera.main.ScreenToWorldPoint(new Vector3(Input.mousePosition.x, Input.mousePosition.y, 3));
            goNew.GetComponent<Rigidbody>().AddForce((targetPos - Camera.main.transform.position) * 10, ForceMode.Impulse);
        }
    }
}
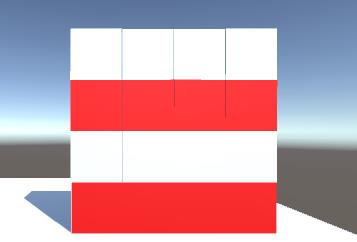
界面效果

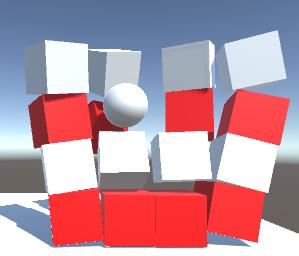
打箱子效果

以上是关于003-unity3d 物理引擎-示例2 打箱子的主要内容,如果未能解决你的问题,请参考以下文章
