Vmware_NAT(可连接外网)_Redhat6.5_Kickstart (http+tftp+dhcp)
Posted
tags:
篇首语:本文由小常识网(cha138.com)小编为大家整理,主要介绍了Vmware_NAT(可连接外网)_Redhat6.5_Kickstart (http+tftp+dhcp)相关的知识,希望对你有一定的参考价值。
一、Vmware虚拟机NAT配置
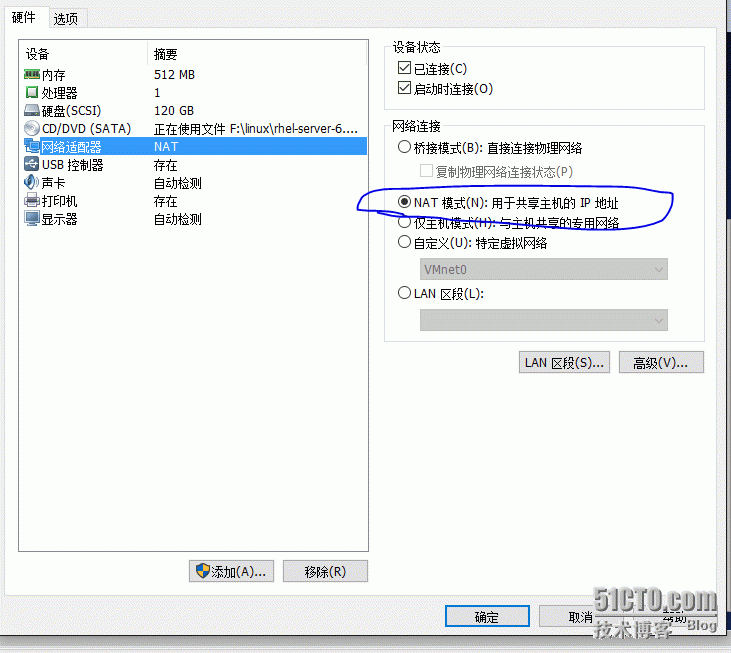
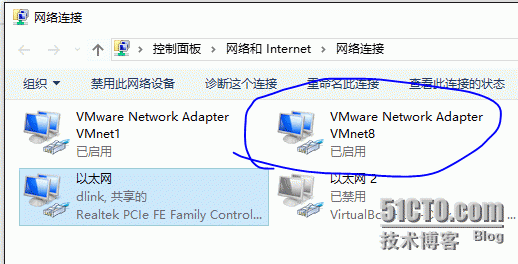
1.新建虚拟机网络设置
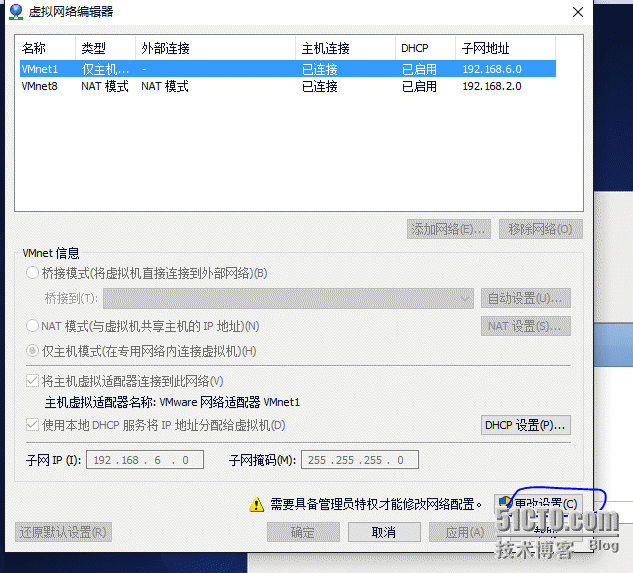
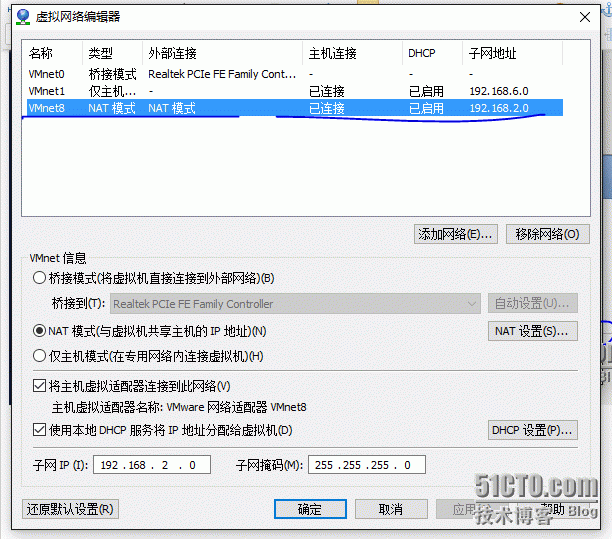
2.在编辑--虚拟网络编辑器下设置网段
(1)更改设置--选中VMnet8--根据需要是否启用DHCP服务或者是设置静态IP
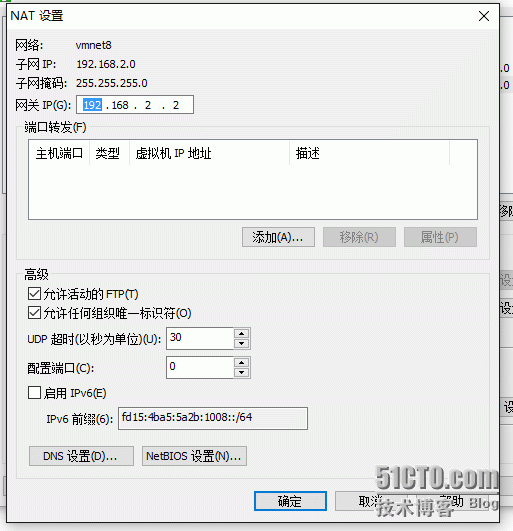
(2)设置好网关,正常情况下更改完子网后会自动变更,其它可默认
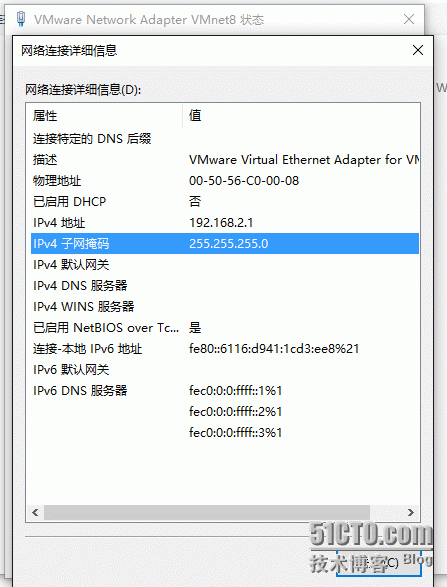
3.本地VMnet8设置成静态IP
二、安装Redhat6.5系统(详细过程略过)
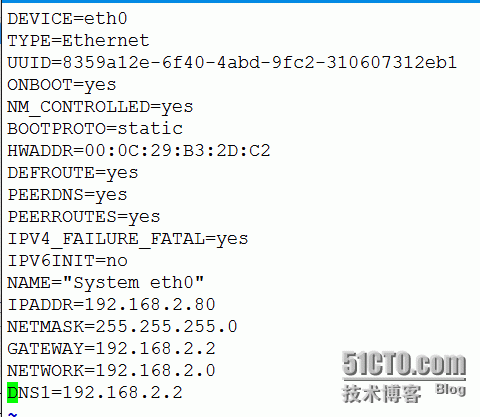
三、设置一下静态IP
四、把系统的更新安装源变成Centos(详细见之前写的文章
五、开始安装过程
(一)关闭防火墙及selinux
#service iptables stop
iptables:将链设置为政策 ACCEPT:filter [确定]
iptables:清除防火墙规则: [确定]
iptables:正在卸载模块: [确定]
#vim /etc/selinux/config
把SELINUX变成disable就可以了
(二)httpd服务安装
查找是否已经安装http服务
#rpm -qa | grep httpd
有则会显示如下
httpd-tools-2.2.15-47.el6.centos.4.x86_64
httpd-2.2.15-47.el6.centos.4.x86_64
否则请使用yum install httpd -y 安装,安装完成设置
开启服务并设置开机启动
/etc/init.d/httpd start
chkconfig --level 35 httpd on
3.在/var/www/html/下建立文件为cdrom
#mkdir -p /var/www/html/cdrom
4.挂载安装光盘
#mount /dev/cdrom /mnt
5.复制光盘所有内容到/var/www/html/cdrom
#cp /mnt/* /var/www/html/cdrom/
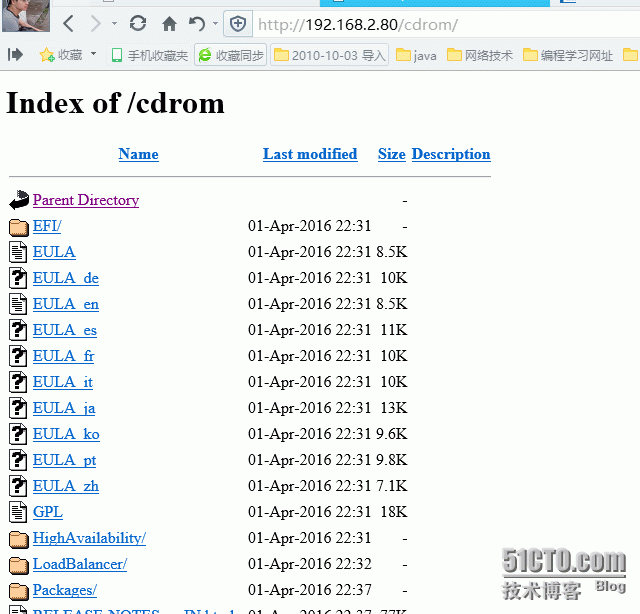
6.最后在本地计算机检查httpd是否可以使用
(三)安装配置tftp
1、安装
#yum install tftp-server -y
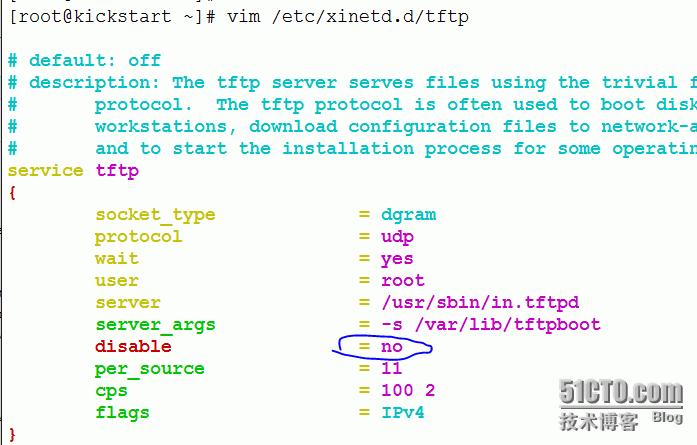
2、修改配置


3.重启服务
(四)配置PXE启动程序
1、复制pxelinux.0 文件至/var/lib/tftpboot/ 文件夹中
说明: pxelinux.0在纯安装redhat6.5路径下/usr/share/syslinux/ 下,syslinux是一个功能强大的引导加载程序,而且兼容各种介质。更加确切地说:SYSLINUX是一个小型的Linux操作系统,它的目的是简化首次安装Linux的时间,并建立修护或其它特殊用途的启动盘,如果没有安装 请使用yum install syslinux -y安装后复制
#cp usr/share/syslinux/pxelinux.0 /var/lib/tftpboot
2、复制iso 镜像中的/image/pxeboot/initrd.img 和vmlinux 至/var/lib/tftpboot/ 文件夹中
 3、 复制iso 镜像中的/isolinux/*.msg 至/var/lib/tftpboot/ 文件夹中
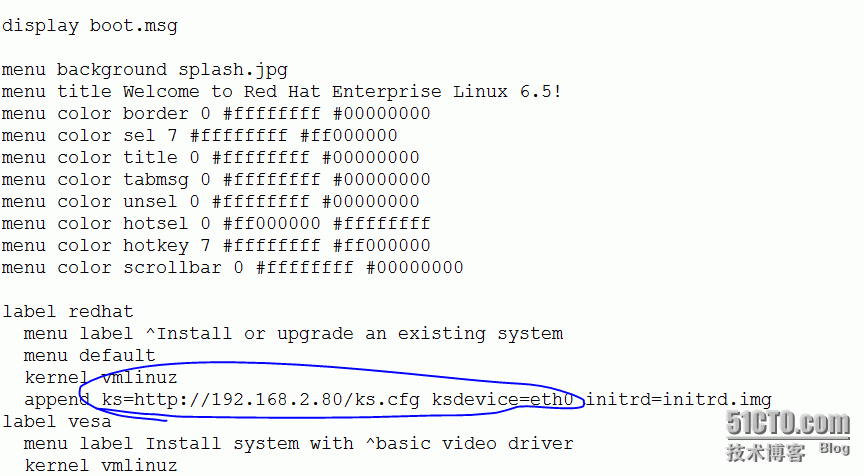
4、在/var/lib/tftpboot/ 中新建一个pxelinux.cfg目录,并将iso 镜像中的/isolinux 目录中的isolinux.cfg复制到pxelinux.cfg目录中,同时更改文件名称为default
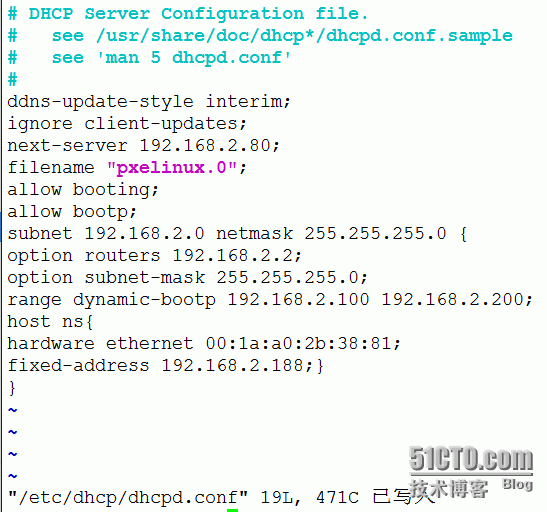
1、安装DHCP服务 及修改配置文件
#yum install dhcp -y
2、修改配置文件,如下
3、重启服务
(六)ks.cf配置 可自行安装(网络上有很多)
最后把ks.cf 复制到/var/www/html/下面
ks.cfg 参考
#platform=x86, AMD64, 或 Intel EM64T
#version=DEVEL
# Firewall configuration
firewall --disabled
# Install OS instead of upgrade
install
# Use network installation
url --url="http://192.168.2.80/cdrom"
# Root password
rootpw --iscrypted $1$O17Pw.x8$Ag0KH4p2EOmwUIP93IsZ3.
# System authorization information
auth --useshadow --passalgo=sha512
# Use text mode install
text
firstboot --disable
# System keyboard
keyboard us
# System language
lang zh_CN
# SELinux configuration
selinux --disabled
# Installation logging level
logging --level=info
# Reboot after installation
reboot
# System timezone
timezone Asia/Shanghai
# Network information
network --bootproto=dhcp --device=eth0 --onboot=on
# System bootloader configuration
bootloader --location=mbr
# Clear the Master Boot Record
zerombr
# Partition clearing information
clearpart --all --initlabel
# Disk partitioning information
part swap --fstype="swap" --size=1000
part /boot --fstype="ext4" --size=500
part / --fstype="ext4" --size=60000
part /home --fstype="ext4" --grow --size=1
%post
wget http://192.168.2.80/cdrom/wgetyum.sh
wget http://192.168.2.80/cdrom/rhel-source.repo
bash /wgetyum.sh
%end
%packages
@basic-desktop
@desktop-debugging
@desktop-platform
@fonts
@general-desktop
@graphical-admin-tools
@input-methods
@legacy-x
@remote-desktop-clients
@x11
%end
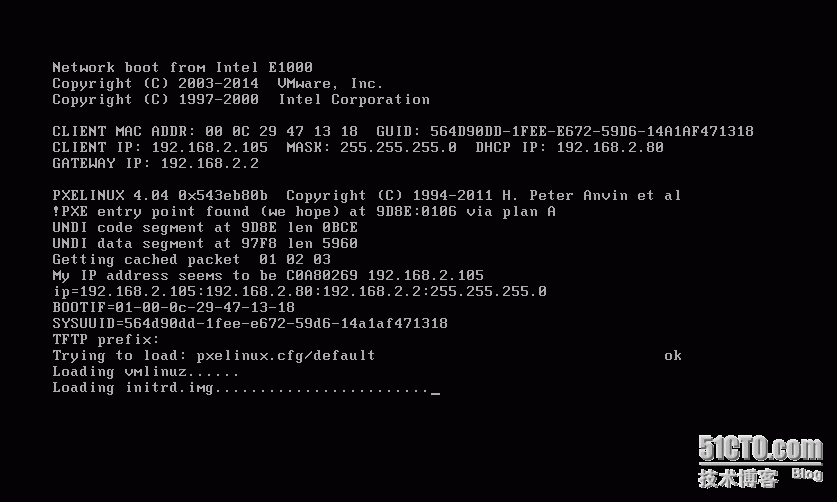
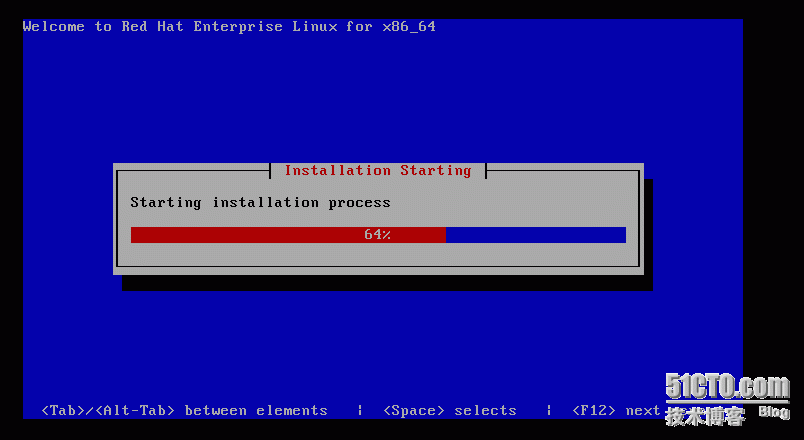
(七)自动安装演示
(八)如果失败请检查一下/var/log/message日志
一般重启一下以下几个服务就正常了
service iptables stop
service rpcbind restart
service nfs restart
service httpd restart
service dhcpd restart
本文出自 “7529372” 博客,请务必保留此出处http://7539372.blog.51cto.com/7529372/1760652
以上是关于Vmware_NAT(可连接外网)_Redhat6.5_Kickstart (http+tftp+dhcp)的主要内容,如果未能解决你的问题,请参考以下文章
Redis(开发与运维):04---Redis的启动连接/外网连接关闭可执行文件与配置参数大全
