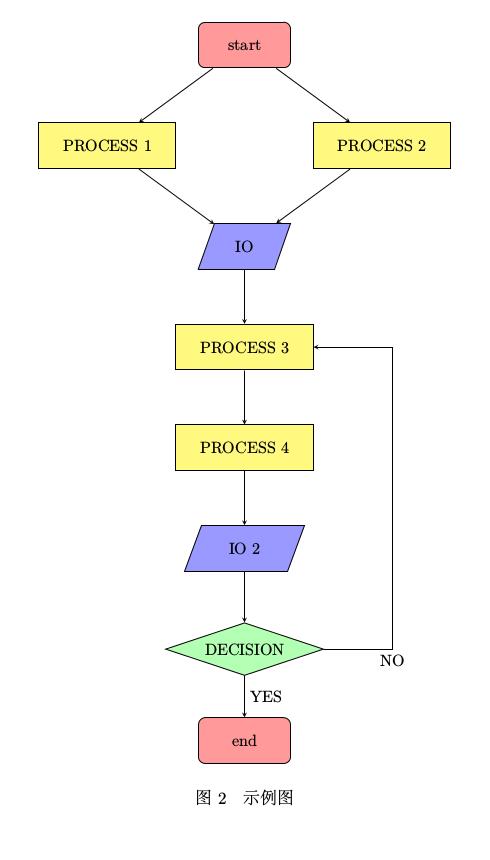
利用TikZ 宏包在 LaTeX 中绘制流程图
Posted 夜雨长安
tags:
篇首语:本文由小常识网(cha138.com)小编为大家整理,主要介绍了利用TikZ 宏包在 LaTeX 中绘制流程图相关的知识,希望对你有一定的参考价值。
发现用TikZ画流程图其实挺方便的,对于简单的图应该比visio简单。
使用的宏包:
\\usepackage{tikz,mathpazo}
\\usetikzlibrary{shapes.geometric, arrows}
\\usetikzlibrary{calc}
结果示例:

具体代码为:
% 流程图定义基本形状
\\tikzstyle{startstop} = [rectangle, rounded corners, minimum width = 2cm, minimum height=1cm,text centered, draw = black, fill = red!40]
\\tikzstyle{io} = [trapezium, trapezium left angle=70, trapezium right angle=110, minimum width=2cm, minimum height=1cm, text centered, draw=black, fill = blue!40]
\\tikzstyle{process} = [rectangle, minimum width=3cm, minimum height=1cm, text centered, draw=black, fill = yellow!50]
\\tikzstyle{decision} = [diamond, aspect = 3, text centered, draw=black, fill = green!30]
% 箭头形式
\\tikzstyle{arrow} = [->,>=stealth]

\\begin{figure}[htbp]
\\centering
\\begin{tikzpicture}[node distance=2cm]
%定义流程图具体形状
\\node (start) [startstop] {start};
\\node (pro1) [process, below of=start, yshift=-0.2cm, left of=start, xshift=-1cm] {PROCESS 1};
\\node (pro2) [process, right of=pro1, xshift= 4cm] {PROCESS 2};
\\node (in1) [io, below of=pro1, yshift= -0.2cm, right of=pro1, xshift=1cm] {IO};
\\node (pro3) [process, below of=in1, yshift= -0.2cm] {PROCESS 3};
\\node (pro4) [process, below of=pro3, yshift= -0.2cm] {PROCESS 4};
\\node (in2) [io, below of=pro4, yshift= -0.2cm] {IO 2};
\\node (dec1) [decision, below of=in2, yshift= -0.2cm] {DECISION};
\\node (stop) [startstop, below of=dec1] {end};

%连接具体形状
\\draw [arrow](start) -- (pro1);
\\draw [arrow](start) -- (pro2);
\\draw [arrow](pro1) -- (in1);
\\draw [arrow](pro2) -- (in1);
\\draw [arrow](in1) -- (pro3);
\\draw [arrow](pro3) -- (pro4);
\\draw [arrow](pro4) -- (in2);
\\draw [arrow](in2) -- (dec1);
\\draw [arrow](dec1) -- ($(dec1.east) + (1.5,0)$) node[anchor=north] {NO} |- (pro3);
\\draw [arrow](dec1) -- node[anchor=west] {YES} (stop);
\\end{tikzpicture}
\\caption{\\label{fig: } 示例图}
\\end{figure}
以上是关于利用TikZ 宏包在 LaTeX 中绘制流程图的主要内容,如果未能解决你的问题,请参考以下文章