e2e测试
Posted 北漂蛮子
tags:
篇首语:本文由小常识网(cha138.com)小编为大家整理,主要介绍了e2e测试相关的知识,希望对你有一定的参考价值。
一.e2e测试简介
e2e或者端到端(end-to-end)或者UI测试是一种测试方法,它用来测试一个应用从头到尾的流程是否和设计时候所想的一样。简而言之,它从一个用户的角度出发,认为整个系统都是一个黑箱,只有UI会暴露给用户。
想象一下,如果把这些自动化的测试工作换成人工来做,那会多么的令人头疼,尤其是对于那些具有大量交互的应用,手工测试将会以编程不可能的任务。
下文中,将会介绍如何使用Nightmare来进行自动e2e测试.
二.什么是Nightmare?
Nightmare是来自Segement的高级浏览器自动化库。
它公布了一些方法,例如.goto(),.type()和.click()等,通过一个个API的衔接使用,给人感觉每个模块似乎是同步的。最常用于UI测试和爬取。
三.如何使用Nightmare?
个人觉得,相对如单元测试(之前踩过ezyme的坑)的一些配置,Nightmare用起来确实挺方便。
首先,安装相应的依赖(不要问我依赖是什么,其实我也不知道是什么^_^):
npm install --save-dev mocha
npm install --save-dev nightmare
npm install --save-dev assert
npm install --save-dev chai
在项目根目录下创建test文件夹(一定要是项目根目录),所有的测试用例都需要以\'.js\'为后缀的格式创建在test文件夹下。然后,打开根目录下package.json文件,配置测试命令,很简单:
"scripts": {
  "test": "mocha"
}
准备工作已经完毕,我们来写几个简单的测试用例:
1.访问某站首页,若成功,显示加载时间,否则抛出error
const Nightmare = require(\'nightmare\')
const assert = require(\'assert\')

describe(\'Load a Page\', function() {
  // 设置超时时间
  this.timeout(\'30s\')

  let nightmare = null
  beforeEach(() => {
    nightmare = new Nightmare()
  })

  it(\'should load locaohos:8000 success\', done => {
    // 实际开发中访问的url可能是这`http://localhost:port/path`
    nightmare.goto(\'http://localhost:8000/\')
    .end()
    .then(function (result) { done() })
    .catch(done)
  })

  it(\'should load baidu(/home page) success\', done => {
    // 访问百度
    nightmare.goto(\'http://www.baidu.com/\')
    .end()
    .then(function (result) { done() })
    .catch(done)
  })

  it(\'should load without error\', done => {
    // 访问谷歌根目录,会error(大家懂的)
    nightmare.goto(\'https://www.google.com/\')
    .end()
    .then(function (result) { done() })
    .catch(done)
  })

  it(\'should load without error\', done => {
    // 访问谷歌根目录下的webhp页面,会error(大家懂的)
    nightmare.goto(\'https://www.google.com/webhp\')
    .end()
    .then(function (result) { done() })
    .catch(done)
  })
})
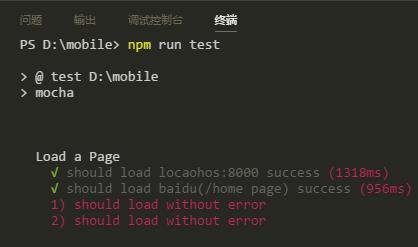
结果如图所示:

2.模拟用户搜索:
const expect = require(\'chai\').expect;
const Nightmare = require(\'nightmare\');
const assert = require(\'assert\');

describe(\'simulate search\', function () {
  this.timeout(\'30s\')

  let nightmare = null
  beforeEach(() => {
    // 设置显示模拟弹框
    nightmare = new Nightmare({
    show: true,
   })
  })

  it(\'模拟用户搜索\', done => {
    nightmare
    .goto(\'https://www.baidu.com/\')  //设置搜索引擎
    .viewport(1200, 672)   //设置弹框视口宽高
    .type(\'form[action*="/s"] [name=wd]\', \'github nightmare\')   //获取搜索框,自动填充搜索内容
    .click(\'form[action*="/s"] [type=submit]\')  //获取点击按钮,模拟点击
    .wait(5000) //等待5s(可为dom节点),获取第一条的信息的内容
    .evaluate(() =>
     document.querySelector(\'#content_left .c-container a em\').innerhtml
    )
    .end()
    .then(content => {
     console.log(content === \'Nightmare\',\'----->true\')  //输出结果
    })
    .catch(error => {
     console.error(\'Search failed:\', error);  //输出捕捉到的错误
    });
  })
})
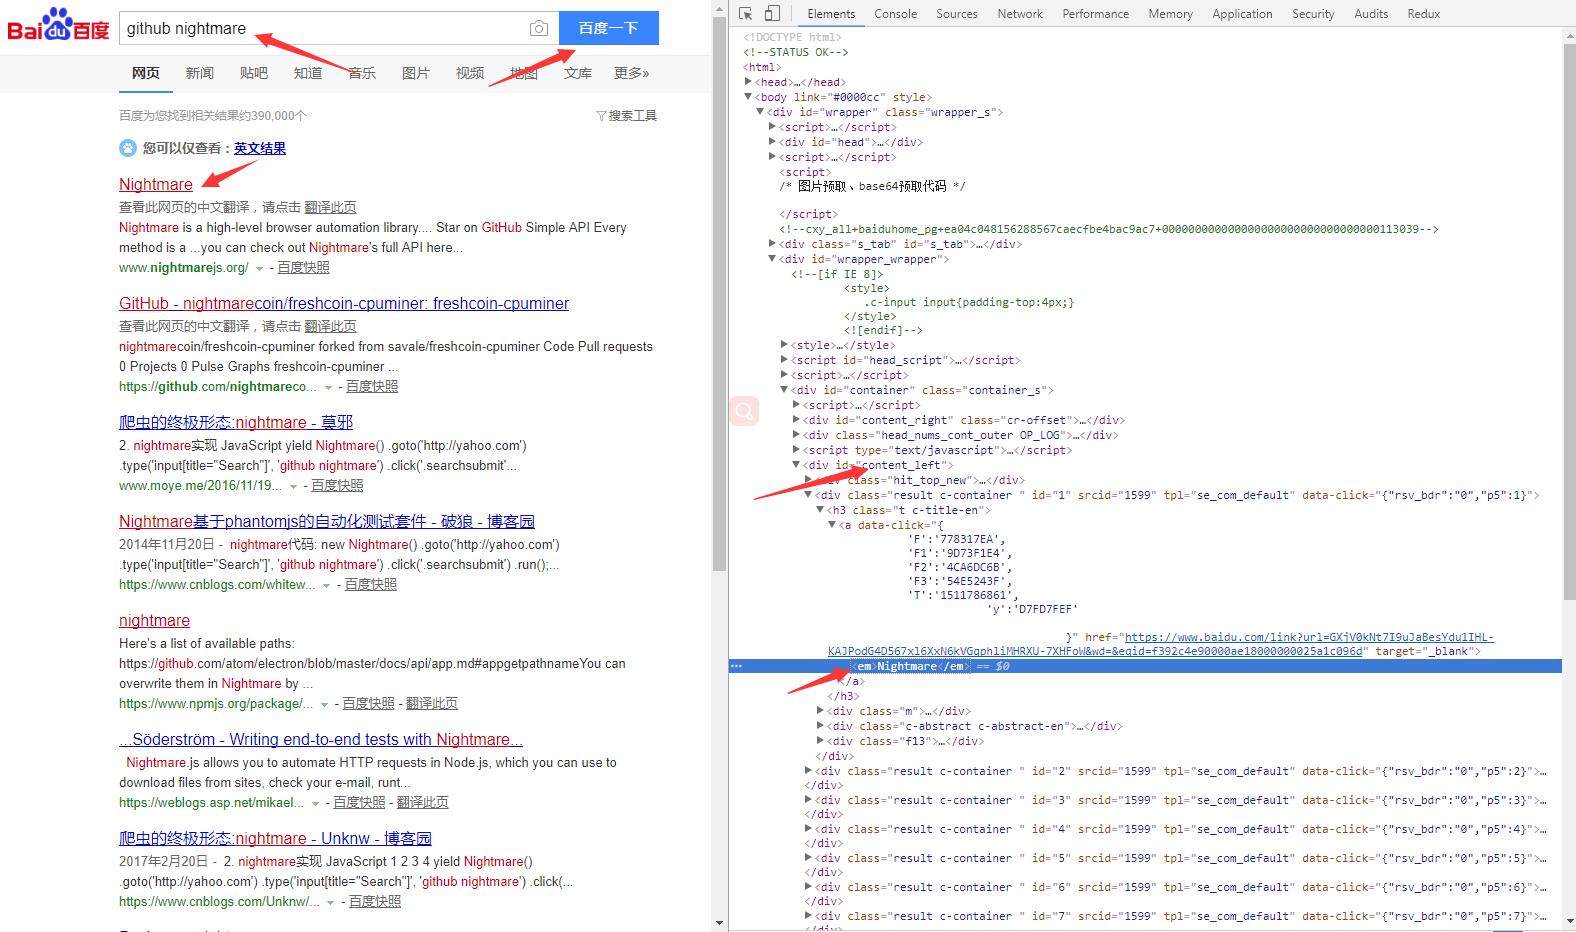
结果大概是这样:

3. 模拟用户登录
const Nightmare = require(\'nightmare\')
const assert = require(\'assert\')

describe(\'submit form\', function () {
  this.timeout(\'30s\')

  let nightmare = null
  beforeEach(() => {
    // 设置显示模拟弹框
    nightmare = new Nightmare({
      show: true
    })
   })

  it(\'模拟用户搜索\', done => {
    nightmare
    .goto(\'登录页url\')   //设置登录loginUrl
    .type(\'selector\', \'填入用户名\')  //通过选择器获取登录名文本框节点,自动模拟用户填写用户名
    .type(\'selector\', \'填入密码\')  //通过选择器获取密码文本框节点,自动模拟用户填写密码
    .click(\'selector\')   //获取点击按钮,模拟点击登录
    .wait(5000)      //设置5s之后返回结果页面title
    .evaluate(() => {
      return document.title;
    })
    .end()
    .then(title => {
     console.log(title) //输出结果
    })
    .catch(error => {
     console.error(\'Search failed:\', error); //输出捕捉到的错误
    });
  })
})
这里的效果就不再展示了。
如果想了解更多,可以查阅官方文档。
以上是关于e2e测试的主要内容,如果未能解决你的问题,请参考以下文章
使用 Firebase 电子邮件链接登录进行 e2e 测试?