使用xib开发界面
Posted motoyang
tags:
篇首语:本文由小常识网(cha138.com)小编为大家整理,主要介绍了使用xib开发界面相关的知识,希望对你有一定的参考价值。
使用xib开发界面
纯代码写界面有时候会降低开发效率,对于一些通用简单的界面,例如程序设置界面,可以使用xib进行开发。
一、关于xib
1. xib和nib
xib文件可以被Xcode编译成nib文件,xib文件本质上是一个xml文件,而nib文件就是编译后的二进制文件,该文件将视图等控件对象封装了起来,而在程序运行起来后,这些对象会被激活。
xib文件本质上是一个xml文件,可以用vim或cat命令查看,例如:
|
1
2
3
4
5
6
7
8
9
10
11
12
13
14
15
16
17
18
19
20
21
22
23
24
25
26
27
28
29
30
31
32
33
34
35
36
37
38
39
40
41
42
43
44
|
$ cat ~/Desktop/JLN-1_xib/JLN-1_xib/GrayViewController.xib<!--?xml version="1.0" encoding="UTF-8" standalone="no"?--><document type="com.apple.interfacebuilder3.cocoatouch.xib" version="3.0" toolsversion="6254" systemversion="14b25" targetruntime="ios.cocoatouch" propertyaccesscontrol="none" useautolayout="yes" usetraitcollections="yes"> <dependencies> <plugin identifier="com.apple.interfacebuilder.ibcocoatouchplugin" version="6247"> </plugin identifier="com.apple.interfacebuilder.ibcocoatouchplugin" version="6247"></dependencies> <objects> <placeholder placeholderidentifier="ibfilesowner" id="-1" userlabel="file\'s owner" customclass="grayviewcontroller"> <connections> <outlet property="actionbutton" destination="edu-ds-gip" id="qav-o1-ta6"> <outlet property="titlelabel" destination="ycj-fh-rdg" id="xj4-yo-zzp"> <outlet property="view" destination="i5m-pr-fkt" id="sfx-zr-jgt"> </outlet property="view" destination="i5m-pr-fkt" id="sfx-zr-jgt"></outlet property="titlelabel" destination="ycj-fh-rdg" id="xj4-yo-zzp"></outlet property="actionbutton" destination="edu-ds-gip" id="qav-o1-ta6"></connections> <placeholder placeholderidentifier="ibfirstresponder" id="-2" customclass="uiresponder"> <view clearscontextbeforedrawing="no" contentmode="scaletofill" id="i5m-pr-fkt"> <rect key="frame" x="0.0" y="0.0" width="300" height="44"> <autoresizingmask key="autoresizingmask" widthsizable="yes" heightsizable="yes"> <subviews> <button opaque="no" contentmode="scaletofill" fixedframe="yes" contenthorizontalalignment="center" contentverticalalignment="center" buttontype="roundedrect" linebreakmode="middletruncation" translatesautoresizingmaskintoconstraints="no" id="edu-ds-gip"> <rect key="frame" x="246" y="7" width="46" height="30"> <state key="normal" title="button"> <color key="titleshadowcolor" white="0.5" alpha="1" colorspace="calibratedwhite"> <connections> <action selector="action:" destination="-1" eventtype="touchupinside" id="svp-jp-gk9"> </action selector="action:" destination="-1" eventtype="touchupinside" id="svp-jp-gk9"></connections> <label opaque="no" userinteractionenabled="no" contentmode="left" horizontalhuggingpriority="251" verticalhuggingpriority="251" fixedframe="yes" text="label" linebreakmode="tailtruncation" baselineadjustment="alignbaselines" adjustsfontsizetofit="no" translatesautoresizingmaskintoconstraints="no" id="ycj-fh-rdg"> <rect key="frame" x="129" y="11" width="42" height="21"> <fontdescription key="fontdescription" type="system" pointsize="17"> <color key="textcolor" cocoatouchsystemcolor="darktextcolor"> <nil key="highlightedcolor"> </nil key="highlightedcolor"></color key="textcolor" cocoatouchsystemcolor="darktextcolor"></fontdescription key="fontdescription" type="system" pointsize="17"></rect key="frame" x="129" y="11" width="42" height="21"></label opaque="no" userinteractionenabled="no" contentmode="left" horizontalhuggingpriority="251" verticalhuggingpriority="251" fixedframe="yes" text="label" linebreakmode="tailtruncation" baselineadjustment="alignbaselines" adjustsfontsizetofit="no" translatesautoresizingmaskintoconstraints="no" id="ycj-fh-rdg"></color key="titleshadowcolor" white="0.5" alpha="1" colorspace="calibratedwhite"></state key="normal" title="button"></rect key="frame" x="246" y="7" width="46" height="30"></button opaque="no" contentmode="scaletofill" fixedframe="yes" contenthorizontalalignment="center" contentverticalalignment="center" buttontype="roundedrect" linebreakmode="middletruncation" translatesautoresizingmaskintoconstraints="no" id="edu-ds-gip"></subviews> <color key="backgroundcolor" white="1" alpha="1" colorspace="custom" customcolorspace="calibratedwhite"> <nil key="simulatedstatusbarmetrics"> <nil key="simulatedtopbarmetrics"> <nil key="simulatedbottombarmetrics"> <freeformsimulatedsizemetrics key="simulateddestinationmetrics"> <point key="canvaslocation" x="382" y="285"> </point key="canvaslocation" x="382" y="285"></freeformsimulatedsizemetrics key="simulateddestinationmetrics"></nil key="simulatedbottombarmetrics"></nil key="simulatedtopbarmetrics"></nil key="simulatedstatusbarmetrics"></color key="backgroundcolor" white="1" alpha="1" colorspace="custom" customcolorspace="calibratedwhite"></autoresizingmask key="autoresizingmask" widthsizable="yes" heightsizable="yes"></rect key="frame" x="0.0" y="0.0" width="300" height="44"></view clearscontextbeforedrawing="no" contentmode="scaletofill" id="i5m-pr-fkt"></placeholder placeholderidentifier="ibfirstresponder" id="-2" customclass="uiresponder"></placeholder placeholderidentifier="ibfilesowner" id="-1" userlabel="file\'s owner" customclass="grayviewcontroller"></objects></document type="com.apple.interfacebuilder3.cocoatouch.xib" version="3.0" toolsversion="6254" systemversion="14b25" targetruntime="ios.cocoatouch" propertyaccesscontrol="none" useautolayout="yes" usetraitcollections="yes"> |
nib文件可以在程序的Build目录下找到。
2. xib文件的若干属性
xib文件有以下几个重要的属性:
-
xib文件名
-
File’s Owner
-
xib文件中的视图的Class
-
xib文件中的视图的Outlet指向
从哪里加载xib,加载xib中的什么视图,都可以根据这几个属性得出。
二、Demo实践
1. 加载xib中File’s Owner为nil的视图
BlueView.xib

MainViewController.m
|
1
2
3
4
5
6
7
8
9
10
11
12
13
14
15
16
|
...@property (strong, nonatomic) UIView *blueView;...- (void)loadBlueViewFromXIB { // BlueView.xib的File\'s Owner为nil NSArray *views = [[NSBundle mainBundle] loadNibNamed:@"BlueView" owner:nil options:nil]; self.blueView = views[0]; // 从xib加载进来的View大小是确定的,但是该视图在父视图中的位置是不确定的 // 此外,视图中的子视图也是原封不动地Load进来的 CGRect rect = _blueView.frame; rect.origin.x += 37.5f; rect.origin.y += 80.0f; _blueView.frame = rect; [self.view addSubview:_blueView];} |
运行结果:
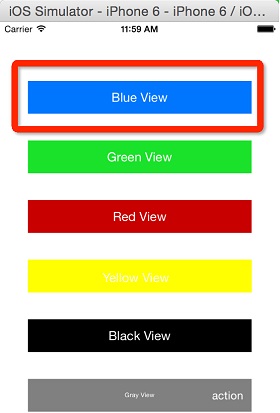
结论:
-
File’s Owner为nil的xib文件中的视图属于通用视图,在工程中可以复用
-
从xib加载进来的View大小是确定的,但是该视图在父视图中的位置是不确定的,因此需要开发者自行指定
-
视图中的所有子视图会被原封不动地Load进来
2. 加载xib中File’s Owner为self的视图

MainViewController.m
|
1
2
3
4
5
6
7
8
9
10
11
12
13
14
15
|
...@property (weak, nonatomic) IBOutlet UIView *greenView;...- (void)loadGreenViewFromXIB { // GreenView.xib的File\'s Owner设为self,并建立了一个从该xib的View到self的IBOutlet greenView [[NSBundle mainBundle] loadNibNamed:@"GreenView" owner:self options:nil]; // 只要self主动调用Load XIB的方法,self持有的IBOutlet指向的视图就会被初始化 // 这里不需要通过views[0]的方式存取视图 CGRect rect = _greenView.frame; rect.origin.x = _blueView.frame.origin.x; rect.origin.y = _blueView.frame.origin.y + 80.0f; _greenView.frame = rect; [self.view addSubview:_greenView];} |
运行结果:
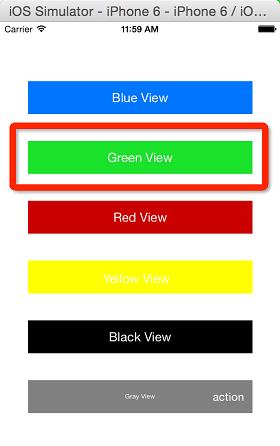
结论:
-
File’s Owner不为nil的xib文件中的视图属于专用视图,在工程中不应该被复用
-
只要self主动调用loadNibNamed:owner:options:方法,self持有的IBOutlet指向的视图就会被初始化
-
存取xib中的视图不用views[0]的方式,而是通过IBOutlet类型的property进行存取
3. 加载xib中File’s Owner为特定类的视图
RedView.xib

RedViewOwner.h
|
1
2
3
4
5
6
7
8
9
10
11
12
13
14
15
16
17
18
19
20
|
@interface RedViewOwner : NSObject@property (strong, nonatomic) IBOutlet UIView *redView;@endMainViewController.m...@property (strong, nonatomic) RedViewOwner *redViewOwner;...- (void)loadRedViewFromXIB { // RedView.xib的File\'s Owner是RedViewOwner类的实例,并建立了一个从该xib的View到RedViewOwner实例的IBOutlet // 只要通过_redViewOwner主动调用Load XIB的方法,该IBOutlet指向的视图就会被初始化 self.redViewOwner = [RedViewOwner new]; [[NSBundle mainBundle] loadNibNamed:@"RedView" owner:_redViewOwner options:nil]; UIView *redView = _redViewOwner.redView; CGRect rect = redView.frame; rect.origin.x = _greenView.frame.origin.x; rect.origin.y = _greenView.frame.origin.y + 80.0f; redView.frame = rect; [self.view addSubview:redView];} |
运行结果:
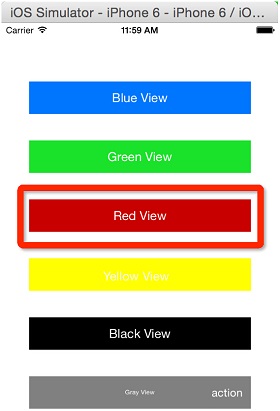
结论:
-
File’s Owner类可以封装视图中的各种逻辑,而不仅仅是提供视图内容
-
只要通过File’s Owner类主动调用loadNibNamed:owner:options:方法,该IBOutlet指向的视图就会被初始化
4. 加载xib中文件名和视图类名一致的视图(File’s Owner为nil)
YellowView.xib

YellowView.h/m
|
1
2
3
4
5
6
7
8
9
10
11
12
13
14
15
16
17
18
19
20
21
22
23
24
25
26
27
28
29
30
31
32
33
34
|
@interface YellowView : UIView+ (instancetype)viewFromNIB;@property (weak, nonatomic) IBOutlet UILabel *titleLabel;@end@implementation YellowView// Convenience Method+ (instancetype)viewFromNIB { // 加载xib中的视图,其中xib文件名和本类类名必须一致 // 这个xib文件的File\'s Owner必须为空 // 这个xib文件必须只拥有一个视图,并且该视图的class为本类 NSArray *views = [[NSBundle mainBundle] loadNibNamed:NSStringFromClass([self class]) owner:nil options:nil]; return views[0];}- (void)awakeFromNib { // 视图内容布局 self.backgroundColor = [UIColor yellowColor]; self.titleLabel.textColor = [UIColor whiteColor];}@endMainViewController.m...@property (strong, nonatomic) YellowView *yellowView;...- (void)loadYellowViewFromXIB { // 说明见YellowView.m的viewFromNIB方法 self.yellowView = [YellowView viewFromNIB]; CGRect rect = _yellowView.frame; UIView *redView = _redViewOwner.redView; rect.origin.x = redView.frame.origin.x; rect.origin.y = redView.frame.origin.y + 80.0f; _yellowView.frame = rect; [self.view addSubview:_yellowView];} |
运行结果:
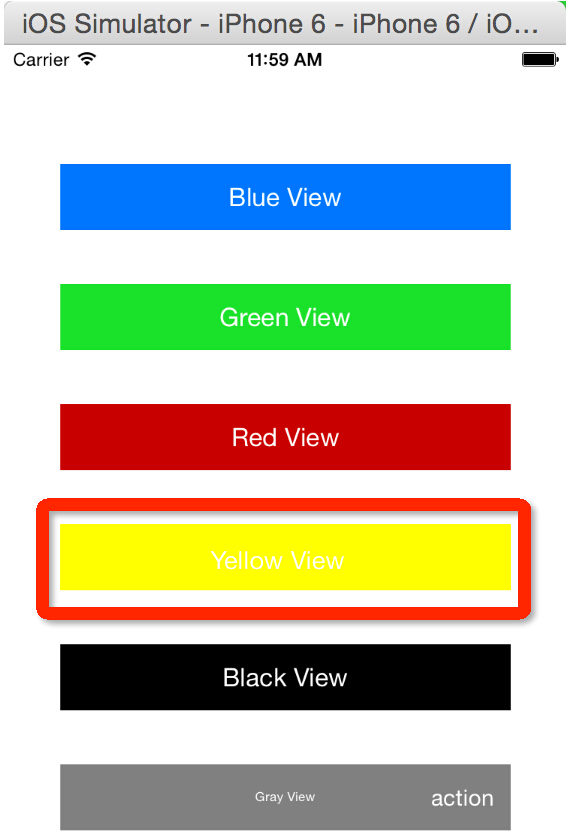
结论:
这里的viewFromNib方法只是对loadNibNamed:owner:options:方法的一个简单封装,要求的条件包括: - xib文件名和本类类名必须一致 - 这个xib文件的File’s Owner必须为空 - 这个xib文件必须只拥有一个视图,并且该视图的class为本类
5. 通过UIViewController的initWithNibName:bundle:方法加载xib文件中的视图
BlackView.xib

如果BlackViewController类希望self.view就是xib文件中的View,可以在Connections页中建立view -> File’s Owner的Outlet,如下:

BlackViewController.h/m
|
1
2
3
4
5
6
7
8
9
10
11
12
13
14
15
16
17
18
19
20
|
@interface BlackViewController : UIViewController@property (weak, nonatomic) IBOutlet UILabel *titleLabel;// Convenience Method+ (instancetype)viewControllerFromNIB;@end@implementation BlackViewController- (void)viewDidLoad { [super viewDidLoad]; self.view.backgroundColor = [UIColor blackColor]; self.titleLabel.textColor = [UIColor whiteColor];}+ (instancetype)viewControllerFromNIB { return [[BlackViewController alloc] initWithNibName:NSStringFromClass([self class]) bundle:[NSBundle mainBundle]];}- (void)didReceiveMemoryWarning { [super didReceiveMemoryWarning]; // Dispose of any resources that can be recreated.}@end |
MainViewController.m
|
1
2
3
4
5
6
7
8
9
10
11
12
13
14
15
16
|
...@property (strong, nonatomic) BlackViewController *blackViewController;...- (void)loadBlackViewFromXIB { self.blackViewController = [[BlackViewController alloc] initWithNibName:@"BlackViewController" bundle:[NSBundle mainBundle]]; // 或使用Conveniece Method,但要求xib文件名和View Controller类名一致 // self.blackViewController = [BlackViewController viewControllerFromNIB]; UIView *blackView = _blackViewController.view; CGRect rect = blackView.frame; rect.origin.x = _yellowView.frame.origin.x; rect.origin.y = _yellowView.frame.origin.y + 80.0f; blackView.frame = rect; [self.view addSubview:blackView];} |
运行结果:
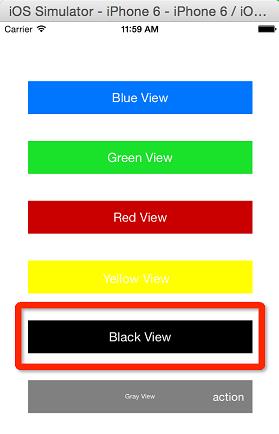
结论:
-
将xib的File’s Owner设成一个UIViewController子类,可以将这个xib文件的视图展示和外部响应事件(例如点击一个按钮触发的点击事件,该视图的手势事件等)全部封装在一个View Controller中,如果把按钮的点击事件封装在一个UIView类中,貌似破坏了MVC模式,因此最好将xib的File’s Owner设成一个UIViewController子类,该类可以通过addChildViewController方法将其添加到现有的View Controller上。如果只是希望加载视图,可以通过viewcontroller.view存取。
如果希望ViewControllerA加载并响应aXIBView中的按钮点击事件,这时必须建立一个aXIBView到ViewControllerA的IBAction,如果ViewControllerA需要拥有多个这样的XIB,那么ViewControllerA会变得非常的庞大,此时可以通过为每一个XIB设置一个ViewController,再让ViewControllerA加载这些Child View Controllers,这样可以将这些事件的响应职责和视图的描绘工作分派给专门的Child View Controller,在减小ViewControllerA体积的同时,也可以提高各个xib的可复用性。
-
这里的viewControllerFromNIB方法其实就是initWithNibName:bundle:方法的一个简单封装,要求:xib的File’s Owner设为本类。
6. 通过UIViewController+NIB加载xib文件中的View Controller类和其视图
GrayView.xib
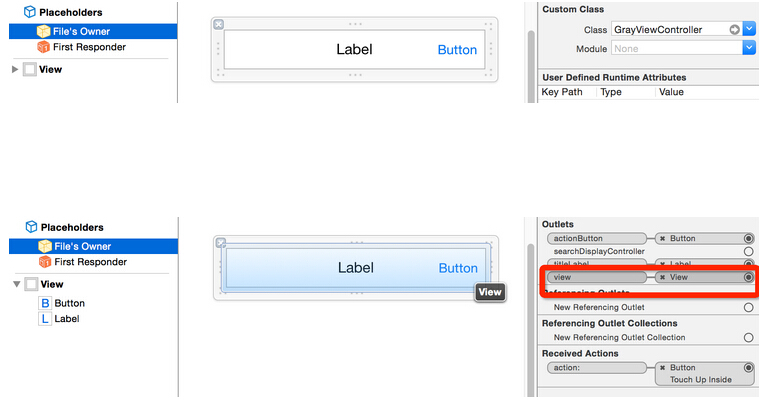
UIViewController+NIB.h/m
|
1
2
3
4
5
6
7
8
9
10
11
12
|
@interface UIViewController (NIB)// 要求xib文件名和View Controller类名一致+ (instancetype)loadFromNib;@end@implementation UIViewController (NIB)+ (instancetype)loadFromNib { // [self class]会由调用的类决定 Class controllerClass = [self class]; NSLog(@"class = %@", controllerClass); return [[controllerClass alloc] initWithNibName:NSStringFromClass(controllerClass) bundle:[NSBundle mainBundle]];}@end |
GrayViewController.h/m
|
1
2
3
4
5
6
7
8
9
10
11
12
13
14
15
16
17
18
19
20
21
22
23
|