Centos7.4 搭建rsync+inotify 实现数据同步
Posted
tags:
篇首语:本文由小常识网(cha138.com)小编为大家整理,主要介绍了Centos7.4 搭建rsync+inotify 实现数据同步相关的知识,希望对你有一定的参考价值。
简介
起因
因公司全部迁云,配置ECS时需要将Web集群之间配置 数据同步 以及 会话保持,接下来配置在 linux Centos7.4版本的系统操作。
优点
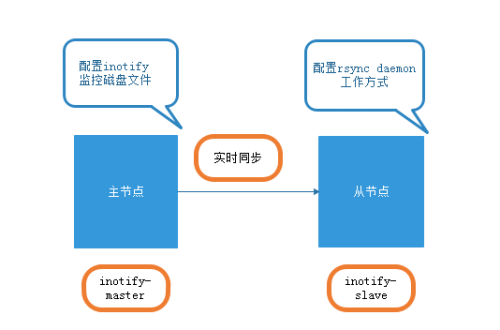
使用rsync工具和inotify机制相结合,可以实现触发式部署(实时同步),只要原始(主)位置的文档发生变幻,则立即启用增量推送操作,否则处于静态等待状态,这样以来,就避免了分布式集群部署过程复杂的问题。
架构
项目采用springMvc+Dubbo(负载均衡集群)
这里使用了三台服务器
IP:39.108.227.169 服务器A
IP:39.108.227.170 服务器B
IP:39.108.227.171服务器C 主节点
安装配置
一、inotify-slave部署 (服务器A和B)
IP:39.108.227.169
(1)检查是否安装rsync工具 rpm -aq rsync
[[email protected]]# rpm -aq rsyncrsync-3.0.9-17.el7.x86_64


  2.安装rsync服务

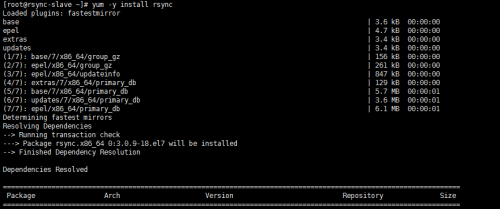
 yum intsall rsync -y 安装.如图所示:
( 2 ) 编辑文件 vi /etc/rsyncd.conf
vim /etc/rsyncd.conf
#工作中指定用户(可以不指定为0)
uid = 0
gid = 0
##相当于黑洞.出错定位
use chroot = no
##有多少个客户端同时传文件
max connections = 200
##超时时间
timeout = 300
##进程号文件
pid file = /var/run/rsyncd.pid
##日志文件
lock file = /var/run/rsync.lock
##日志文件
log file = /var/log/rsyncd.log
##模块开始
##模块名称随便起(可以是多个)
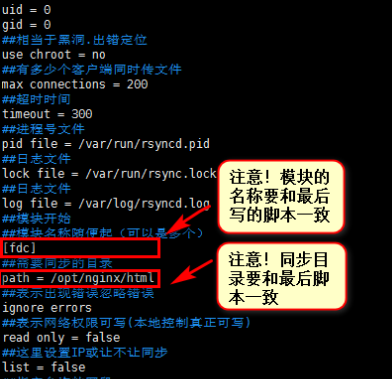
[fdc]
##需要同步的目录
##表示出现错误忽略错误
ignore errors
##表示网络权限可写(本地控制真正可写)
read only = false
##这里设置IP或让不让同步
list = false
##指定允许的网段
hosts allow = 39.108.227.170
##拒绝链接的地址,一下表示没有拒绝的链接。
hosts deny = 0.0.0.0/32
##不要动的东西(默认情况)
##虚拟用户
auth users = rsynclsl
##虚拟用户的密码文件
secrets file = /etc/rsync.password
注意!粘贴代码之后!要注意(模块名称,同步目录,虚拟用户密码文件。)
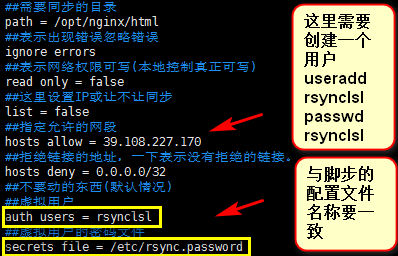
注意!需要在服务器创建一个用户与 vim /etc/rsyncd.conf 虚拟用户名一致。
操作命令如下:
useradd rsynclsl
passwd rsynclsl
cd /home 或者 vim /etc/passwd 下看到你创建的用户
(3)配置虚拟用户的密码文件
[[email protected]] # echo "rsynclsl:123456" >/etc/rsync.password
[[email protected]] # cat /etc/rsync.password
rsynclsl:123456 # rsynclsl为虚拟用户 123456为虚拟用户密码。
[[email protected]] # chmod 600 /etc/rsync.password #为密码提取,增加安全性。
(4)启动rsync 服务
[[email protected]]# rsync --daemon #启动rsync服务 或者 systemctl start rsyncd 启动。
[[email protected]]# ps -ef | grep rsync
[[email protected]]# netstat -lnutp | grep rsync
二、inotify-master配置
IP:39.108.227.170
(1)查看当前系统是否支持inotify
[[email protected]]# ll /proc/sys/fs/inotify
解释:/proc/sys/fs/inotify/max_queued_evnets
表示调用inotify_init时分配给inotify instance中可排队的event的数目的最大值,超出这个值的事件被丢弃,但会触发IN_Q_OVERFLOW事件。
/proc/sys/fs/inotify/max_user_instances
表示每一个real user ID可创建的inotify instatnces的数量上限。
/proc/sys/fs/inotify/max_user_watches
表示每个inotify instatnces可监控的最大目录数量。如果监控的文件数目巨大,需要根据情况,适当增加此值的大小。
例如: echo 30000000 > /proc/sys/fs/inotify/max_user_watches
(2)下载inotify源码包并编译安装
inotify是一种强大的、细粒度的、异步的文件系统事件控制机制。linux内核从2.6.13起,加入了inotify支持,通过inotify可以监控文件系统中添加、删除、修改、移动等各种事件,利用这个内核接口,第三方软件就可以监控文件系统下文件的各种变化情况,而inotify-tools正是实施监控的软件。
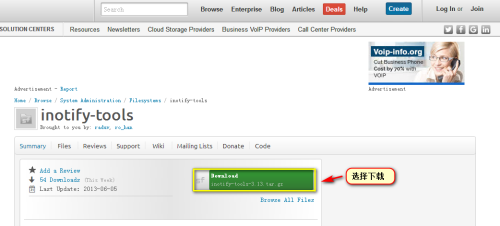
注意!下载inotify安装包可以选择我图上的github上下载,或者,选择官方下载。
Github
[[email protected]]# wget http://github.com/downloads/rvoicilas/inotify-tools/inotify-tools-3.14.tar.gz
[[email protected]]# tar zxf inotify-tools-3.14.tar.gz
[[email protected]]# cd inotify-tools-3.14
[[email protected] inotify-tools-3.14]# ./configure --prefix=/usr/local/include/
[[email protected] inotify-tools-3.14]# make && make install
官网:地址 https://sourceforge.net/projects/inotify-tools/
(3)安装 rsync安装包可以 rpm 安装 或者 yum 安装。
命令如下: yum -y install rsync 即可。
(4)主节点 inotify_pay.sh 脚本 脚本如下:
#!/bin/bash
host_slave=39.108.227.169 #inotify-slave的ip地址
master_src=/opt/nginx/html/ #本地监控的目录
inotify_home=/usr/local/include/ #inotify的安装目录
${inotify_home}/bin/inotifywait -mrq --timefmt ‘%d/%m/%y %H:%M‘ --format ‘%T %w%f‘ -e close_write,modify,delete,create,attrib $master_src \
| while read file
do
rsync -az --delete ${master_src} [email protected]${host_slave}::fdc --password-file=/etc/rsync.password
done
#注意!模块名称 fdc 要和vim /etc/rsyncd.conf 里面的一致
#注意!本地监控目录 要和vim /etc/rsyncd.conf 里面的一致
#注意!inotify的安装目录 要和vim /etc/rsyncd.conf 里面的一致
#注意!vim /etc/rsync.password 配置文件名称要一致
#注意!!!!检查 vim /etc/rsync.password 的权限,一定是600
(chmod 600 /etc/rsync.password)!!!
(5)后台执行脚本
[[email protected]] # chmod -R 777 inotify.sh #给予最高权限或者给予相应权限!
[[email protected]] # ./inotify.sh
(6)测试
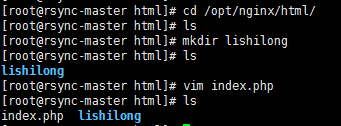
注意!进入你配置的监控目录/opt/nginx/html 下创建 文件。
rsync-master下:
ip:39.108.227.170
inotify-slave下:
ip:39.108.227.169
补充!
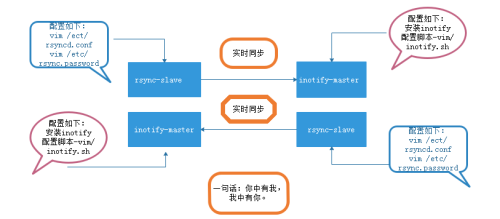
这时候有的运维伙伴该问了?我想两台服务器都可以分别监控服务操作?
答: 可以两台服务器都互相配置相同的操作,就可以互相监控了!例:如图所示:
总结!这个数据同步并不难,难在脚本,配置文件写错了,要多注意!
本文出自 “李世龙” 博客,谢绝转载!
以上是关于Centos7.4 搭建rsync+inotify 实现数据同步的主要内容,如果未能解决你的问题,请参考以下文章
