通过jettymain启动项目
Posted 大战风车的男人
tags:
篇首语:本文由小常识网(cha138.com)小编为大家整理,主要介绍了通过jettymain启动项目相关的知识,希望对你有一定的参考价值。
jetty是一个比tomcat轻量级好多的服务器,通过简单的配置即可成功的跑起来,编译过程要短一点,可以一定程度上提高开发效率
首先,要下载下来jetty的包,mvn信息如下:
<dependency>
  <groupId>org.eclipse.jetty.aggregate</groupId>
  <artifactId>jetty-all</artifactId>
  <version>9.2.14.v20151106</version>
</dependency>
<dependency>
    <groupId>javax.servlet</groupId>
    <artifactId>javax.servlet-api</artifactId>
    <version>3.1.0</version>
</dependency>
<dependency>
    <groupId>org.eclipse.jetty</groupId>
    <artifactId>jetty-jsp</artifactId>
    <version>9.2.15.v20160210</version>
</dependency>

加到pom.xml即可;
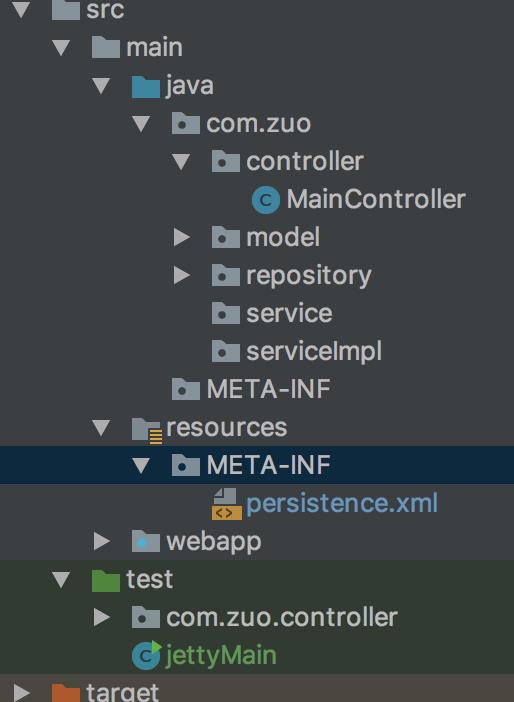
我的目录结构是这样的:

jettyMain.java
import org.eclipse.jetty.server.Server;
import org.eclipse.jetty.webapp.WebAppContext;


public class jettyMain {


    public static void main(String[] args) {


// 服务器的监听端口
        Server server = new Server(8080);
        // 关联一个已经存在的上下文
        WebAppContext context = new WebAppContext();
        // 设置描述符位置
        context.setDescriptor("./src/main/webapp/WEB-INF/web.xml");
        // 设置Web内容上下文路径
        context.setResourceBase("./src/main/webapp");
        // 设置上下文路径
        context.setContextPath("/");
        context.setParentLoaderPriority(true);
        server.setHandler(context);


        try {
            server.start();
            // server.join();
        } catch (Exception e) {
            e.printStackTrace();
        }
        System.out.println("server is  started");


}
}
注意事项:
- 注意Jetty的最低使用的jdk版本,最新版本使用jdk1.8
- HelloServlet是一个继承了HttpServlet的servlet
- 运行成功后程序会被挂起
代码里面已经包含了main函数,直接run就行,即可在loaclhost:8080/「你的项目名」查看;
以上是关于通过jettymain启动项目的主要内容,如果未能解决你的问题,请参考以下文章