Egret之Eui.Button换肤
Posted
tags:
篇首语:本文由小常识网(cha138.com)小编为大家整理,主要介绍了Egret之Eui.Button换肤相关的知识,希望对你有一定的参考价值。
在Gui中对Button换皮相当的给力:
Gui.Button.skinName = new egret.gui.ButtonSkin(normal_resource, up_resource , disable_resource);
但是在EUI中没有ButtonSkin类.所以找到了其他方法.
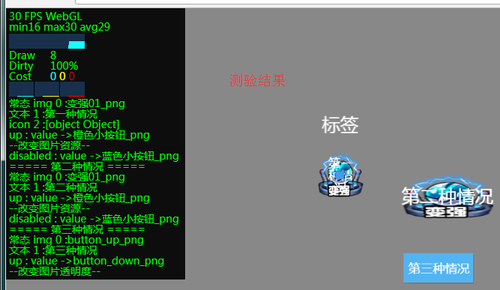
我用三种按钮进行测试 : 1,有自定义皮肤的按钮 2,没有自定义皮肤的按钮(三种状态都有resource图片) , 3,new的Button
测试View:
一 : 自定义皮肤情况
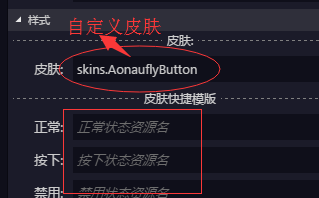
①,自定义皮肤 : AonauflyButton.exml
<?xml version="1.0" encoding="utf-8"?>
<e:Skin class="skins.AonauflyButton"  states="up,down,disabled" width="75" height="75" xmlns:e="http://ns.egret.com/eui">
    <e:Image width="100%" height="100%" scale9Grid="1,3,8,8" alpha.disabled="0.5"
             source="变强01_png"
             source.down="橙色小按钮_png"
             source.disabled="蓝色小按钮_png"/>
    <e:Label id="labelDisplay" top="8" bottom="8" left="8" right="8"
             size="20"
             textColor="0xFFFFFF" verticalAlign="middle" textAlign="center"/>
    <e:Image id="iconDisplay" horizontalCenter="0" verticalCenter="0"/>
</e:Skin>
②,现在一个ButtonDemo.exml用于显示如上图.建一个Button,设置他的皮肤为我们的自定义皮肤
命名 : btn_demo
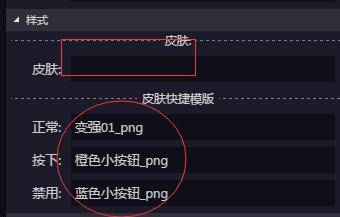
二 : 使用默认Button(三种状态都有resource图片)
命名 : btn_demo2
三 : 自定义一个Button , 命名 : $btn_demo3
代码如下:
module app {
	export class ButtonDemo extends eui.Component implements eui.UIComponent {
		private btn_demo : eui.Button;
		private btn_demo2 : eui.Button;
		private $btn_demo3 : eui.Button;
		public constructor() {
			super();
			this.skinName = "resource/eui_skins/ButtonDemo.exml";
		}

		private handlerListener( isAdd : boolean ) : void{
			this.touchEnabled = isAdd;
			if( isAdd ){
				this.addEventListener( egret.TouchEvent.TOUCH_TAP , this.onclick , this );
			}else{
				this.removeEventListener( egret.TouchEvent.TOUCH_TAP , this.onclick , this );
			}
		}
		private onclick( $e : egret.TouchEvent ) : void{
			this.btn_demo.enabled = !this.btn_demo.enabled;
			this.btn_demo2.enabled = !this.btn_demo2.enabled;
			this.$btn_demo3.enabled = !this.$btn_demo3.enabled;
		}
		protected childrenCreated():void{
			super.childrenCreated();
			this.handlerListener(true);
			this.btn_demo.label="第一种情况";
			this.btn_demo.icon = RES.getRes("button_down_png");

			this.baseChildren4BTN(this.btn_demo);

			this.changeChildren4BTN( this.btn_demo );

			egret.log("===== 第二种情况 =====");

			this.baseChildren4BTN( this.btn_demo2 );
			this.changeChildren4BTN( this.btn_demo2 );

			egret.log("===== 第三种情况 =====");
			this.$btn_demo3 = new eui.Button();
			this.$btn_demo3.label = "第三种情况";
			this.$btn_demo3.x = this.$btn_demo3.y = 250;
			this.addChild( this.$btn_demo3 );

			this.baseChildren4BTN( this.$btn_demo3 );
			this.changeChildren4BTN( this.$btn_demo3 );

		}

		private baseChildren4BTN(btn : eui.Button) : void{
			let $img2Btn_normal : eui.Image = <eui.Image>btn.getChildAt(0);
			egret.log(" 常态 img 0 :" + $img2Btn_normal.source);
			// 改变常态img( 成功 )
			// $img2Btn_normal.source = RES.getRes("蓝色小按钮_png");

			let $label2Btn : eui.Label = <eui.Label>btn.getChildAt(1);
			egret.log(" 文本 1 :" + $label2Btn.text);
			if( btn.numChildren >= 3 ){
				let $icon2Btn : eui.Image = <eui.Image>btn.getChildAt(2);
				if( $icon2Btn != null && $icon2Btn.source != null)
					egret.log("icon 2 :" + $icon2Btn.source.toString());
			}
		}

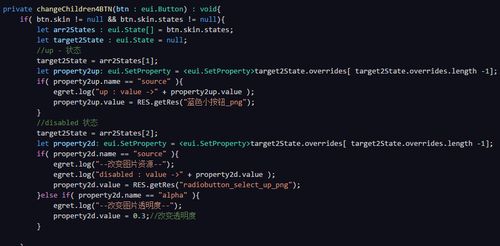
		private changeChildren4BTN(btn : eui.Button) : void{
			if( btn.skin != null && btn.skin.states != null){
				let arr2States : eui.State[] = btn.skin.states;
				let target2State : eui.State = null;
				//up - 状态
				target2State = arr2States[1];
				let property2up: eui.SetProperty = <eui.SetProperty>target2State.overrides[ target2State.overrides.length -1];
				if( property2up.name == "source" ){
					egret.log("up : value ->" + property2up.value );
					property2up.value = RES.getRes("蓝色小按钮_png");
				}
				//disabled 状态
				target2State = arr2States[2];
				let property2d: eui.SetProperty = <eui.SetProperty>target2State.overrides[ target2State.overrides.length -1];
				if( property2d.name == "source" ){
					egret.log("--改变图片资源--");
					egret.log("disabled : value ->" + property2d.value );
					property2d.value = RES.getRes("radiobutton_select_up_png");
				}else if( property2d.name == "alpha" ){
					egret.log("--改变图片透明度--");
					property2d.value = 0.3;//改变透明度
				}

			}

		}
	}
}
要更改normal :
要更改 up , disable :(可以同时有alpha和source , 可以同时得修改他们)
本文出自 “Better_Power_Wisdom” 博客,请务必保留此出处http://aonaufly.blog.51cto.com/3554853/1976445
以上是关于Egret之Eui.Button换肤的主要内容,如果未能解决你的问题,请参考以下文章


