bind9在多view情况下通过TSIG key实现主dns和多个辅DNS的同步传输
Posted
tags:
篇首语:本文由小常识网(cha138.com)小编为大家整理,主要介绍了bind9在多view情况下通过TSIG key实现主dns和多个辅DNS的同步传输相关的知识,希望对你有一定的参考价值。
操作系统:CentOS 5.5
BIND 版本:bind-9.3.6-4.P1
Master DNS 地址:
192.168.190.174
Slave DNS 地址:
telecom区:192.168.184.241,192.168.184.242
unicom区:192.168.176.241,192.168.176.242
hangyou区:192.168.110.191,192.168.110.192
1)所有主从服务器上执行
yum install -y perl-Net-SSLeay
rpm -ivh webmin-1.820-1.noarch.rpm
yum -y install bind* caching-nameserver
cd /var/named/chroot/etc
cp -av named.caching-nameserver.conf named.conf
chkconfig named on
service named start
2)
在master和slaver上都加上所有服务器host解析
vim /etc/hosts
192.168.190.174 DNS-190174.ch.com DNS-190174
192.168.184.241 DNS-184241.ch.com DNS-184241
192.168.184.242 DNS-184242.ch.com DNS-184242
192.168.176.241 DNS-176241.ch.com DNS-176241
192.168.176.242 DNS-176242.ch.com DNS-176242
192.168.110.191 DNS-110191.ch.com DNS-110191
192.168.110.192 DNS-110192.ch.com DNS-110192
3)
访问主dns上的webmin:
https://192.168.190.174:10000/
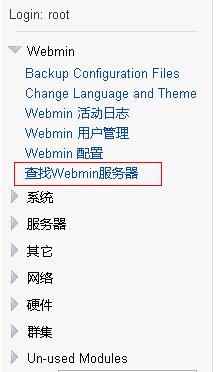
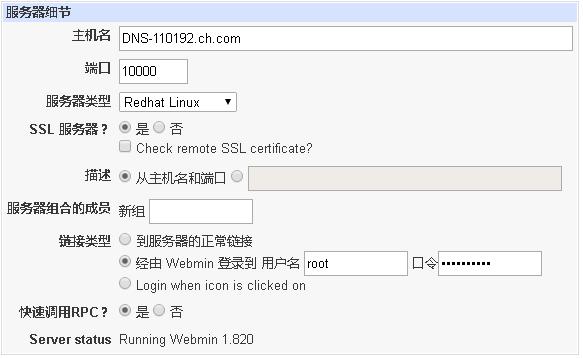
注册slaver服务器:
https://192.168.190.174:10000/servers/
4)进入Cluster Slave Servers设置slaver服务器
5)将master服务器的named.conf的view之前的内容贴到所有slaver节点
options {
    listen-on port 53 {
        192.168.190.174;    //此处填主从各自的IP
        };
    listen-on-v6 port 53 { ::1; };
    directory     "/var/named";
    dump-file     "/var/named/data/cache_dump.db";
        statistics-file "/var/named/data/named_stats.txt";
        memstatistics-file "/var/named/data/named_mem_stats.txt";

    allow-query {
        any;
        };
    allow-query-cache { any; };

    dnssec-enable yes;   //也可以通过webmin上开启DNSSEC Verification,勾选启用yes

    forwarders {         //也可以通过在webmin"转发和传输"里设置
        180.76.76.76;
        223.5.5.5;
        114.114.114.114;
        };
};

logging {
        channel default_debug {
                file "data/named.run";
                severity dynamic;
        };
};

include "/etc/dns.acl";
include "/etc/unicom.acl";
include "/etc/hangyou.acl";


key "unicom_key" {
        algorithm hmac-md5;
        secret "IpN2QloOKigDG0oOUbWdqA==";
};

key "hangyou_key" {
        algorithm hmac-md5;
        secret "rbzJeWvXUkFPIKb0kRwNOQ==";
};

key "any_key" {
        algorithm hmac-md5;
        secret "qdtTr5nLv90YURPio5WRVA==";
};
生成 TSIG-KEY
使用 BIND 自带的工具 ddns-confgen 生成 TSIG-KEY,每个 view 需要一个
TSIG-KEY。例如:
ddns-confgen -a hmac-md5
生成内容示例:
# To activate this key, place the following in named.conf,
and
# in a separate keyfile on the system or systems from which
nsupdate
# will be run:
// 下边secret后的内容是我们需要的TSIG-KEY
key "ddns-key" {
       algorithm hmac-md5;
       secret "O+DKeC059bYyNH6S6Nq7OA==";
};

# Then, in the "zone" statement for each zone you wish to
dynamically
# update, place an "update-policy" statement granting update
permission
# to this key. For example, the following
statement grants this key
# permission to update any name within the zone:
update-policy {
       grant ddns-key zonesub ANY;
};

# After the keyfile has been placed, the following command
will
# execute nsupdate using this key:
nsupdate -k
以上是关于bind9在多view情况下通过TSIG key实现主dns和多个辅DNS的同步传输的主要内容,如果未能解决你的问题,请参考以下文章


