centos6 编译安装httpd-2.4
Posted
tags:
篇首语:本文由小常识网(cha138.com)小编为大家整理,主要介绍了centos6 编译安装httpd-2.4相关的知识,希望对你有一定的参考价值。
看今天小编用俩种方法讲讲怎么用centos6 编译安装httpd-2.4
方法一:
1.如果之前有httpd,先把之前的httpd给卸了:yum remove httpd
源码:

解压:tar xvf apr-1.6.2.tar.gz tar xvf apr-util-1.6.0.tar.gz tar xvf httpd-2.3.28.tar.bz2
2.开始编译apr:先装包组:

编译:./configure --prefix=/app/apr
make && make install
![]()
![]()
3.开始编译apr-util,进入该目录下,进行编译:./configure --prefix=/app/apr-util --with-apr=/app/apr/

然后安装包:
![]()
现在进行编译:
![]()
然后:make && make install
![]()
4.编译httpd
![]()
先安装包:
![]()
进入该目录下,进行编译:cd /httpd-2.4.28
![]()
![]()
好了,到现在为止,已经编译完成了
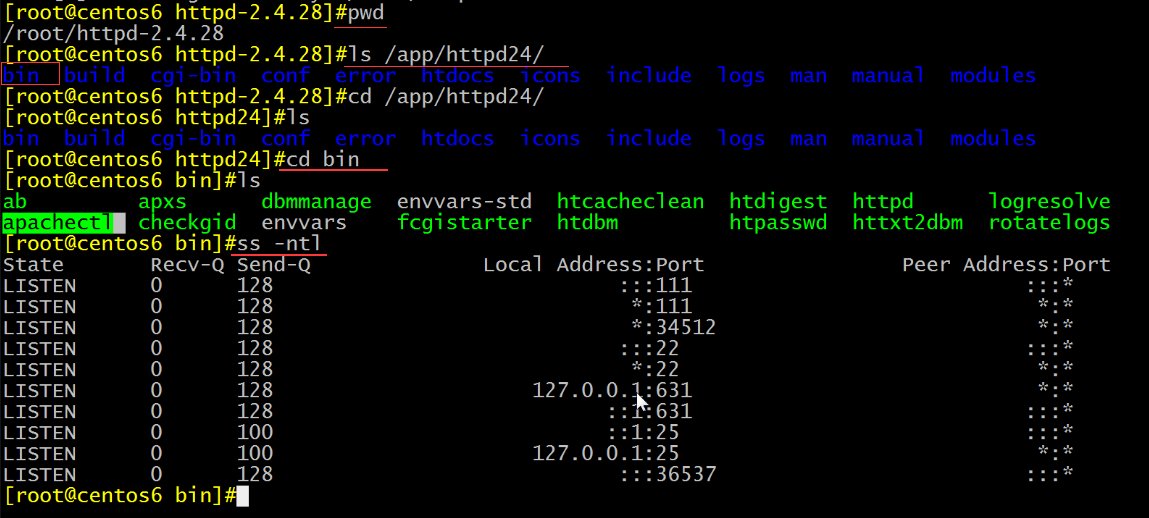
找启动服务:

启动服务:./apachectl

访问一下:

方法二:
把Apr和util 和httpd解压到同一个目录
首先安装包组
yum groupinstall "development tools"
yum install openssl-devel pcre-devel expat-devel
2.先建一个目录,把我们需要解压的包全放进去,这样有条理
mkdir src
mv apr* httpd-2.4.28.tar.bz2 src/
进入该目录cd src
进行解压:tar xvf apr-1.6.2.tar.gz tar xvf apr-util-1.6.0.tar.gz tar xvf httpd-2.4.28.tar.bz2
3.把apr整个目录拷进httpd-2.4.28/srclib/下并改名
cp -a apr-1.6.2 httpd-2.4.28/srclib/apr (a表示保留所有的属性)
cp -a apr-util-1.6.0 httpd-2.4.28/srclib/apr-util
4.编译
cd httpd-2.4.28/
./configure --prefix=/app/httpd24 --enable-so --enable-ssl --enable-cgi --enable-rewrite --with-zlib --with-pcre --with-included-apr --enable-modules=most --enable-mpms-shared=all --with-mpm=prefork
make -j 4 && make install (4指的是并发)
5.配置文件
可启动服务的路径:cd /app/httpd24/bin/apachectl 主程序在:cd /app/httpd24/bin/httpd
修改路径,启动比较方便(在任何路径都能启动):vim /etc/profile.d/httpd24.sh PATH=/app/httpd24/bin:$PATH
执行一下文件,让其生效:. /etc/profile.d/httpd24.sh
启动服务:apachectl
注意一定要关闭防火墙和SElinux策略:iptables -F ,getenforce
修改主页面:主页面位置/app/httpd24/htdocs/index.html
6. 在另一主机上访问一下:
扩展:指定运行身份:
指定运行身份Apache
首先确认系统有账户apache:id apache 如果不存在就要自己创建一个:useradd -r apache 查看apache的默认路径:getent passwd apache
查看系统自带的apache账户来源:rpm -q --scripts httpd
指定身份:
vim /app/httpd24/conf/httpd.conf
User apache
Group apache
2.做成服务,这样就可以用service命令来控制,并且可以设成开机启动:
停止该进程:apachectl stop
复制原脚本,然后进行修改:
cd /etc/init.d/
cp httpd httpd24
vim /etc/init.d/httpd24
apachectl=/app/httpd24/bin/apachectl
httpd=${HTTPD-/app/httpd24/bin/httpd}
pidfile=${PIDFILE-/app/httpd24/logs/httpd.pid}
lockfile=${LOCKFILE-/var/lock/subsys/httpd24}
添加进服务列表:chkconfig --add httpd24
确认一下:chkconfig --list httpd24
开机启动:chkconfig httpd24 on
启动该服务:service httpd24 start
查看进程:ps aux 进程的pid文件位置:ls /app/httpd24/logs/
3. 测试:
好了,到此止为止,小编讲完了,好开心哦
本文出自 “shell脚本” 博客,转载请与作者联系!
以上是关于centos6 编译安装httpd-2.4的主要内容,如果未能解决你的问题,请参考以下文章


