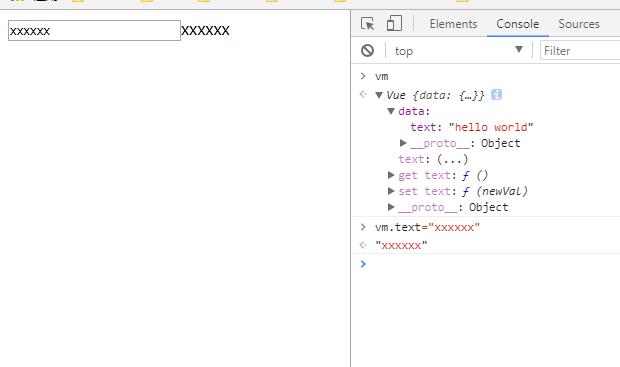
Vue双向绑定简单实现
Posted Yuri 前端什么狮子
tags:
篇首语:本文由小常识网(cha138.com)小编为大家整理,主要介绍了Vue双向绑定简单实现相关的知识,希望对你有一定的参考价值。
<!DOCTYPE html>
<html lang="en">
<head>
  <meta charset="UTF-8">
  <title>双向绑定简单实现</title>
</head>
<body>

  <div id="app">
    <input type="text" v-model="text">
    {{ text }}
  </div>

  <script>
    function observe (obj, vm) {
      Object.keys(obj).forEach(function (key) {
        defineReactive(vm, key, obj[key]);
      });
    }

    function defineReactive (obj, key, val) {

      var dep = new Dep();

      Object.defineProperty(obj, key, {
        get: function () {
          // 添加订阅者watcher到主题对象Dep
          if (Dep.target) dep.addSub(Dep.target);
          return val
        },
        set: function (newVal) {
          if (newVal === val) return
          val = newVal;
          // 作为发布者发出通知
          dep.notify();
        }
      });
    }

    function nodeToFragment (node, vm) {
      var flag = document.createDocumentFragment();
      var child;

      while (child = node.firstChild) {
        compile(child, vm);
        flag.appendChild(child); // 将子节点劫持到文档片段中
      }

      return flag;
    }

    function compile (node, vm) {
      var reg = /\\{\\{(.*)\\}\\}/;
      // 节点类型为元素
      if (node.nodeType === 1) {
        var attr = node.attributes;
        // 解析属性
        for (var i = 0; i < attr.length; i++) {
          if (attr[i].nodeName == \'v-model\') {
            var name = attr[i].nodeValue; // 获取v-model绑定的属性名
            node.addEventListener(\'input\', function (e) {
              // 给相应的data属性赋值,进而触发该属性的set方法
              vm[name] = e.target.value;
            });
            node.value = vm[name]; // 将data的值赋给该node
            node.removeAttribute(\'v-model\');
          }
        };

        new Watcher(vm, node, name, \'input\');
      }
      // 节点类型为text
      if (node.nodeType === 3) {
        if (reg.test(node.nodeValue)) {
          var name = RegExp.$1; // 获取匹配到的字符串
          name = name.trim();

          new Watcher(vm, node, name, \'text\');
        }
      }
    }

    function Watcher (vm, node, name, nodeType) {
      Dep.target = this;
      this.name = name;
      this.node = node;
      this.vm = vm;
      this.nodeType = nodeType;
      this.update();
      Dep.target = null;
    }

    Watcher.prototype = {
      update: function () {
        this.get();
        if (this.nodeType == \'text\') {
          this.node.nodeValue = this.value;
        }
        if (this.nodeType == \'input\') {
          this.node.value = this.value;
        }
      },
      // 获取data中的属性值
      get: function () {
        this.value = this.vm[this.name]; // 触发相应属性的get
      }
    }

    function Dep () {
      this.subs = []
    }

    Dep.prototype = {
      addSub: function(sub) {
        this.subs.push(sub);
      },

      notify: function() {
        this.subs.forEach(function(sub) {
          sub.update();
        });
      }
    };

    function Vue (options) {
      this.data = options.data;
      var data = this.data;

      observe(data, this);

      var id = options.el;
      var dom = nodeToFragment(document.getElementById(id), this);

      // 编译完成后,将dom返回到app中
      document.getElementById(id).appendChild(dom);
    }

    var vm = new Vue({
      el: \'app\',
      data: {
        text: \'hello world\'
      }
    });

  </script>

</body>
</html>

转载自:http://www.cnblogs.com/kidney/p/6052935.html 代码 解释 这里
以上是关于Vue双向绑定简单实现的主要内容,如果未能解决你的问题,请参考以下文章