安装OpenCV3.1 与VS2015配置主要步骤
Posted lzbqqq
tags:
篇首语:本文由小常识网(cha138.com)小编为大家整理,主要介绍了安装OpenCV3.1 与VS2015配置主要步骤相关的知识,希望对你有一定的参考价值。
Main Steps to set up OpenCV in Visual Studio 2015 (OS: Windows 10, X64)
Ref: https://www.youtube.com/watch?v=l4372qtZ4dc
(1) Install Visual Studio 2015
(2) Install OpenCV 3.1
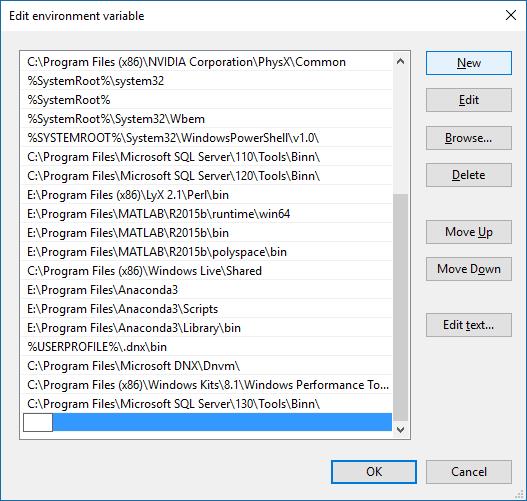
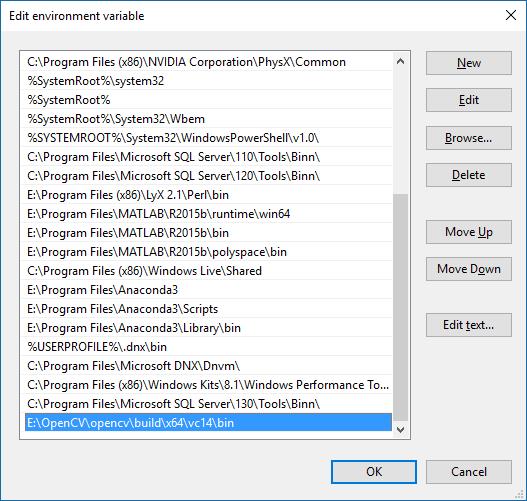
(3) Set the environment variable of OpenCV


Click Edit, then copy the path of OpenCV bin: for example
E:\\OpenCV\\opencv\\build\\x64\\vc14\\bin
Click "New", and paste the path. Click and finish.

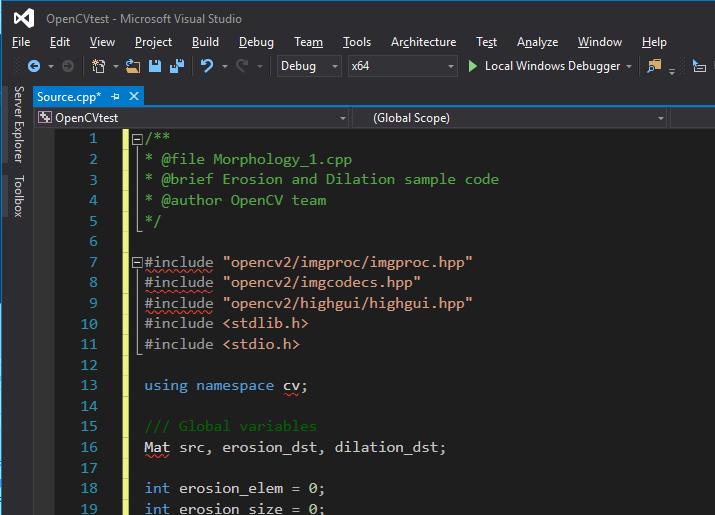
(4) Build a new sample project to include the Directories and link the libraries.
Build a new Win32 console application, add a new source file (.cpp). Copy the content in a existed sample cpp in the opencv folder into the .cpp. For example, find a file in \'E:\\OpenCV\\opencv\\sources\\samples\\cpp\\tutorial_code\\ImgProc\'.
Since the libraries have not been included in the project yet, there are errors when using "including" the opencv related files.
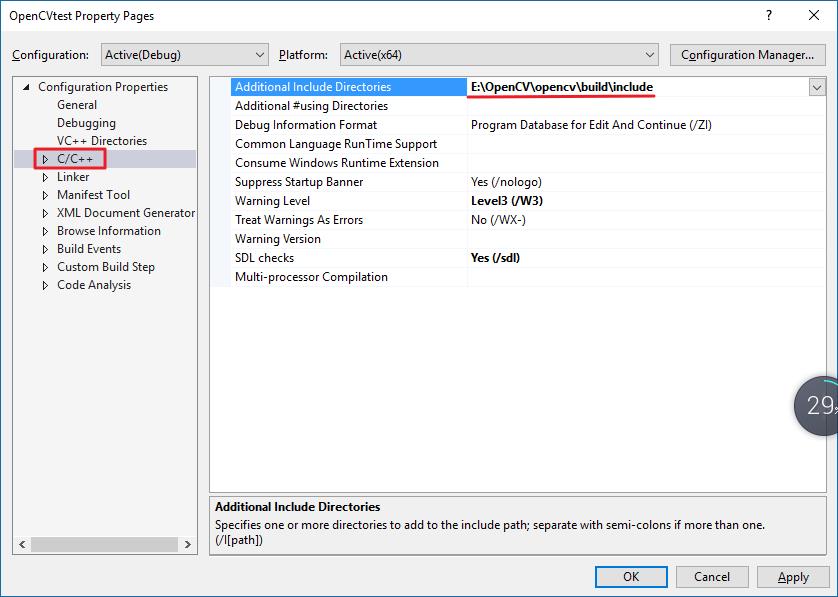
Go to project properties, paste the \'include\' path of OpenCV into "Addiditional Include Directories" in \'C/C++\' property. Apply it.
Then we need to link the libraries.
Copy the library path of OpenCV into "Addidional Library Directories" in Linker property. Apply it.

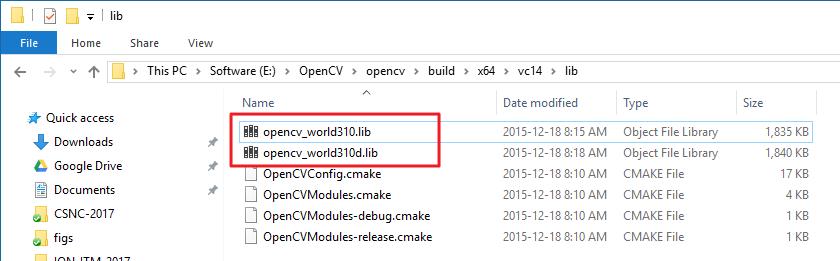
Then add the specific library (.lib) into "Additional Dependencies" in the \'Input\' of Linker property, by clicking downward arrow and edit. This .lib file can be found in the above directory.
- \'opencv_world310d.lib\' is for debug mode;
- \'opencv_world310.lib\' is for release mode.
Here we use debug mode, so write opencv_world310d.lib into "Additional Dependencies".
Finished!
<wiz_tmp_tag id="wiz-table-range-border" contenteditable="false" style="display: none;">
以上是关于安装OpenCV3.1 与VS2015配置主要步骤的主要内容,如果未能解决你的问题,请参考以下文章