OPENCV学习笔记12_扫描图像并访问相邻像素
Posted
tags:
篇首语:本文由小常识网(cha138.com)小编为大家整理,主要介绍了OPENCV学习笔记12_扫描图像并访问相邻像素相关的知识,希望对你有一定的参考价值。
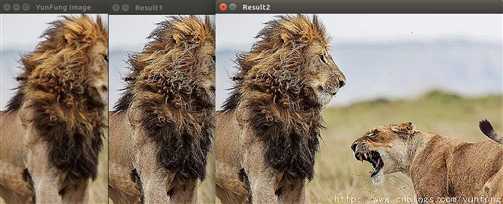
To illustrate this recipe, we will apply a processing function that sharpens an image(锐化图像的处理函数). This time, the processing cannot be accomplished in-place. Users need to provide an output image. The image scanning(扫描)is done using three pointers, one for the current line, one for the line above, and another one for the line below.
Since filtering is a common operation in image processing, OpenCV has defined a special function that performs this task: the cv::filter2D function. Note that it is particularly advantageous(特别有利) to use the filter2D function with a large kernel, in this case, a more efficient algorithm.
#include <opencv2/core/core.hpp>
#include <opencv2/highgui/highgui.hpp>
#include <opencv2/imgproc/imgproc.hpp>
using namespace cv;
void sharpen(const Mat &image, Mat &result) ;
void sharpen2D(const Mat &image, Mat &result);

int main()
{
    Mat image = imread("test.jpg");
    resize(image, image, Size(), 0.6, 0.6);
    Mat result1;
    Mat result2;

    namedWindow("YunFung Image");
    imshow("YunFung Image", image);

    sharpen(image, result1);
    namedWindow("Result1");
    imshow("Result1", result1);

    sharpen2D(image, result2);
    namedWindow("Result2");
    imshow("Result2", result2);

    waitKey();
    return 0;
}

void sharpen(const Mat &image, Mat &result) {
    result.create(image.size(), image.type());   // allocate if necessary
    int nchannels = image.channels();

    for (int j = 1; j < image.rows - 1; j++) {    // for all rows (except first and last)
        const uchar* previous = image.ptr<const uchar>(j - 1);  // previous row
        const uchar* current = image.ptr<const uchar>(j);        // current row
        const uchar* next = image.ptr<const uchar>(j + 1);        // next row

        uchar* output = result.ptr<uchar>(j);                   // output row pointer
        //saturate_cast<uchar>  changing negative values to 0 and values over 255 to 255
        //sharpened_pixel = 5 * current - left - right - up - down;
        for (int i = nchannels; i < (image.cols - 1)*nchannels; i++) {
            *output++ = saturate_cast<uchar>(5 * current[i] - current[i - nchannels]
                                                                - current[i + nchannels] - previous[i] - next[i]);
        }
    }

    // Set the unprocessed pixels to 0   - left - right - up - down
    result.row(0).setTo(Scalar(0));
    result.row(result.rows - 1).setTo(Scalar(0));
    result.col(0).setTo(Scalar(0));
    result.col(result.cols - 1).setTo(Scalar(0));
}
void sharpen2D(const Mat &image, Mat &result) {

    // Construct kernel (all entries initialized to 0)
    Mat kernel(3, 3, CV_32F, Scalar(0));
    // assigns kernel values
    kernel.at<float>(1, 1) =  5.0;
    kernel.at<float>(0, 1) = -1.0;
    kernel.at<float>(2, 1) = -1.0;
    kernel.at<float>(1, 0) = -1.0;
    kernel.at<float>(1, 2) = -1.0;

    //filter the image
    filter2D(image, result, image.depth(), kernel);
}
以上是关于OPENCV学习笔记12_扫描图像并访问相邻像素的主要内容,如果未能解决你的问题,请参考以下文章