pxe+kickstart自动化安装
Posted 皮特王同学
tags:
篇首语:本文由小常识网(cha138.com)小编为大家整理,主要介绍了pxe+kickstart自动化安装相关的知识,希望对你有一定的参考价值。
什么是PXE?
PXE(Pre-boot Execution Environment,预启动执行环境)是Intel公司开发的最新技术,工作于Client/Server模式。PXE是一种远程引导方式,要求计算机网卡支持PXE协议,即网卡ROM中有PXEClient。计算机引导时,Bios将PXEClient调入内存,PXEClient其实主要包括DHCPClient和TFTPClient两部分,PXEClient请求DHCP服务器分配IP,然后请求TFTP服务器下载引导文件和内核。
PXE的工作流程
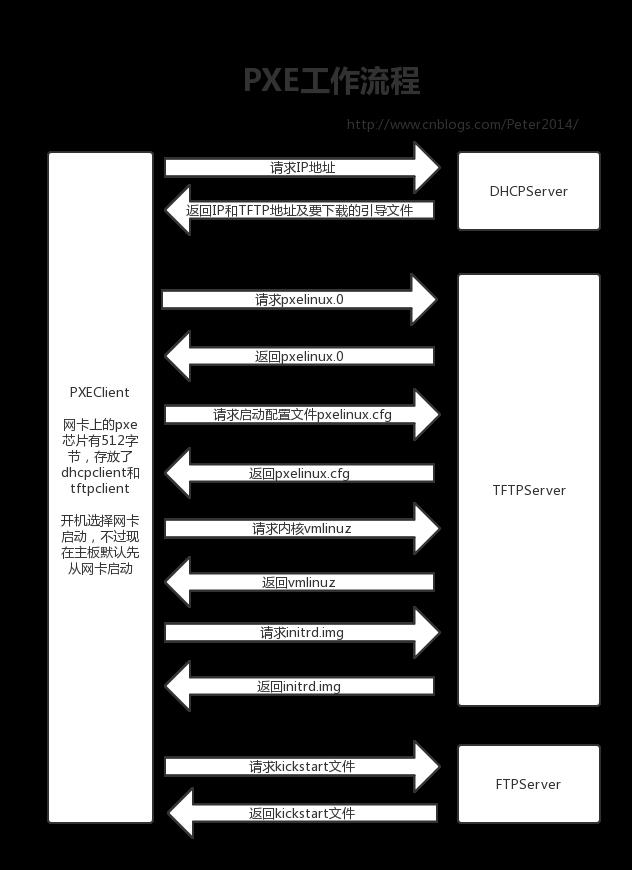
pxelinux.0:引导程序,类似GRUB,pxelinux.0默认读取/var/lib/tftpboot/pxelinux.cfg/default配置文件
pxelinux.cfg/default:存储启动菜单、vmlinuz、initrd.img位置、ks文件下载地址,类似grub.conf
vmlinuz:压缩过的内核
initrd.img:将部分内存虚拟成磁盘,供内核使用
kickstart文件:存放安装应答选项、镜像下载地址
什么是Kickstart
Kickstart是一种无人值守的安装方式。它的工作原理是在安装过程中记录典型的需要人工干预填写的各种参数,并生成一个名为ks.cfg的文件。如果在安装过程中(不只局限于生成Kickstart安装文件的机器)出现要填写参数的情况,安装程序首先会去查找Kickstart生成的文件,如果找到合适的参数,就采用所找到的参数;如果没有找到合适的参数,便需要安装者手工干预了。所以,如果Kickstart文件涵盖了安装过程中可能出现的所有需要填写的参数,那么安装者完全可以只告诉安装程序从何处取ks.cfg文件,然后就去忙自己的事情。等安装完毕,安装程序会根据ks.cfg中的设置重启系统,并结束安装。
DHCP配置
[root@test88 ~]# cat /etc/redhat-release
CentOS release 6.6 (Final)

[root@test88 ~]# uname -rm
2.6.32-504.el6.x86_64 x86_64

[root@test88 ~]# yum install -y dhcp

[root@test88 ~]# vim /etc/dhcp/dhcpd.conf

log-facility local7;

subnet 172.16.1.0 netmask 255.255.255.0 {
range 172.16.1.200 172.16.1.220;
default-lease-time 600;
max-lease-time 7200;
next-server 172.16.1.88;
filename "pxelinux.0";
}

[root@test88 ~]# /etc/init.d/dhcpd start
[root@test88 ~]# chkconfig dhcpd on

[root@test88 ~]# netstat -nutlp | grep dhcp
udp        0      0 0.0.0.0:67                  0.0.0.0:*                               24960/dhcpd
TFTP配置
[root@test88 ~]# yum install -y tftp-server xinetd

[root@test88 ~]# vim /etc/xinetd.d/tftp

service tftp
{
        socket_type             = dgram
        protocol                = udp
        wait                    = yes
        user                    = root
        server                  = /usr/sbin/in.tftpd
        server_args             = -s /var/lib/tftpboot
        disable                 = no
        per_source              = 11
        cps                     = 100 2
        flags                   = IPv4
}


[root@test88 ~]# yum install -y syslinux     // 通过安装该软件包获得引导文件

[root@test88 ~]# cp /usr/share/syslinux/pxelinux.0 /var/lib/tftpboot/

[root@test88 ~]# mount /dev/cdrom /opt/

[root@test88 ~]# cp /opt/isolinux/* /var/lib/tftpboot/

[root@test88 ~]# mkdir /var/lib/tftpboot/pxelinux.cfg

[root@test88 ~]# cp /opt/isolinux/isolinux.cfg /var/lib/tftpboot/pxelinux.cfg/default

[root@test88 ~]# chmod 644 /var/lib/tftpboot/pxelinux.cfg/default

[root@test88 ~]# vim /var/lib/tftpboot/pxelinux.cfg/default

default vesamenu.c32
timeout 60

display boot.msg

......

label linux                               // 每一个label定义了一个启动菜单项目
  menu label ^Install CentOS 6
  menu default
  kernel vmlinuz
  append initrd=initrd.img inst.ks=ftp://172.16.1.88/ks.cfg ip=dhcp quiet
label check
  menu label Test this ^media & install CentOS 6
  kernel vmlinuz
  append initrd=initrd.img inst.stage2=hd:LABEL=CentOS\\x207\\x20x86_64 rd.live.check quiet

[root@test88 ~]# /etc/init.d/xinetd start

[root@test88 ~]# chkconfig xinetd on

[root@test88 ~]# netstat -nutlp | grep xinetd
udp        0      0 0.0.0.0:69                  0.0.0.0:*                               25209/xinetd
FTP配置
[root@test88 ~]# yum install -y vsftpd

[root@test88 ~]# yum install -y system-config-kickstart

#使用 system-config-kickstart 工具生成kickstart文件,需要图形界面

[root@test88 ~]# cp /tmp/ks.cfg /var/ftp/ks.cfg

[root@test88 ~]# ksvalidator /var/ftp/ks.cfg   // 检查ks文件语法

[root@test88 ~]# umount /opt/

[root@test88 ~]# mount /dev/cdrom /var/ftp/pub/
mount: /dev/sr0 is write-protected, mounting read-only

[root@test88 ~]# /etc/init.d/vsftpd start
[root@test88 ~]# chkconfig vsftpd on
system-config-kickstart配置
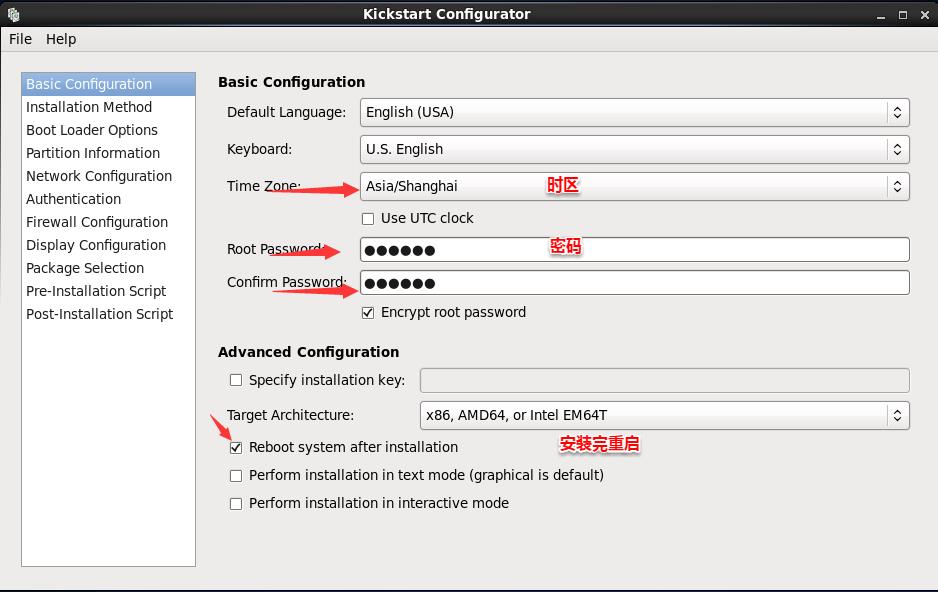
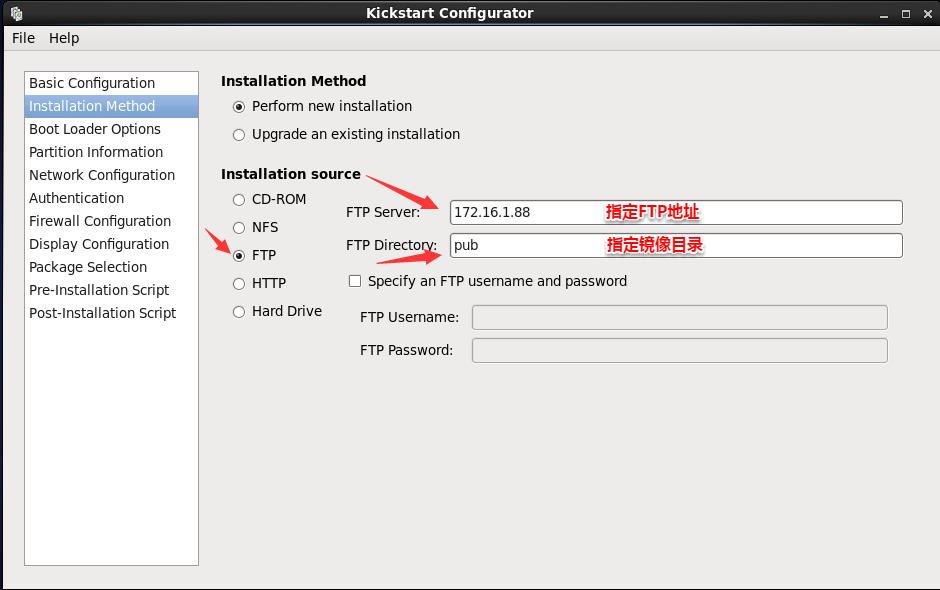
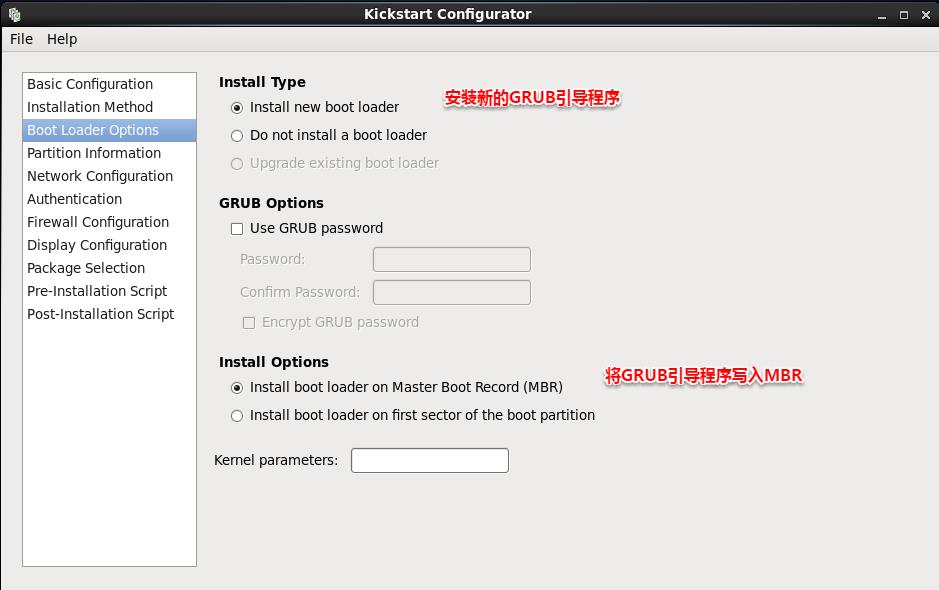
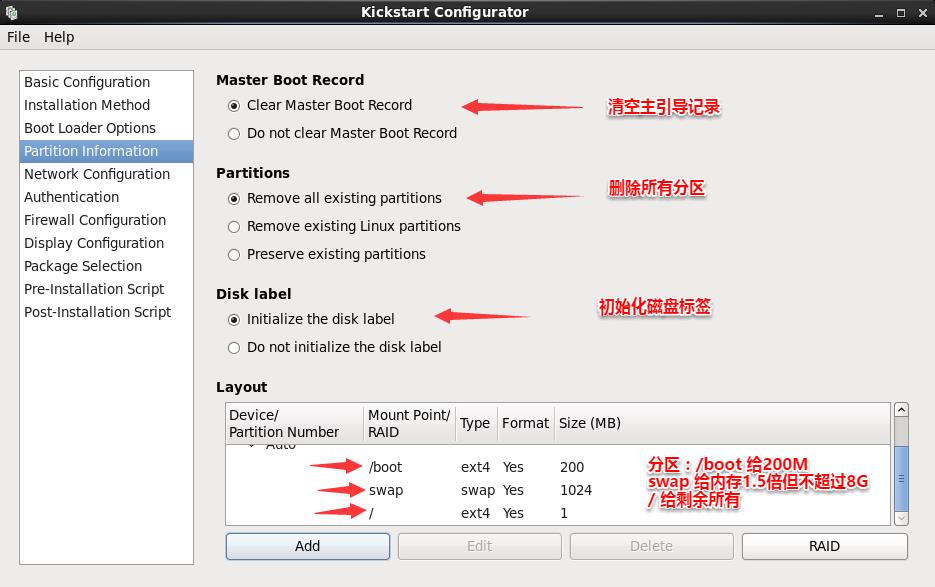
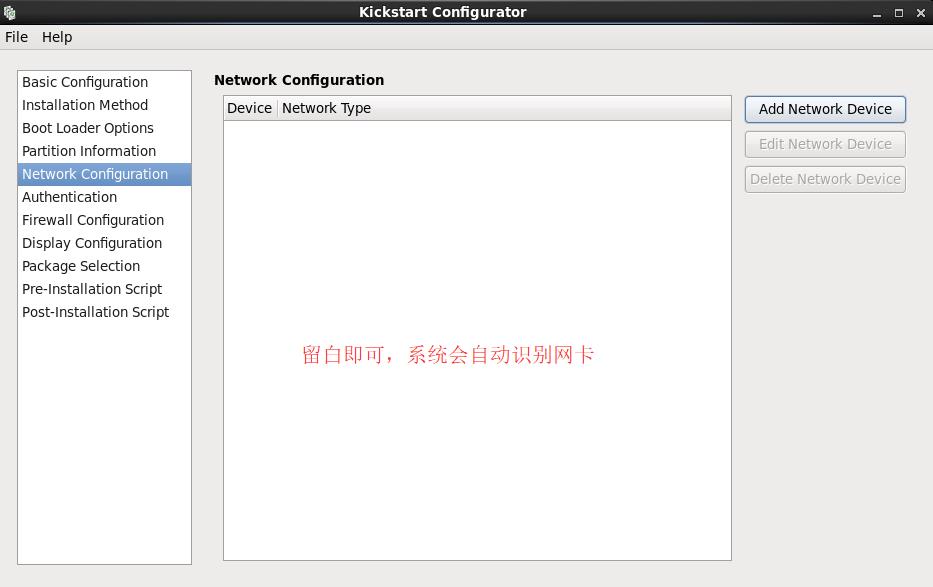
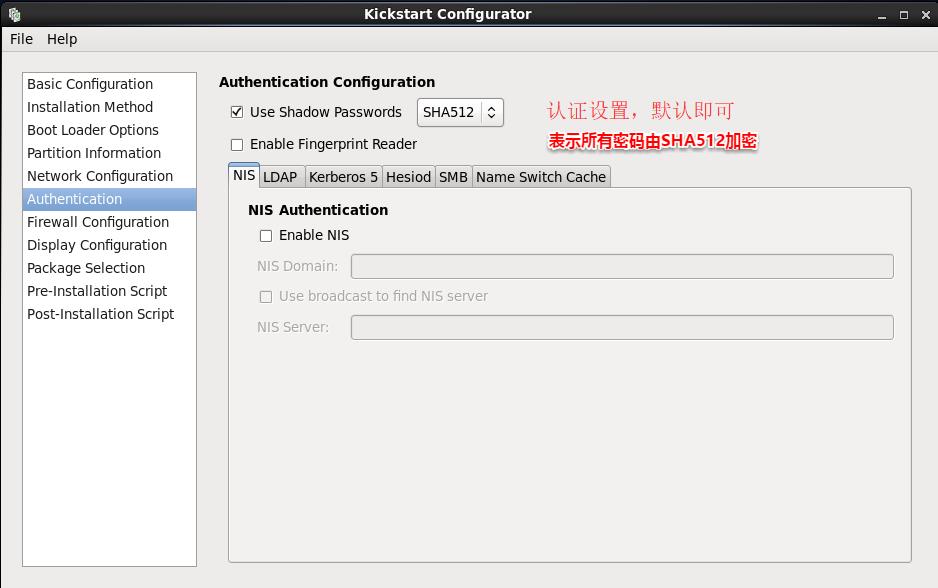
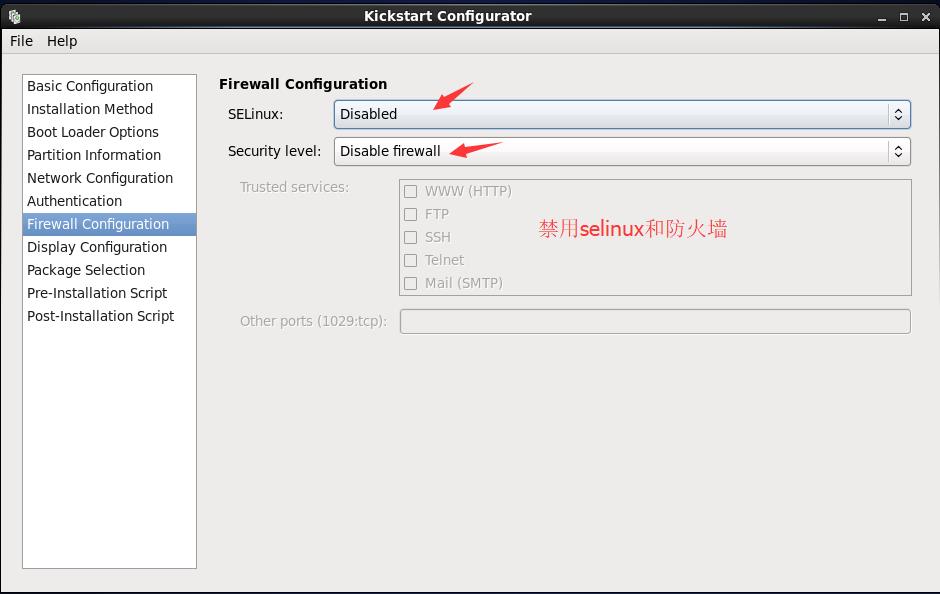
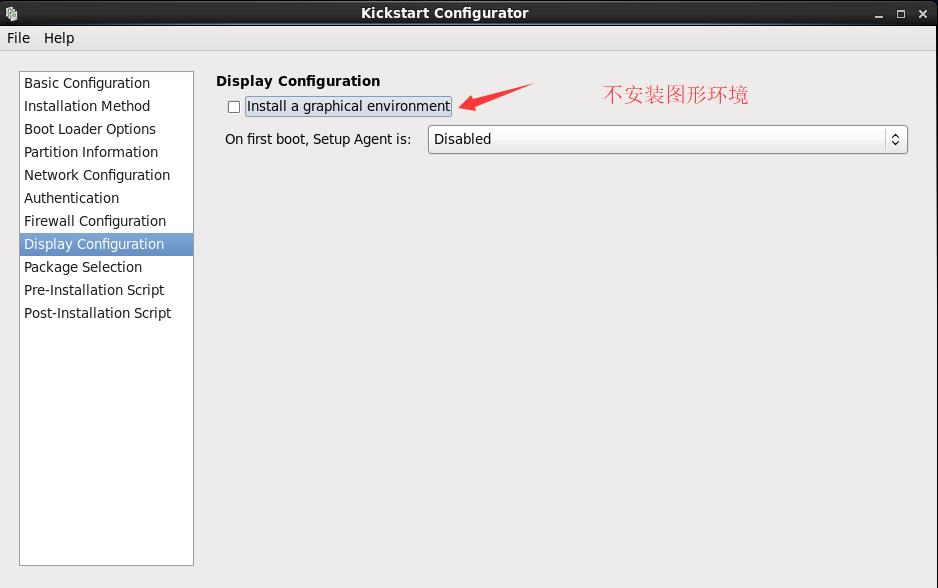
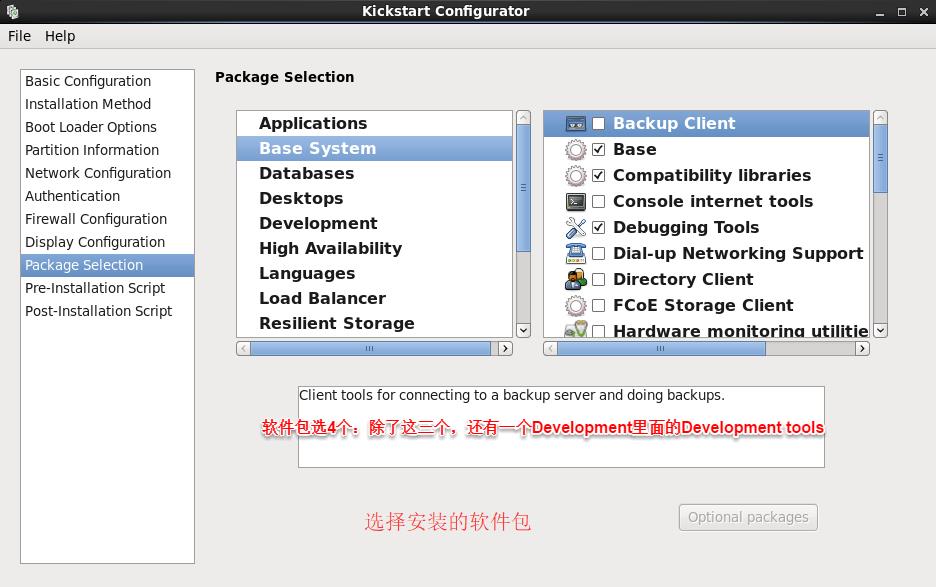
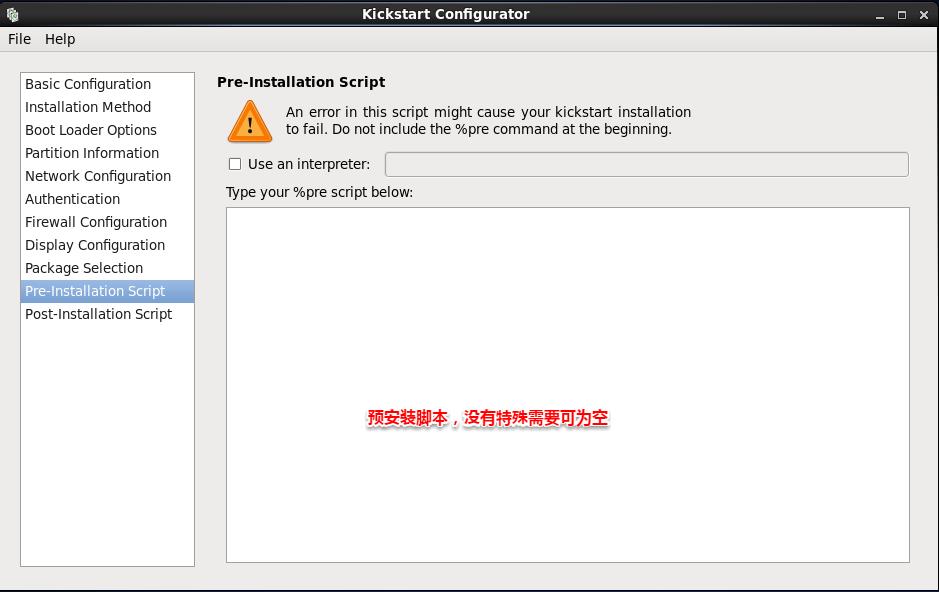
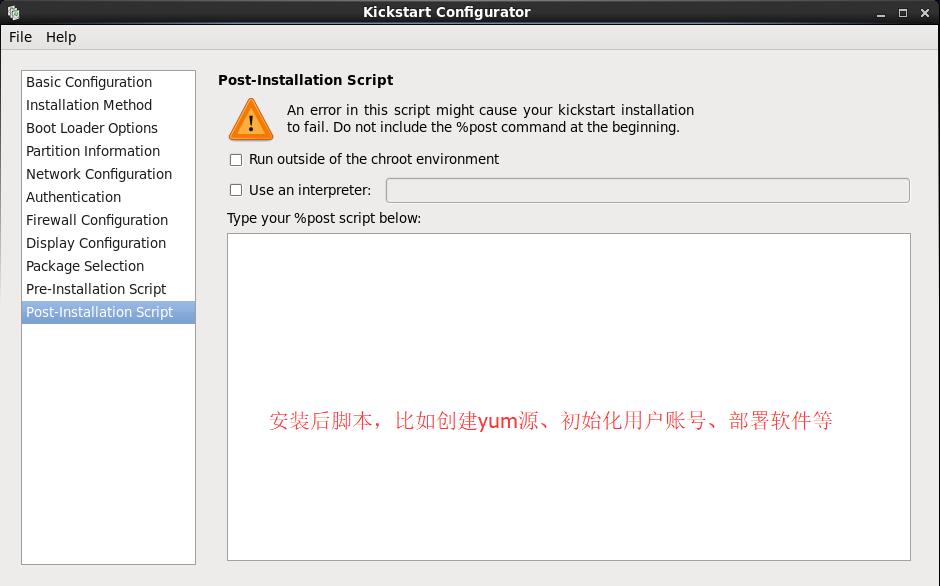
kickstart文件
#platform=x86, AMD64, or Intel EM64T
#version=DEVEL
# Firewall configuration
firewall --disabled
# Install OS instead of upgrade
install
# Use network installation
url --url="ftp://172.16.1.88/pub"
# Root password
rootpw --iscrypted $1$j2xUB1S7$9MW5sEYgcn3P/dqgF0/8L.
# System authorization information
auth  --useshadow  --passalgo=sha512
# Use graphical install
graphical
# System keyboard
keyboard us
# System language
lang en_US
# SELinux configuration
selinux --disabled
# Do not configure the X Window System
skipx
# Installation logging level
logging --level=info
# Reboot after installation
reboot
# System timezone
timezone  Asia/Shanghai
# System bootloader configuration
bootloader --location=mbr
# Clear the Master Boot Record
zerombr
# Partition clearing information
clearpart --all --initlabel
# Disk partitioning information
part /boot --asprimary --fstype="ext4" --size=200
part swap --asprimary --fstype="swap" --size=1024
part / --asprimary --fstype="ext4" --grow --size=1

%packages
@base
@compat-libraries
@debugging
@development

%end
以上是关于pxe+kickstart自动化安装的主要内容,如果未能解决你的问题,请参考以下文章