一步步带你做vue后台管理框架——上手使用
Posted herozhou工巧
tags:
篇首语:本文由小常识网(cha138.com)小编为大家整理,主要介绍了一步步带你做vue后台管理框架——上手使用相关的知识,希望对你有一定的参考价值。
系列教程《一步步带你做vue后台管理框架》第二课
github地址:vue-framework-wz
线上体验地址:立即体验
闲扯再多不会用也没白搭,这节课我来带大家直接上手框架,体验到简单方便之后你就会爱上这个框架欲罢不能的。
首先跟所有的vue项目一样,两种方式,一种去项目github地址:vue-framework-wz上下载代码包到本地,或者使用
git clone https://github.com/herozhou/vue-framework-wz.git
无论哪种方式,只要我们能够拿到整个代码包就行。在我们代码包的根目录下打开命令行,执行如下命令:
npm install --registry=https://registry.npm.taobao.org
建议大家最好使用这样的方式,cnpm总是会出现各种奇怪的bug。
等到依赖安装完成之后我们运行
npm run dev
然后在浏览器中输入http://localhost:9001,就可以直接看到我们的主界面了。
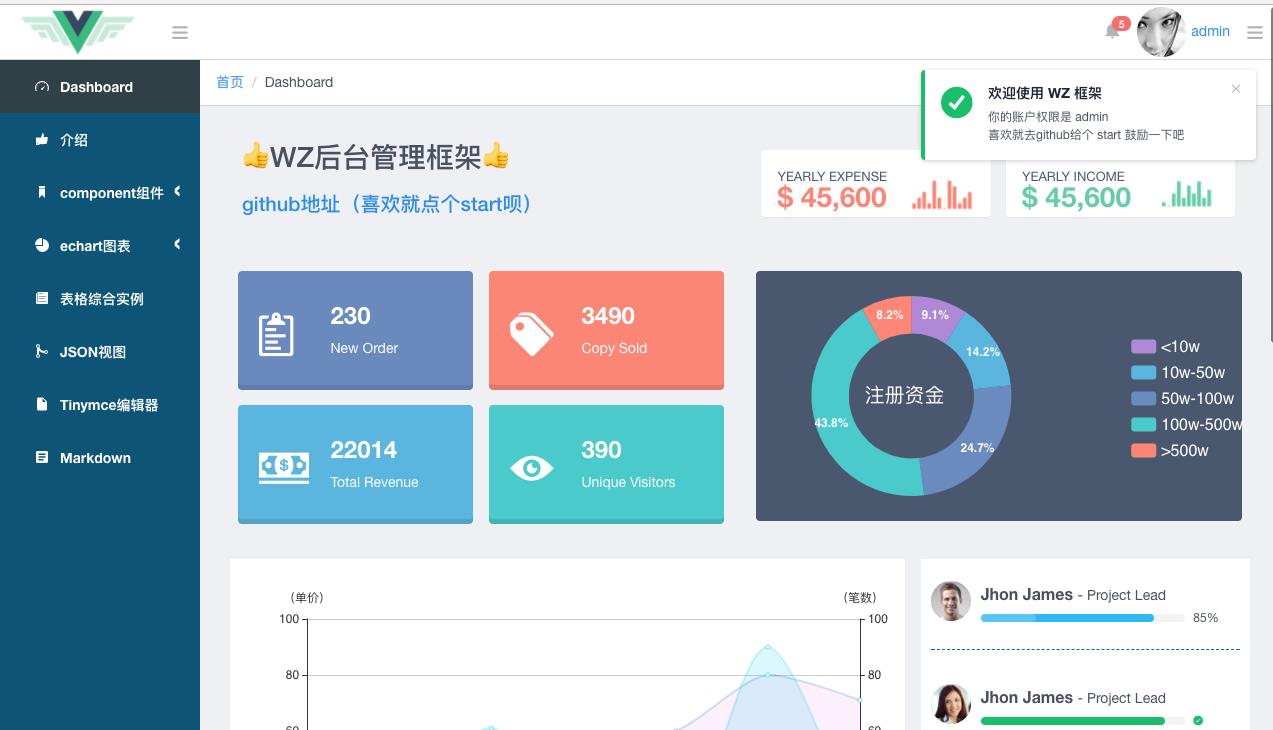
这是一个很粗糙的首页,我们接下来要学习如何做一个自己的界面。
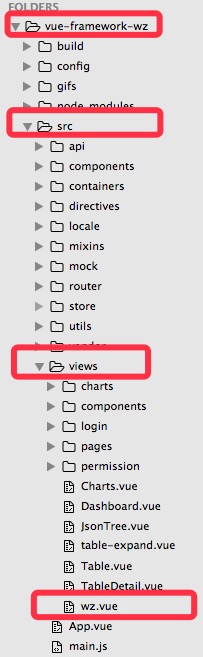
打开编辑器,进入到vue-framework-wz/src/views文件夹下,新建一个vue文件,名字就叫做wz.vue,然后定义好一个vue组件的dom模板,如下图。
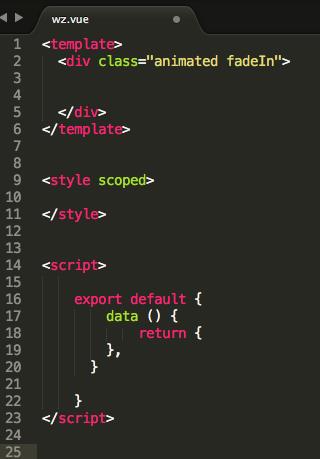
我们写点什么呢?先写一个简单标题能看到效果吧。
<template>
  <div class="animated fadeIn">

    <h3>框架在手,天下我有</h3>
    <p>好用的框架决定了一个程序员的效率</p>
  </div>
</template>
如果我们想要有自适应的效果怎么办?加上Row行组件和Col列组件,并设置好Col的属性
<template>
  <div class="animated fadeIn">

    <Row>
      <Col :sm="24" :md="24" :lg="12">

        <h3>框架在手,天下我有</h3>
        <p>好用的框架决定了一个程序员的效率</p>

      </Col>
    </Row>

  </div>
</template>


<script>

    export default {
        data () {
            return {
                }
      }

    }
</script>
这样就很简单的做好了一个页面,接下来就要配置路由了,进入到vue-framework-wz/src/router/index.js文件,把我们的组件引入进来,然后在下面配置好我们的路由,如下所示。
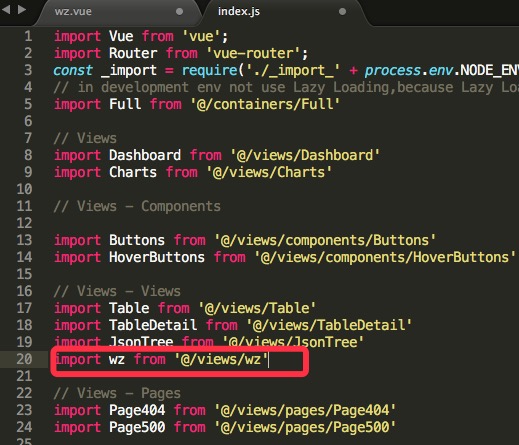
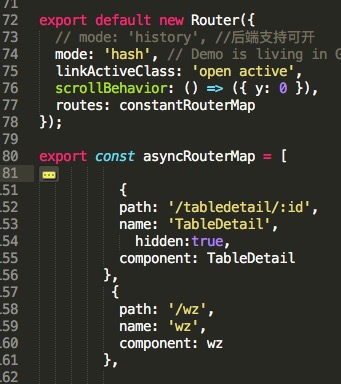
完整index.js代码
import Vue from \'vue\';
import Router from \'vue-router\';
const _import = require(\'./_import_\' + process.env.NODE_ENV);
import Full from \'@/containers/Full\'
import Buttons from \'@/views/components/Buttons\'

// Views - Pages
import Page404 from \'@/views/errorPages/Page404\'
import Page500 from \'@/views/errorPages/Page500\'


/* login */
const Login = _import(\'login/index\');
Vue.use(Router);

export const constantRouterMap = [
    { path: \'/login\', component: Login, hidden: true },
    {path: \'/pages\',redirect: \'/pages/p404\', name: \'Pages\',
          component: {
            render (c) { return c(\'router-view\') }
              // Full,
          },
          children: [{path: \'404\',  name: \'Page404\', component: _import(\'errorPages/Page404\') },
                     {path: \'500\',name: \'Page500\',component: _import(\'errorPages/Page404\')},
                    ]
    }


]

export default new Router({
  mode: \'hash\',
  linkActiveClass: \'open active\',
  scrollBehavior: () => ({ y: 0 }),
  routes: constantRouterMap
});

export const asyncRouterMap = [

 {
    path: \'/\',
    redirect: \'/dashboard\',
    name: \'首页\',
    component: Full,
    hidden:false,
    children: [
     {path: \'/dashboard\',name: \'Dashboard\',icon:\'speedometer\',component: _import(\'Dashboard\')},
     {path: \'/introduction\',name: \'介绍\',icon:\'thumbsup\',component: _import(\'Introduction\')},
     {path: \'/components\',name: \'component组件\',redirect: \'/components/buttons\',icon:\'bookmark\',
        component: {render (c) { return c(\'router-view\') }},
        children: [ {path: \'buttons\',name: \'Buttons按钮\',icon:\'social-youtube\',component: _import(\'components/Buttons\'), hidden:false, },
                    {path: \'hoverbuttons\',name: \'悬停特效按钮\',icon:\'wand\',component: _import(\'components/HoverButtons\')},
                    {path: \'alert\',name: \'Alert警告提示\',icon:\'alert\',component: _import(\'components/Alert\')},
                    {path: \'card\',name: \'Card卡片\',icon:\'ios-browsers-outline\',component: _import(\'components/Card\')},
                    {path: \'datepicker\',name: \'DatePicker\',icon:\'ios-calendar-outline\',component: _import(\'components/DatePicker\')},
                    {path: \'form\',name: \'Form表单\',icon:\'ios-list-outline\',component: _import(\'components/Form\')},
                    {path: \'modal\',name: \'Modal对话框\',icon:\'ios-chatbubble-outline\',component: _import(\'components/Modal\')},
                    {path: \'select\',name: \'Select选择器\',icon:\'ios-arrow-down\',component: _import(\'components/Select\')},
                    {path: \'spin\',name: \'Spin加载中\',icon:\'load-d \',component: _import(\'components/Spin\')},
                    {path: \'steps\',name: \'Steps步骤条\',icon:\'ios-checkmark-outline\',component: _import(\'components/Steps\')},
                    {path: \'timeline\',name: \'Timeline时间轴\',icon:\'android-more-vertical\',component: _import(\'components/Timeline\')},
                    {path: \'transfer\',name: \'Transfer穿梭框\',icon:\'ios-pause-outline\',component: _import(\'components/Transfer\')},
                    {path: \'timepicker\',name: \'Timepicker\',icon:\'ios-clock-outline\',component: _import(\'components/Timepicker\')},
                    {path: \'upload\',name: \'Upload上传\',icon:\'ios-cloud-upload-outline\',component: _import(\'components/Upload\')},
                  ]
      },
       {path: \'/charts\',name: \'echart图表\',redirect: \'/charts/shopchart\',icon:\'pie-graph\',
        component: {render (c) { return c(\'router-view\') }},
        children: [ {path: \'shopchart\',name: \'商场统计图表\',icon:\'stats-bars\',component: _import(\'charts/ShopChart\'), hidden:false, },
                    {path: \'radarchart\',name: \'雷达图\',icon:\'arrow-graph-up-right\',component: _import(\'charts/RadarChart\')},
                    {path: \'cakechart\',name: \'蛋糕销量图表\',icon:\'ios-analytics\',component: _import(\'charts/CakeChart\')}
                  ]
      },
      {path: \'/table\', name: \'表格综合实例\',icon:\'ios-paper\',component: _import(\'Table\'),meta: { role: [\'admin\'] }},
      {path: \'/jsontree\', name: \'JSON视图\',icon:\'merge\',component: _import(\'JsonTree\')},
      {path: \'/tabledetail/:id\',name: \'TableDetail\', hidden:true, component: _import(\'TableDetail\')},
      {path: \'/tinymce\',name: \'Tinymce编辑器\',icon:"android-document",component: _import(\'Tinymce\')},
      {path: \'/markdown\',name: \'Markdown\',icon:"android-list",component: _import(\'Markdown\')},
       {path: \'/wz\',name: \'WZ\',icon:"social-html5",component: _import(\'wz\')},
    ]
  },
  { path: \'*\', redirect: \'/pages/404\', hidden: true }

];
然后打开我们的浏览器进入到http://localhost:9001/#/wz
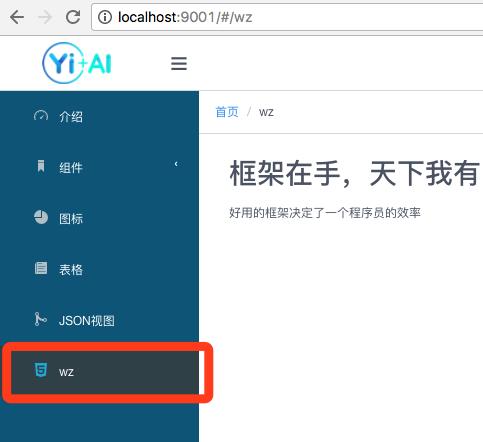
页面就显示出来了,而且侧边栏已经自动遍历可访问的路由生成列表项了。
很方便吧?
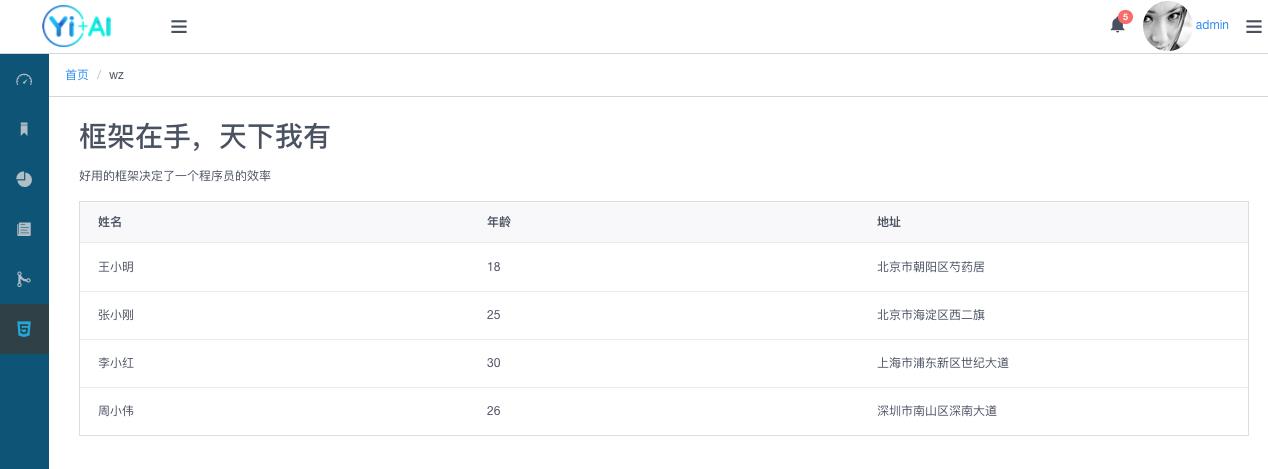
接下来我们进阶一下,看看如何做一个表格。
首先加入Table标签,
<Table :columns="columns1" :data="data1"></Table>
再配置列和data属性:
 export default {
        data () {
            return {
               columns1: [
                    {
                        title: \'姓名\',
                        key: \'name\'
                    },
                    {
                        title: \'年龄\',
                        key: \'age\'
                    },
                    {
                        title: \'地址\',
                        key: \'address\'
                    }
                ],
                data1: [
                    {
                        name: \'王小明\',
                        age: 18,
                        address: \'北京市朝阳区芍药居\'
                    },
                    {
                        name: \'张小刚\',
                        age: 25,
                        address: \'北京市海淀区西二旗\'
                    },
                    {
                        name: \'李小红\',
                        age: 30,
                        address: \'上海市浦东新区世纪大道\'
                    },
                    {
                        name: \'周小伟\',
                        age: 26,
                        address: \'深圳市南山区深南大道\'
                    }
                ]
            }
        },
      }
这样简单的表格就做好了
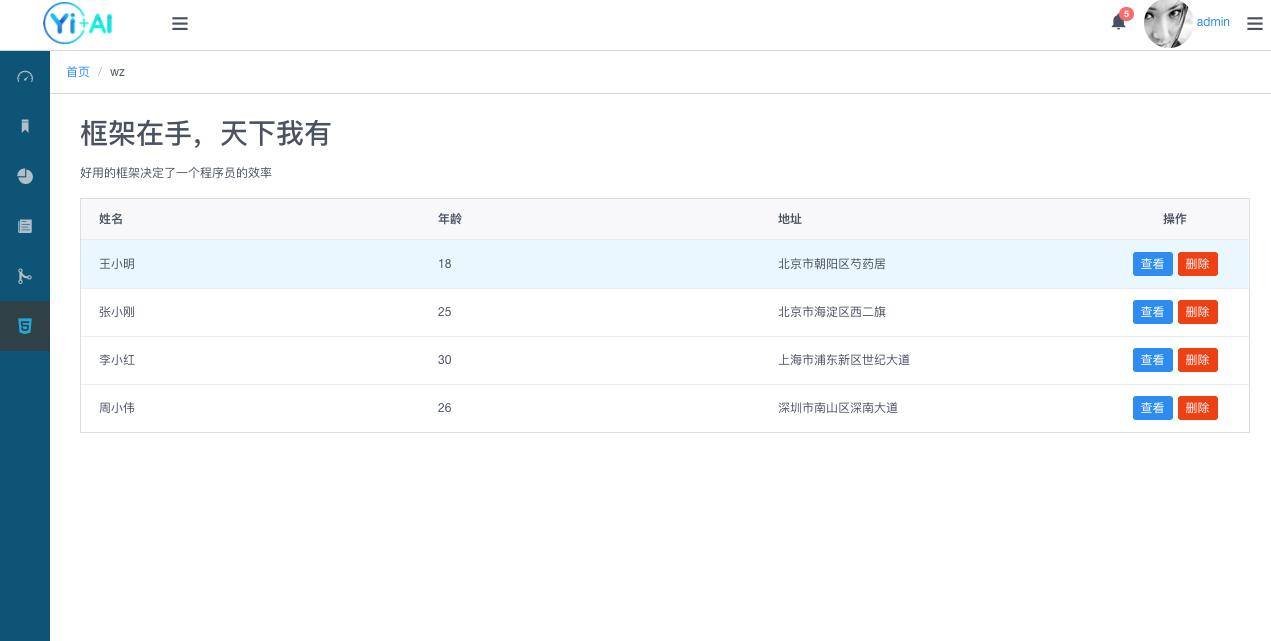
怎么在表格中加入按钮呢,比如查看,删除?
这就用到vue的render函数了。
在columns1中加入一个新的属性,是一个render函数。
{
                        title: \'操作\',
                        key: \'action\',
                        width: 150,
                        align: \'center\',
                        render: (h, params) => {
                            return h(\'div\', [
                                h(\'Button\', {
                                    props: {
                                        type: \'primary\',
                                        size: \'small\'
                                    },
                                    style: {
                                        marginRight: \'5px\'
                                    },
                                    on: {
                                        click: () => {
                                            this.show(params.index)
                                        }
                                    }
                                }, \'查看\'),
                                h(\'Button\', {
                                    props: {
                                        type: \'error\',
                                        size: \'small\'
                                    },
                                    on: {
                                        click: () => {
                                            this.remove(params.index)
                                        }
                                    }
                                }, \'删除\')
                            ]);
                        }
                    }
如果对render函数很陌生的话,移步vue文档学习一下render函数。
然后我们加入一些功能函数,实现查看和删除功能。
  methods: {
            show (index) {
                this.$Modal.info({
                    title: \'用户信息\',
                    content: `姓名:${this.data1[index].name}<br>年龄:${this.data1[index].age}<br>地址:${this.data1[index].address}`
                })
            },
            remove (index) {
                this.data1.splice(index, 1);
            }
        },
当我们点击查看就会出现一个对话框,点击删除就会移除这一行
大家有什么问题最好去我github提issues,文章评论评论较长时间才查看一次。
接下来的教程讲一下封装UI组件、router、webpack、node命令行构建工具等内容。
希望大家看了这系列教程都能制作出自己的前端框架,从而在工作中得心应手。
如果喜欢就点个start鼓励下作者吧。
github地址:vue-framework-wz
线上体验地址:立即体验
以上是关于一步步带你做vue后台管理框架——上手使用的主要内容,如果未能解决你的问题,请参考以下文章