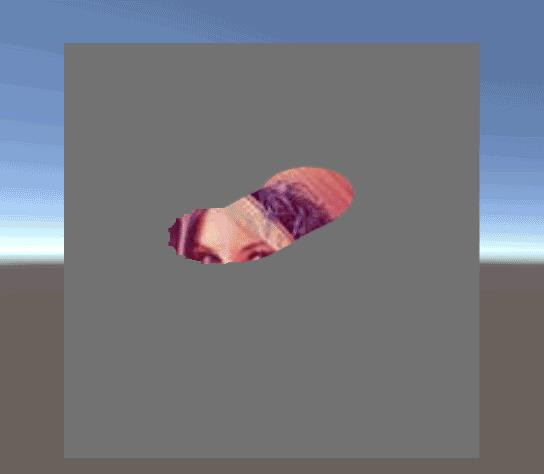
实现一个涂抹擦除效果
Posted HONT blog
tags:
篇首语:本文由小常识网(cha138.com)小编为大家整理,主要介绍了实现一个涂抹擦除效果相关的知识,希望对你有一定的参考价值。

涂抹还是满常见的效果。
要做涂抹,首先要存一张中间贴图作为mask。
然后需要两个shader,一个做mask一个做混合。
MaskShader:
Shader "Unlit/MaskShader"
{
    Properties
    {
        _MainTex ("Texture", 2D) = "white" {}
        _MaskDecalTex("Mask Decal Texture", 2D) = "white" {}
        _MaskOffset("Mask Offset", vector) = (0,0,0,0)
    }

    SubShader
    {
        Tags { "RenderType"="Opaque" }
        LOD 100

        Pass
        {
            CGPROGRAM
            #pragma vertex vert
            #pragma fragment frag
            // make fog work
            #pragma multi_compile_fog

            #include "UnityCG.cginc"

            struct appdata
            {
                float4 vertex : POSITION;
                float2 uv : TEXCOORD0;
            };

            struct v2f
            {
                float2 uv : TEXCOORD0;
                float4 vertex : SV_POSITION;
            };

            sampler2D _MainTex;
            float4 _MainTex_ST;
            float4 _MaskOffset;

            sampler2D _MaskDecalTex;

            v2f vert (appdata v)
            {
                v2f o;
                o.vertex = UnityObjectToClipPos(v.vertex);
                o.uv = TRANSFORM_TEX(v.uv, _MainTex);
                return o;
            }

            fixed4 frag (v2f i) : SV_Target
            {
                fixed4 r = tex2D(_MainTex, i.uv);

#if UNITY_UV_STARTS_AT_TOP
                float grabSign = -_ProjectionParams.x;
#else
                float grabSign = _ProjectionParams.x;
#endif

                half2 uv = float2(1, grabSign) * (i.uv - half2(0.5, 0.5)) / _MaskOffset.ww + half2(0.5, 0.5);

                fixed4 mask = tex2D(_MaskDecalTex, uv + _MaskOffset.xy);
                return r + mask;
            }
            ENDCG
        }
    }
}
BlendShader:
Shader "Unlit/BlendShader"
{
    Properties
    {
        _MainTex ("Texture", 2D) = "white" {}
        _SecondTex("Second Texture", 2D) = "white" {}
        _MaskTex("Mask Texture", 2D) = "white" {}
    }

    SubShader
    {
        Tags { "RenderType"="Opaque" }
        LOD 100

        Pass
        {
            CGPROGRAM
            #pragma vertex vert
            #pragma fragment frag
            // make fog work
            #pragma multi_compile_fog

            #include "UnityCG.cginc"

            struct appdata
            {
                float4 vertex : POSITION;
                float2 uv : TEXCOORD0;
            };

            struct v2f
            {
                float2 uv : TEXCOORD0;
                float4 vertex : SV_POSITION;
            };

            sampler2D _MainTex;
            float4 _MainTex_ST;

            sampler2D _SecondTex;
            sampler2D _MaskTex;

            v2f vert (appdata v)
            {
                v2f o;
                o.vertex = UnityObjectToClipPos(v.vertex);
                o.uv = TRANSFORM_TEX(v.uv, _MainTex);
                return o;
            }

            fixed4 frag (v2f i) : SV_Target
            {
                fixed4 col1 = tex2D(_MainTex, i.uv);
                fixed4 col2 = tex2D(_SecondTex, i.uv);

#if UNITY_UV_STARTS_AT_TOP
                float grabSign = -_ProjectionParams.x;
#else
                float grabSign = _ProjectionParams.x;
#endif

                half2 uv = float2(1, grabSign) * (i.uv - half2(0.5, 0.5)) + half2(0.5, 0.5);

                fixed4 mask = tex2D(_MaskTex, uv);
                return lerp(col1, col2, mask.a);
            }
            ENDCG
        }
    }
}
脚本(核心部分):
Vector4 viewPortPoint = Camera.main.WorldToViewportPoint(maskMappingPoint.position);

viewPortPoint -= new Vector4(0.5f, 0.5f);
viewPortPoint.w = maskMappingPoint.localScale.x;

if (mPersistMaskTex == null)
{
    mPersistMaskTex = new Texture2D(src.width, src.height, TextureFormat.RGBA32, false, true);
    for (int x = 0; x < mPersistMaskTex.width; x++)
        for (int y = 0; y < mPersistMaskTex.height; y++)
            mPersistMaskTex.SetPixel(x, y, new Color(0, 0, 0, 0));

    mPersistMaskTex.Apply();
}

maskMat.SetTexture("_MainTex", mPersistMaskTex);
maskMat.SetVector("_MaskOffset", viewPortPoint);
Graphics.Blit(mPersistMaskTex, maskRT, maskMat);

blendMat.SetTexture("_MainTex", src);
blendMat.SetTexture("_SecondTex", tempRT);
blendMat.SetTexture("_MaskTex", maskRT);
Graphics.Blit(src, des, blendMat);

var cacheActive = RenderTexture.active;

RenderTexture.active = maskRT;

mPersistMaskTex.ReadPixels(new Rect(0, 0, mPersistMaskTex.width, mPersistMaskTex.height), 0, 0);
mPersistMaskTex.Apply();

RenderTexture.active = cacheActive;
2018/11/18补充:近期实现了对涂抹像素的判断操作,涂抹到一定程度后则完成擦除:
以上是关于实现一个涂抹擦除效果的主要内容,如果未能解决你的问题,请参考以下文章