从 UIAlertView 到 UIAlertController
Posted alexZeng
tags:
篇首语:本文由小常识网(cha138.com)小编为大家整理,主要介绍了从 UIAlertView 到 UIAlertController相关的知识,希望对你有一定的参考价值。
在 ios8中,苹果提供了UIAlertController,以取代原有的 UIAlertView 和 UIActionSheet,以前的 UIAlertView是这样的:
1 UIAlertView *alertView = [[UIAlertView alloc]
2                            initWithTitle:@"DefaultStyle"
3                            message:@"the default alert view style"
4                            delegate:self
5                            cancelButtonTitle:@"Cancel"
6                            otherButtonTitles:@"OK", nil];
7
8 [alertView show];

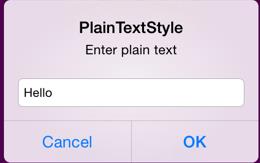
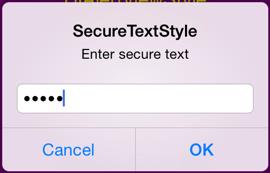
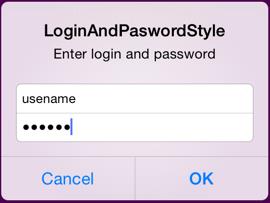
UIAlertView 有一个代理协议,可以执行按钮点击事件的回调,以及设置按钮是否可用等。
UIAlertController 的创建和 UIAlertView类似,但是可以在 preferredStyle 中选择是新建一个 alertView 还是 actionSheet.
1.alertView
1 UIAlertController *alertController = [UIAlertController
2                               alertControllerWithTitle:alertTitle
3                               message:alertMessage
4                               preferredStyle:UIAlertControllerStyleAlert];
这样创建的 UIAlertController 并没有按钮,需要创建 UIAlertAction(默认的样式有三种:default, cancel 和 destructive(默认为红色)),并添加到 UIAlertController 中来。UIAlertAction显示的顺序是和添加的顺序相同的。注意:取消按钮只能有一个!
 1 UIAlertAction *cancelAction = [UIAlertAction
 2             actionWithTitle:NSLocalizedString(@"Cancel", @"Cancel action")
 3                       style:UIAlertActionStyleCancel
 4                     handler:^(UIAlertAction *action)
 5                     {
 6                       NSLog(@"Cancel action");
 7                     }];
 8
 9 UIAlertAction *okAction = [UIAlertAction
10             actionWithTitle:NSLocalizedString(@"OK", @"OK action")
11                       style:UIAlertActionStyleDefault
12                     handler:^(UIAlertAction *action)
13                     {
14                       NSLog(@"OK action");
15                     }];
16
17 [alertController addAction:cancelAction];
18 [alertController addAction:okAction];
添加文本框:
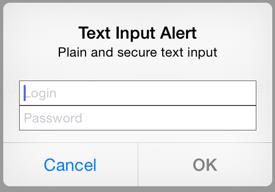
UIAlertController添加文件筐也更为方便,可以在添加的同时配置文本框的各项设置。
 1 UIAlertController *alertController = [UIAlertController
 2                     alertControllerWithTitle:alertTitle
 3                                      message:alertMessage
 4                               preferredStyle:UIAlertControllerStyleAlert];
 5
 6 [alertController addTextFieldWithConfigurationHandler:^(UITextField *textField)
 7  {
 8    textField.placeholder = NSLocalizedString(@"LoginPlaceholder", @"Login");
 9  }];
10
11 [alertController addTextFieldWithConfigurationHandler:^(UITextField *textField)
12  {
13    textField.placeholder = NSLocalizedString(@"PasswordPlaceholder", @"Password");
14    textField.secureTextEntry = YES;
15  }];
如果要产生类似原来的alertViewShouldEnableOtherButton:的效果,可以使用以下的办法:
[alertController addTextFieldWithConfigurationHandler:^(UITextField *textField)
 {
     textField.placeholder = NSLocalizedString(@"LoginPlaceholder", @"Login");
    //给文本框添加一个文字改变的事件
     [textField addTarget:self
                   action:@selector(alertTextFieldDidChange:)
         forControlEvents:UIControlEventEditingChanged];
 }];
//在开始展示 alertController 之前禁止使用按钮
okAction.enabled = NO;

//文本框的文字改变的事件
- (void)alertTextFieldDidChange:(UITextField *)sender
{
  UIAlertController *alertController = (UIAlertController *)self.presentedViewController;
  if (alertController)
  {
    UITextField *login = alertController.textFields.firstObject;
    UIAlertAction *okAction = alertController.actions.lastObject;
    okAction.enabled = login.text.length > 2;
  }
}
效果如下:
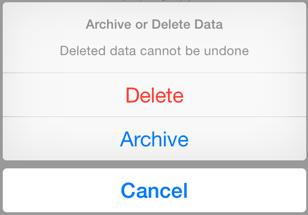
2.Action Sheet
创建方法和之前那个例子类似,选一下preferredStyle就好,再添加 action。
1 UIAlertController *alertController = [UIAlertController
2                alertControllerWithTitle:alertTitle
3                                 message:alertMessage
4                          preferredStyle:UIAlertControllerStyleActionSheet];
1 UIAlertAction *cancelAction = ...;  // UIAlertActionStyleCancel
2 UIAlertAction *deleteAction = ...;  // UIAlertActionStyleDestructive
3 UIAlertAction *archiveAction = ...; // UIAlertActionStyleDefault
4
5 [alertController addAction:cancelAction];
6 [alertController addAction:deleteAction];
7 [alertController addAction:archiveAction];
8 [self presentViewController:alertController animated:YES completion:nil];
效果如下:
如果要设置标题的属性和下面的 actionSheet 的字体的颜色,可以使用 KVC 的方法:
1 [alert setValue:attrDict forKey:@"attributedTitle"];
1 [action setValue:[UIColor colorWithHexColor:@"#2a2a2a"] forKey:@"_titleTextColor"];
2         [alertController addAction:action];
如果要设置 actionSheet 的文字大小,就只能设置全局的大小了:
1 UILabel *appearanceLabel = [UILabel appearanceWhenContainedIn:UIAlertController.class, nil];
2         UIFont *font = [UIFont systemFontOfSize:15];
3         [appearanceLabel setAppearanceFont:font];
设置图片
1 UIImage *accessoryImage = [UIImage imageNamed:@"someImage"];
2 [action setValue:accessoryImage forKey:@"image"];
以上是关于从 UIAlertView 到 UIAlertController的主要内容,如果未能解决你的问题,请参考以下文章