heartbeat+ipvs+keepalived
Posted
tags:
篇首语:本文由小常识网(cha138.com)小编为大家整理,主要介绍了heartbeat+ipvs+keepalived相关的知识,希望对你有一定的参考价值。
1.高可用Heartbeat
Server1和server4安装资源包
heartbeat-3.0.4-2.el6.x86_64.rpm
heartbeat-devel-3.0.4-2.el6.x86_64.rpm
heartbeat-libs-3.0.4-2.el6.x86_64.rpm
ldirectord-3.9.5-3.1.x86_64.rpm
yum install -y heartbeat-*
[[email protected] ha.d]# cd /usr/share/doc/heartbeat-3.0.4/
[[email protected] heartbeat-3.0.4]# cp ha.cf authkeys haresources /etc/ha.d/
[[email protected] heartbeat-3.0.4]# cd /etc/ha.d
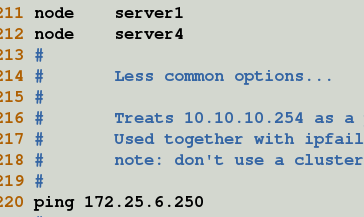
[[email protected] ha.d]# vim ha.cf
[[email protected] ha.d]# vim authkeys
[[email protected] ha.d]# chmod 600 authkeys
[[email protected] ha.d]# vim haresources
[[email protected] ha.d]# scp ha.cf authkeys haresources server4:/etc/ha.d
[[email protected] ha.d]# /etc/init.d/heartbeat start
Server4做相同的操作
[[email protected] ha.d]# /etc/init.d/heartbeat start
测试:
[[email protected] ha.d]# /etc/init.d/heartbeat stop
[[email protected] ha.d]# /etc/init.d/heartbeat start
1.ipvs负载均衡
首先停掉server1和server4上的heartbeat
Server1上的操作,并且server1做调度器
[[email protected] ~]# yum install -y ldirectord-3.9.5-3.1.x86_64.rpm
[[email protected] ~]# cd /usr/share/doc/ldirectord-3.9.5/
[[email protected] ldirectord-3.9.5]# cp ldirectord.cf /etc/ha.d
[[email protected] ~]# yum install -y ipvsadm
[[email protected] ~]# ipvsadm -L
[[email protected] ~]# ipvsadm -C ##清除规则
[[email protected] ~]# ipvsadm -A -t 172.25.6.100:80 -s rr ##rr表示采用轮询调度算法,添加新的虚拟ip
[[email protected] ~]# ip addr add 172.25.6.100/24 dev eth0
[[email protected] ~]# ip addr
[[email protected] ~]# ipvsadm -a -t 172.25.6.100:80 -r 172.25.6.2:80 -g ##添加新规则
[[email protected] ~]# ipvsadm -a -t 172.25.6.100:80 -r 172.25.6.3:80 -g
[[email protected] ~]# /etc/init.d/ipvsadm save ##保存添加的规则
[[email protected] ~]# ipvsadm -L ##显示内核中虚拟服务器列表
[[email protected] ~]# /etc/init.d/httpd restart
Server2上的操作
[[email protected] ~]# ip addr add 172.25.6.100/32 dev eth0
[[email protected] ~]# ip addr
[[email protected] ~]# yum install -y arptables_jf
[[email protected] html]# arptables -A IN -d 172.25.6.100 -j DROP
[[email protected] html]# arptables -A OUT -s 172.25.6.200 -j mangle --mangle-ip-s 172.25.6.2
[[email protected] html]# /etc/init.d/arptables_jf save
[[email protected] html]# /etc/init.d/httpd restart
Server3上的操作
[[email protected] ~]# /etc/init.d/httpd start
[[email protected] ~]# ip addr add 172.25.6.100/32 dev eth0 ##给内网网卡添加ip
[[email protected] ~]# ip addr
[[email protected] ~]# yum install -y arptables_jf
[[email protected] html]# arptables -A IN -d 172.25.6.100 -j DROP ##给这个地址追加策略
[[email protected] html]# arptables -A OUT -s 172.25.6.100 -j mangle --mangle-ip-s 172.25.6.3 ##追加策略,由100源地址跳到3上
[[email protected] ~]# /etc/init.d/arptables_jf save ##保存添加的策略
[[email protected] ~]# /etc/init.d/arptables_jf start
[[email protected] ~]# /etc/init.d/httpd restart
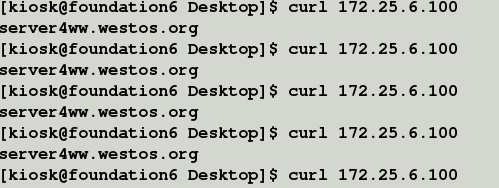
测试:
2.高可用与负载均衡
[[email protected] ~]# yum install -y ldirectord-3.9.5-3.1.x86_64.rpm
[[email protected] ~]# cd /etc/ha.d/
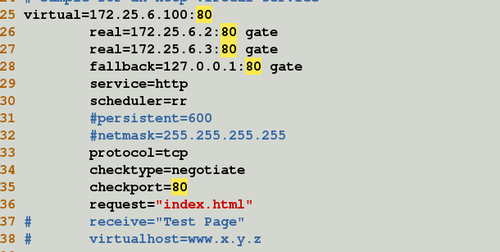
[[email protected] ha.d]# vim ldirectord.cf
[[email protected] ha.d]# ipvsadm -C ##清除策略
[[email protected] ha.d]# ipvsadm -L ##查看策略
[[email protected] ha.d]# ip addr del 172.25.6.100/24 dev eth0 ##删除内网网卡上的ip
[[email protected] ha.d]# vim haresources
[[email protected] ha.d]# scp haresources ldirectord.cf 172.25.6.4:/etc/ha.d/ ##server4上做与server1相同的操作
打开server4上的heartbeat替代server1的heartbeat
[[email protected] html]# /etc/init.d/httpd restart
测试:
如果server2和server3的httpd打开
如果server2和server3 httpd关闭,则访问heartbeat所在的主机
4.keepalived
关闭server1和server4的heartbeat,打开server2和server3的httpd
Server1上的操作
[[email protected] ~]# tar zxf keepalived-1.2.20.tar.gz
[[email protected] ~]#cd keepalived-1.2.20/
[[email protected] keepalived-1.2.20]# ./configure --prefix=/usr/local/keepalived/ ##解译到指定路径
[[email protected] keepalived-1.2.20]# make && make install
[[email protected] keepalived-1.2.20]# cd /usr/local/keepalived/
[[email protected] local]# scp -r keepalived/ 172.25.6.4:/usr/local/
[[email protected] sbin]#
ln -s /usr/local/keepalived/sbin/keepalived /sbin/
[[email protected] etc]# ln -s /usr/local/keepalived/etc/keepalived/ /etc/
[[email protected] sysconfig]#
ln -s /usr/local/keepalived/etc/sysconfig/keepalived /etc/sysconfig/
[[email protected] sysconfig]#
ln -s /usr/local/keepalived/etc/rc.d/init.d/keepalived /etc/init.d/
[[email protected] init.d]# chmod +x keepalived
[[email protected] init.d]# cd /etc/keepalived/
[[email protected] keepalived]# ls
keepalived.conf samples
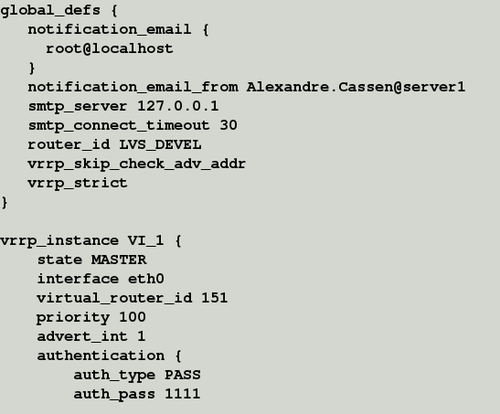
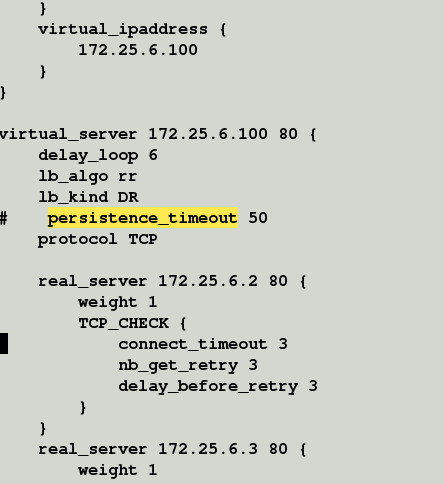
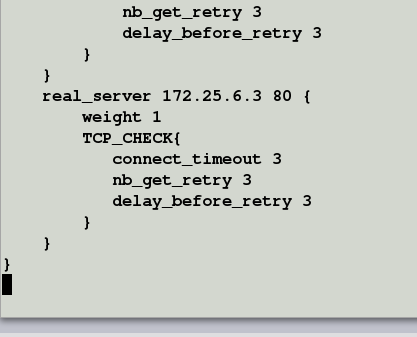
[[email protected] keepalived]# vim keepalived.conf
[[email protected] keepalived]# /etc/init.d/keepalived start
将修改的配置文件发送到server4同位置
Server4上的操作
[[email protected] keepalived]#
ln -s /usr/local/keepalived/sbin/keepalived /sbin/
[[email protected] keepalived]#
ln -s /usr/local/keepalived/etc/rc.d/init.d/keepalived /etc/init.d
[[email protected] keepalived]#
chmod +x /usr/local/keepalived/etc/rc.d/init.d/keepalived
[[email protected] keepalived]#
ln -s /usr/local/keepalived/etc/sysconfig/keepalived /
etc/sysconfig/
[[email protected] keepalived]# /etc/init.d/keepalived start
[[email protected] keepalived]# mkdir /etc/keepalived/
将文件中的server1改为server4,state改为backup,
两者的virtual_router_id一定不同,server4的priority值小于server1的值
将keepalived进行重启
测试:
以上是关于heartbeat+ipvs+keepalived的主要内容,如果未能解决你的问题,请参考以下文章


