stm32_DMA采集一个AD数据_并通过DMA向串口发送
Posted 优秀不够,你是否无可替代
tags:
篇首语:本文由小常识网(cha138.com)小编为大家整理,主要介绍了stm32_DMA采集一个AD数据_并通过DMA向串口发送相关的知识,希望对你有一定的参考价值。
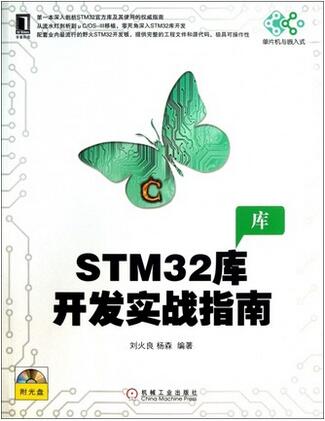
这是以前学32的时候写的,那时候学了32之后感觉32真是太强大了,比51强的没影。关于dma网上有许多的资料,关于dma采集ad网上也有很多。亲们搜搜,这里只贴代码了,其实我也想详详细细地叙述一番,但是自己本身打字就慢,还有好多事情要做!代码是我亲自都在板子上测试过的,,当然粘贴/复制过去可能也不会尽如人意,知识这东西总是有许多道不清说不明的东西在里头,往往总是不经一番彻骨寒,哪得梅花扑鼻香。推荐一本书吧!这是野火出的。

这本书自从在图书馆借来就从来没有再放回去,总是在续借。像是在打广告了
#include <stm32f10x.h>
#include "ADC1.h"
#include "DMA1.h"
#include "USART1.h"
#include "time.h"
#include "stdio.h"

extern uint32_t SendBuff;
float ADC_Received;
uint32_t ADC_Received1;
uint8_t ADC_Received2[11];

//printf函数重新定向,方便在程序中使用
int fputc(int ch, FILE *f)
{
    USART_SendData(USART1, (unsigned char) ch);

    while (!(USART1->SR & USART_FLAG_TXE));

    return (ch);
}

void usart_putchar(uint8_t ch)
{
  USART_SendData(USART1,ch);
  while(USART_GetFlagStatus(USART1,USART_FLAG_TXE) == RESET);
}

int main()
{
    ADC1_Config();
    DMA_Config();
    USART1_Config();
 while(1)
 {

//      ADC_Received = (float)ADC_GetConversionValue(ADC1)*3.3/4069;
//      ADC_Received1 = ADC_Received * 1000000000;

     ADC_Received = (float)SendBuff*3.3/4069;
     ADC_Received1 = ADC_Received * 1000000000;

     ADC_Received2[0]=(ADC_Received1/1000000000 + 0x30);
     //usart_putchar(0x2e);
     ADC_Received2[1]=(ADC_Received1%1000000000/100000000 + 0x30);
   ADC_Received2[2]=(ADC_Received1%1000000000%100000000/10000000 + 0x30);
   ADC_Received2[3]=(ADC_Received1%1000000000%100000000%10000000/1000000 + 0x30);
   ADC_Received2[4]=(ADC_Received1%1000000000%100000000%10000000%1000000/100000 + 0x30);
   ADC_Received2[5]=(ADC_Received1%1000000000%100000000%10000000%1000000%100000/10000 + 0x30);
     ADC_Received2[6]=(ADC_Received1%1000000000%100000000%10000000%1000000%100000%10000/1000 + 0x30);
     ADC_Received2[7]=(ADC_Received1%1000000000%100000000%10000000%1000000%100000%10000%1000/100 + 0x30);
     ADC_Received2[8]=(ADC_Received1%1000000000%100000000%10000000%1000000%100000%10000%1000%100/10 + 0x30);
     ADC_Received2[9]=(ADC_Received1%10 + 0x30);
     ADC_Received2[10]=0x0d;

     USART_DMACmd(USART1, USART_DMAReq_Tx, ENABLE);
//      delay_ms(1000);
//      USART_DMACmd(USART1, USART_DMAReq_Tx, DISABLE);
//      delay_ms(1000);
//     ADC_Received = (float) SendBuff/4069*3.3;

//      ADC_Received = (u16)ADC1 -> DR;
//      ADC_Received = (float)ADC_Received/4069*3.3;
//      printf("\r\n v = %f V \r\n",ADC_Received);
//        while(!ADC_GetFlagStatus(ADC1, ADC_FLAG_EOC ));

//      usart_putchar(‘\r‘);
//      usart_putchar(‘\n‘);

//      usart_putchar(0x0d);
//      usart_putchar(0x0a);

//      printf("\r");
//      printf("\n");
//      printf("\r\n V = %fv\r\n",ADC_Received);

 }
}
#include "ADC1.h"

void ADC1_Config(void)
{
  ADC_InitTypeDef ADC_InitStructure;
    RCC_APB2PeriphClockCmd(RCC_APB2Periph_ADC1, ENABLE);
    ADC1_Gpio_Config();

    ADC_DeInit(ADC1); //复位 ADC1,将外设 ADC1 的全部寄存器重设为缺省值

    // ADC1 配置
  ADC_InitStructure.ADC_Mode = ADC_Mode_Independent; //ADC1工作在独立模式
  ADC_InitStructure.ADC_ScanConvMode = ENABLE;//使能扫描
  ADC_InitStructure.ADC_ContinuousConvMode = ENABLE;;//ADC转换工作在连续模式
  ADC_InitStructure.ADC_ExternalTrigConv = ADC_ExternalTrigConv_None;//由软件控制转换
  ADC_InitStructure.ADC_DataAlign = ADC_DataAlign_Right;//转换数据右对齐
  ADC_InitStructure.ADC_NbrOfChannel = 1;//转换通道为通道1
  ADC_Init(ADC1, &ADC_InitStructure); //初始化ADC

  //ADC1选择信道0,顺续等级1,采样时间239.5个周期
  ADC_RegularChannelConfig(ADC1, ADC_Channel_0, 1, ADC_SampleTime_28Cycles5);

    //打开ADC1
  ADC_Cmd(ADC1, ENABLE);

 //重置ADC1校准寄存器
  ADC_ResetCalibration(ADC1);
 //等待ADC1校准重置完成
  while(ADC_GetResetCalibrationStatus(ADC1));

  //开始ADC1校准
  ADC_StartCalibration(ADC1);

 //等待ADC1校准完成
  while(ADC_GetCalibrationStatus(ADC1));

 //使能ADC1软件开始转换
  ADC_SoftwareStartConvCmd(ADC1, ENABLE);

    //配置ADC时钟=PCLK2 1/6    12MHz
  RCC_ADCCLKConfig(RCC_PCLK2_Div6);

    //使能ADC1模块DMA
  ADC_DMACmd(ADC1, ENABLE);
}

static void ADC1_Gpio_Config(void)
{
  GPIO_InitTypeDef GPIO_InitStructure;
    RCC_APB2PeriphClockCmd(RCC_APB2Periph_GPIOA, ENABLE);

    GPIO_InitStructure.GPIO_Mode = GPIO_Mode_AIN;
    GPIO_InitStructure.GPIO_Pin = GPIO_Pin_0;
    GPIO_Init(GPIOA , &GPIO_InitStructure);

}
#include "DMA1.h"

/* 其他函数里 USART_DMACmd(USART1, USART_DMAReq_Tx, ENABLE);     */
uint32_t  SendBuff;
extern float ADC_Received;
extern uint8_t ADC_Received2[11];
//描述  :DMA 串口的初始化配置

void DMA_Config(void)
{
      //初始化结构体
    DMA_InitTypeDef DMA_InitStructure;

      //开启DMA时钟
      RCC_AHBPeriphClockCmd(RCC_AHBPeriph_DMA1, ENABLE);

      //配置DMA中断
      NVIC_Config();

       //设置DMA源:地址

    DMA_InitStructure.DMA_PeripheralBaseAddr = (u32)&ADC1 -> DR;
      //*内存地址(要传输的变量的指针)
    DMA_InitStructure.DMA_MemoryBaseAddr = (u32)&SendBuff;

      //外设作为数据传输的来源
    DMA_InitStructure.DMA_DIR = DMA_DIR_PeripheralSRC;

      //指定 DMA 通道的 DMA 缓存的大小,单位为数据单位。
    DMA_InitStructure.DMA_BufferSize = 1;

      //*外设地址不增
    DMA_InitStructure.DMA_PeripheralInc = DMA_PeripheralInc_Disable;

      //*内存地址不增
    DMA_InitStructure.DMA_MemoryInc = DMA_MemoryInc_Disable;

      //*外设数据单位数据宽度为 16 位
    DMA_InitStructure.DMA_PeripheralDataSize = DMA_PeripheralDataSize_HalfWord;

      //*内存数据单位数据宽度为 16 位
    DMA_InitStructure.DMA_MemoryDataSize = DMA_MemoryDataSize_HalfWord;

      //*DMA模式:一次传输/循环
//         DMA_Mode_Circular 工作在循环缓存模式
//    DMA_Mode_Normal 工作在正常缓存模式
//     DMA_InitStructure.DMA_Mode = DMA_Mode_Normal ;
    DMA_InitStructure.DMA_Mode = DMA_Mode_Circular;

      //*优先级:高
    DMA_InitStructure.DMA_Priority = DMA_Priority_High;

      //*禁止内存到内存的传输
    DMA_InitStructure.DMA_M2M = DMA_M2M_Disable;

      //*配置DMA1的1通道
    DMA_Init(DMA1_Channel1, &DMA_InitStructure);

      //使能DMA
      DMA_Cmd (DMA1_Channel1,ENABLE);

    //配置DMA发送完成后产生中断
//       DMA_ITConfig(DMA1_Channel1,DMA_IT_TC,ENABLE);

//****************************************************///
//****************************************************///
//****************************************************///

//设置DMA源:地址
    DMA_InitStructure.DMA_PeripheralBaseAddr = (u32)&USART1 -> DR;
      //*内存地址(要传输的变量的指针)
    DMA_InitStructure.DMA_MemoryBaseAddr = (u32)ADC_Received2;

      //外设作为数据传输的目的地
    DMA_InitStructure.DMA_DIR = DMA_DIR_PeripheralDST;

      //指定 DMA 通道的 DMA 缓存的大小,单位为数据单位。
    DMA_InitStructure.DMA_BufferSize = 11;

      //*外设地址不增
    DMA_InitStructure.DMA_PeripheralInc = DMA_PeripheralInc_Disable;

      //*内存地址不增
    DMA_InitStructure.DMA_MemoryInc = DMA_MemoryInc_Enable;

      //*外设数据单位数据宽度为 16 位
    DMA_InitStructure.DMA_PeripheralDataSize = DMA_PeripheralDataSize_Byte;

      //*内存数据单位数据宽度为 16 位
    DMA_InitStructure.DMA_MemoryDataSize = DMA_MemoryDataSize_Byte;

      //*DMA模式:一次传输/循环
//         DMA_Mode_Circular 工作在循环缓存模式
//    DMA_Mode_Normal 工作在正常缓存模式
//     DMA_InitStructure.DMA_Mode = DMA_Mode_Normal ;
    DMA_InitStructure.DMA_Mode = DMA_Mode_Circular;

      //*优先级:中
    DMA_InitStructure.DMA_Priority = DMA_Priority_Medium;

      //*禁止内存到内存的传输
    DMA_InitStructure.DMA_M2M = DMA_M2M_Disable;

      //*配置DMA1的4通道
    DMA_Init(DMA1_Channel4, &DMA_InitStructure);

      //使能DMA
      DMA_Cmd (DMA1_Channel4,ENABLE);

    //配置DMA发送完成后产生中断
//       DMA_ITConfig(DMA1_Channel1,DMA_IT_TC,ENABLE);
}
#include "time.h"

/****************
延时多少个 1/72 us
****************/
void delay_1_72us(uint32_t time)
{
  SysTick -> LOAD = (u32) time; //定时器赋初值

    SysTick -> CTRL = 0x00000005; //选择72MHz 并 打开定时器

    while(!(SysTick -> CTRL & 0x00010000));//等待计数到零

    SysTick -> CTRL = 0x00000004;//关闭定时器

}

void delay_ms(u32 time)
{
 while(time -- )
    {
        delay_1_72us(72000);
   }

}
#include "USART1.h"


//描述  :USART1 GPIO 配置,工作模式配置。115200 8-N-1

void USART1_Config(void)
{
    GPIO_InitTypeDef GPIO_InitStructure;
    USART_InitTypeDef USART_InitStructure;

    // 打开  USART1 的时钟
    RCC_APB2PeriphClockCmd(RCC_APB2Periph_USART1 | RCC_APB2Periph_GPIOA, ENABLE);


    // USART1 Tx (PA_9)
    GPIO_InitStructure.GPIO_Pin = GPIO_Pin_9;
    GPIO_InitStructure.GPIO_Mode = GPIO_Mode_AF_PP;//复用推挽输出
    GPIO_InitStructure.GPIO_Speed = GPIO_Speed_50MHz;
    GPIO_Init(GPIOA, &GPIO_InitStructure);
    // USART1 Tx (PA_10)
    GPIO_InitStructure.GPIO_Pin = GPIO_Pin_10;
    GPIO_InitStructure.GPIO_Mode = GPIO_Mode_IN_FLOATING;//浮空输入
    GPIO_Init(GPIOA, &GPIO_InitStructure);

    /* USART1 mode config */
    USART_InitStructure.USART_BaudRate = 115200;
    USART_InitStructure.USART_WordLength = USART_WordLength_8b;
    USART_InitStructure.USART_StopBits = USART_StopBits_1;
    USART_InitStructure.USART_Parity = USART_Parity_No ;
    USART_InitStructure.USART_HardwareFlowControl = USART_HardwareFlowControl_None;
    USART_InitStructure.USART_Mode = USART_Mode_Rx | USART_Mode_Tx;
    USART_Init(USART1, &USART_InitStructure);
    USART_Cmd(USART1, ENABLE);
}
以上是关于stm32_DMA采集一个AD数据_并通过DMA向串口发送的主要内容,如果未能解决你的问题,请参考以下文章