一步一步学Vue
Posted
tags:
篇首语:本文由小常识网(cha138.com)小编为大家整理,主要介绍了一步一步学Vue相关的知识,希望对你有一定的参考价值。
接上篇,在本篇中,我们将要实现如下,功能,编辑和查询,我们当前的todolist程序,和线上其它的demo程序不同,我们会对其进行增删改查的基本操作,之后进行进一步的完善,按照常规的系统使用经验,一般我们新增和编辑都是在模态框中处理,这里我们不会去构建复杂的模态框,只用一个简单的div层来代替,后期接下来的文章中我们会重复造轮子,构建我们自己的轻量级框架(UI库)。
首先,我们对我们的页面结构进行一下简单的调整,加入bootstrap只是为了让页面不那么赤裸裸,对其它不会有任何影响
<!DOCTYPE html>
<html lang="en">

<head>
    <meta charset="UTF-8">
    <meta name="viewport" content="width=device-width, initial-scale=1.0">
    <meta http-equiv="X-UA-Compatible" content="ie=edge">
    <title>demo1</title>
    <script src="https://cdn.bootcss.com/vue/2.4.1/vue.js"></script>
    <link href="https://cdn.bootcss.com/bootstrap/4.0.0-alpha.6/css/bootstrap.css" rel="stylesheet">

</head>

<body class="container">
    <div id="app" class=\'row\'>
        <div class="col-md-6">
            <table class="table table-bordered">
                <tr>
                    <th>title</th>
                    <th>desc</th>
                    <th></th>
                </tr>
                <tr v-for="(todoItem,index) in todolist">
                    <td>{{todoItem.title}}</td>
                    <td>{{todoItem.desc}}</td>
                    <td><input type="button" value="remove" @click="remove(index)" class="btn btn-danger" /></td>
                </tr>
            </table>
        </div>
        <div class="col-md-6">

            <div class="form-inline">
                <label for="title" class="control-label col-md-4">title:</label>
                <input type="text" v-model="title" class="form-control col-md-8">
            </div>
            <div class="form-inline">
                <label for="desc" class="control-label col-md-4">desc</label>
                <input type="text" v-model="desc" class="form-control col-md-8">
            </div>
            <div class="form-inline">
                <input type="button" value="OK" v-on:click="addItem()" class="btn btn-primary offset-md-10" />

            </div>

        </div>


    </div>
    <script>
        var TodoItem = function (title, desc) {
            this.title = title;
            this.desc = desc;
        }
        new Vue({
            el: \'#app\',
            data: {
                todolist: [],
                title: \'\',
                desc: \'\'
            },
            methods: {
                addItem: function () {
                    this.todolist.push(new TodoItem(this.title, this.desc))

                    this.title = this.desc = \'\';

                },
                remove: function (index) {
                    this.todolist.splice(index, 1);
                }

            }
        })
    </script>
</body>

</html>
js没有任何变化,只是引入了bootstrap4之后,对html结构进行了微调整,由于我们需要增加编辑操作,我们把增加编辑操作归纳为以下几个步骤:
1、增加编辑按钮;
2、点击编辑按钮绑定所对应todoitem到表单进行编辑
3、点击表单中OK按钮,对编辑结果进行应用。
注意:这里需要区分,在点击OK按钮时,进行的是新增操作还是编辑操作,我们对我们数据结构加入自增ID来标示,如果编辑项目有ID,则为保存编辑操作,如果不存在ID则为新增保存操作,对我们的数据结构进行以下微调,由于新增了ID项目,那么在data属性中也要增加ID属性,这样每次新增属性都要直接修改data属性,这就是变化点,下面我们对变化点进行简单封装,修改代码如下:
 data: {
                todolist: [],
                todoItem:{
                    id:\'\',
                    title:\'\',
                    desc:\'\'
                }
            },
另外我们需要实现自增ID,这里采用最直接的方式,全局ID,使其自增即可,对TodoItem进行简单的闭包处理:
  var TodoItem = (function () {
            var id = 1;
            return function (title, desc) {
                this.title = title;
                this.desc = desc;

                this.id = id++;
            }
        })();
为了适应新数据结构的变化,则其它修改部分整体贴出来,变化部分见黄色:
<!DOCTYPE html>
<html lang="en">

<head>
    <meta charset="UTF-8">
    <meta name="viewport" content="width=device-width, initial-scale=1.0">
    <meta http-equiv="X-UA-Compatible" content="ie=edge">
    <title>demo1</title>
    <script src="https://cdn.bootcss.com/vue/2.4.1/vue.js"></script>
    <link href="https://cdn.bootcss.com/bootstrap/4.0.0-alpha.6/css/bootstrap.css" rel="stylesheet">

</head>

<body class="container">
    <div id="app" class=\'row\'>
        <div class="col-md-6">
            <table class="table table-bordered">
                <tr>
                    <th></th>
                    <th>title</th>
                    <th>desc</th>
                    <th></th>
                </tr>
                <tr v-for="(todoItem,index) in todolist">
                    <th>{{todoItem.id}}</th>
                    <td>{{todoItem.title}}</td>
                    <td>{{todoItem.desc}}</td>
                    <td><input type="button" value="remove" @click="remove(index)" class="btn btn-danger" /></td>
                </tr>
            </table>
        </div>
        <div class="col-md-6">

            <div class="form-inline">
                <label for="title" class="control-label col-md-4">title:</label>
                <input type="hidden" v-bind:value="todoItem.id" />
                <input type="text" v-model="todoItem.title" class="form-control col-md-8">
            </div>
            <div class="form-inline">
                <label for="desc" class="control-label col-md-4">desc</label>
                <input type="text" v-model="todoItem.desc" class="form-control col-md-8">
            </div>
            <div class="form-inline">
                <input type="button" value="OK" v-on:click="addItem()" class="btn btn-primary offset-md-10" />

            </div>

        </div>


    </div>
    <script>
        var TodoItem = (function () {
            var id = 1;
            return function (title, desc) {
                this.title = title;
                this.desc = desc;

                this.id = id++;
            }
        })();
        new Vue({
            el: \'#app\',
            data: {
                todolist: [],
                todoItem: {
                    id: \'\',
                    title: \'\',
                    desc: \'\'
                }
            },
            methods: {
                addItem: function () {
                    // this.todolist.push(new TodoItem(this.title, this.desc))
                    this.todolist.push(
                        new TodoItem(
                            this.todoItem.title,
                            this.todoItem.desc
                        )
                    );

                    this.todoItem={};

                },
                remove: function (index) {
                    this.todolist.splice(index, 1);
                }

            }
        })
    </script>
</body>

</html>
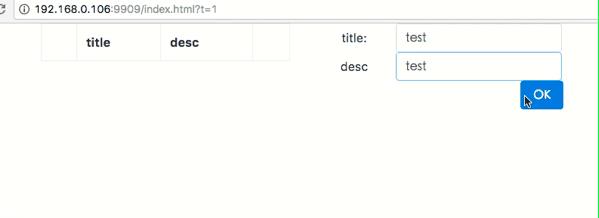
刷新页面,测试效果如下:

自增ID已经完成,那么添加编辑时绑定,按照上面的步骤,先添加编辑按钮,在删除按钮后添加编辑按钮,并在methods对象中增加对应的回调函数,对edit操作进行响应,函数中主要实现对todoItem对象进行绑定操作,具体代码修改如下:
    <table class="table table-bordered">
                <tr>
                    <th></th>
                    <th>title</th>
                    <th>desc</th>
                    <th></th>
                </tr>
                <tr v-for="(todoItem,index) in todolist">
                    <th>{{todoItem.id}}</th>
                    <td>{{todoItem.title}}</td>
                    <td>{{todoItem.desc}}</td>
                    <td>
                        <input type="button" value="remove" @click="remove(index)" class="btn btn-danger" />
                        <input type="button" value="edit" @click="edit(todoItem.id)" class="btn btn-info" />
                    </td>
                </tr>
            </table>
 methods: {
                edit: function (id) {
                    //找到id值等于所传参数的todoitem
                    var obj = this.todolist.filter(v => v.id === id)[0];
                    //对数据进行绑定,则数据会响应到表单上
                    this.todoItem = obj;
                },
            ...省略其它
}
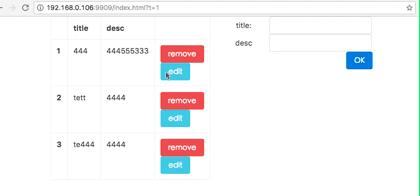
这样有没有问题呢?我们运行看一下效果:

从运行结果上看,我们点击edit操作,的确完成了绑定,但是在我们修改编辑,还没有点击OK按钮的情况下,表单中的变化已经提现到了列表中,这就不符合正常逻辑了,为什么会有这样的情况呢,原因就在于this.todoItem=obj;这句代码就是所谓的引用赋值,所以todoitem和obj指向的是同一个地址,则对this.todoItem的修改,会直接反应到obj上,也就是todoList中的这个元素上,所以在列表中会直接提现出来,避免这种情况的发生的方法,只要避免饮用赋值即可,所以对上述代码进行如下修改:
 //找到id值等于所传参数的todoitem
                    var obj = this.todolist.filter(v => v.id === id)[0];
                    //对数据进行绑定,则数据会响应到表单上
                    this.todoItem = {
                        id:obj.id,
                        title:obj.title,
                        desc:obj.desc
                    };
刷新运行,发生程序按照预期运行了,接下来,增加更新保存操作,修改OK按钮的事件绑定方式为save,并通过id判断新增还是修改操作:
 <div class="col-md-6">

            <div class="form-inline">
                <label for="title" class="control-label col-md-4">title:</label>
                <input type="hidden" v-bind:value="todoItem.id" />
                <input type="text" v-model="todoItem.title" class="form-control col-md-8">
            </div>
            <div class="form-inline">
                <label for="desc" class="control-label col-md-4">desc</label>
                <input type="text" v-model="todoItem.desc" class="form-control col-md-8">
            </div>
            <div class="form-inline">
                <input type="button" value="OK" v-on:click="save()" class="btn btn-primary offset-md-10" />
            </div>
        </div>
 methods: {
                edit: function (id) {
                    //找到id值等于所传参数的todoitem
                    var obj = this.todolist.filter(v => v.id === id)[0];
                    //对数据进行绑定,则数据会响应到表单上
                    this.todoItem = {
                        id: obj.id,
                        title: obj.title,
                        desc: obj.desc
                    };
                },
                save: function () {
                    if (this.todoItem.id) {
                        //编辑保存
                        var obj = this.todolist.filter(v => v.id === this.todoItem.id)[0];
                        obj.title = this.todoItem.title;
                        obj.desc = this.todoItem.desc;

                    } else {
                        //新增保存
                        this.todolist.push(
                            new TodoItem(
                                this.todoItem.title,
                                this.todoItem.desc
                            )
                        );
                    }
                    //重置表单  这部分笔误,在实际代码中已修改,但是贴上来的代码没有做修改,具体见最下面代码,错误原因见下方回复
                    this.todoItem = {};
                },

                remove: function (index) {
                    this.todolist.splice(index, 1);
                }

            }
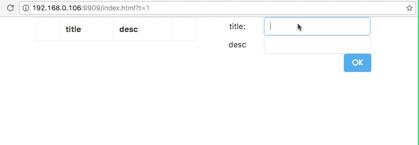
代码比较简单,这里就不再赘述,可以看一下运行效果:

为了逼格更高一点,这里我再介绍一个指令,其实上面已经使用了,v-bind ,这个指令和v-on是类似的,两者的区别在于后面的参数不同,一般v-bind用来传递属性参数,一般使用缩写形式:attr,可以绑定自定义属性,上面代码中我们对Id值的绑定已经使用了v-bind:value="todoItem.id",这里相当于angular中ng-bind。基于对v-bind的了解,我们可以推理,给v-bind添加disable的属性,使OK按钮只有再title不为空的前提下再可用。
<div class="form-inline">
                <input type="button" value="OK" v-on:click="save()" class="btn btn-primary offset-md-10" :disabled=\'!todoItem.title\'/>
            </div>
刷新运行:

上面代码能很好的运行,但是现在如果我需要修改一下验证规则,在title和desc都不为空的情况下,才使用OK按钮可用,如何做?你当然会说,很简单,直接加入一个&&条件不就行了,但是问题在于,现在我的模型比较小,属性比较少,如果我存在一个大量属性的对象,做类似的验证,这样来修改代码就是一个坑了,说到这里,其实已经可以想到,既然验证规则再变,那么可以考虑作为一个变化点封装起来,最直观的方式,是封装为一个方法,但是vue提供了更好的方式:computed,计算属性,这个计算属性应该是来自于knockout的概念,有兴趣的可以看一下knockout中计算属性,修改代码如下:
 new Vue({
            el: \'#app\',
            data: {
                todolist: [],
                todoItem: {
                    id: \'\',
                    title: \'\',
                    desc: \'\'
                }
            },
            computed:{
                canSave:function(){
                    return !this.todoItem.title || !this.todoItem.desc;
                }
            },
           ...省略其它
            }
        })
可以看到computed属性是以方法的方式来定义的,这里是最简单方式,只读的方式,当然还可以通过get set方式进行读写控制,我们后期的代码中可能会见到,如果捉急,可以去查看官方文档。在computed使用的时候,和方法调用截然不同,而是和data属性中代理的模式一样,如果你使用过knockout,那么你对这种用法就见怪不怪了,html部分修改如下:
<div class="form-inline">
                <input type="button" value="OK" v-on:click="save()" class="btn btn-primary offset-md-10" :disabled=\'canSave\'/>
            </div>
刷新页面,运行效果如图:

ok,编辑这部分内容就到这里吧,在没有后端接口的前提下,保存操作都是模拟的,接下来对我们的查询进行一下简单的介绍,这里查询,由于没有后端接口,咱们只做最简单的演示,对代码做如下处理:
1、增加查询输入框,keyword,添加查询按钮
2、点击查询操作,预期结果:根据输入的查询关键字,过滤列表
按照上面思路对我们代码进行修改: