如何使用"OpenSSL"自签证书(Self-Sign Certificate)
Posted
tags:
篇首语:本文由小常识网(cha138.com)小编为大家整理,主要介绍了如何使用"OpenSSL"自签证书(Self-Sign Certificate)相关的知识,希望对你有一定的参考价值。
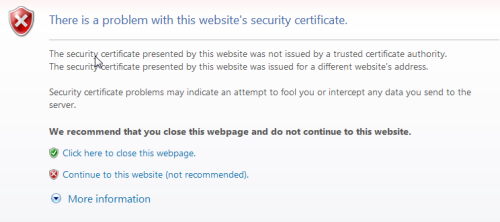
当您访问自己组织或个人的服务时是否经常遇到如下的证书问题:
当然,您可以容忍此错误,Continue to this website。 或者从CA(证书颁发机构)购买SSL证书,除此之外我们是否还有更多的选择呢?
是的,我们可以使用OpenSSL创建个人的免费证书。
OpenSSL
OpenSSL是大多数MacOS X,Linux,和Unix安装的免费工具。 您还可以在 http://slproweb.com/products/Win32OpenSSL.html 下载Windows版本进行使用。 使用OpenSSL创建自签名证书的过程非常简单:
生成CA根证书
1) 创建私钥(rootCA.key)
2) 创建CA根证书(rootCA.crt)
3) 安装CA根证书
生成CA自签证书
1) 创建私钥
2) 创建CSR
3) 使用CA根证书签名CSR
生成CA根证书
创建私钥
openssl genrsa -out rootCA.key 2048
私钥的标准大小为 1024/2048/4096,请根据需要进行选择。
还可以创建加密私钥:
openssl genrsa -des3 -out rootCA.key 2048
创建CA根证书
openssl req -x509 -new -nodes -key rootCA.key -sha256 -days 1024 -out rootCA.crt
此时需要输入一些如下相关信息:
-----
Country Name (2 letter code) [AU]:CN
State or Province Name (full name) [Some-State]:Beijing
Locality Name (eg, city) []:Beijing
Organization Name (eg, company) [Internet Widgits Pty Ltd]:VMware
Organizational Unit Name (eg, section) []:Euc
Common Name (eg, YOUR name) []:CA
Email Address []:[email protected]
安装CA根证书
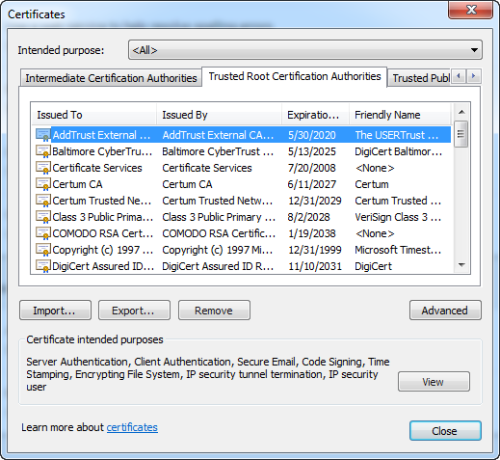
1) IE & Chrome
IE: Internet Options->Content->Certificates
Chrome: Settings->Advanced->Privacy and security->Manage certificates
IE & Chrome 都会指定到相同的 windows certificate repository,选择"Trusted Root Certification Authorities", Import "rootCA.crt"
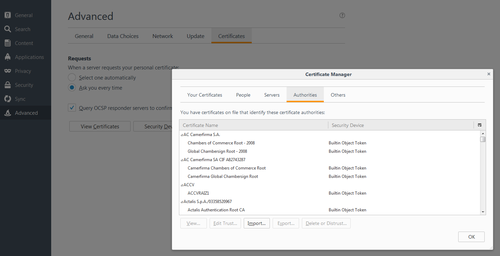
2) Firefox
Options->Advanced->Certificates->View Certificates
生成CA自签证书
创建私钥
openssl genrsa -out server.key 2048
创建CSR
1)配置Subject-Alternative-Name 否则会出现No subject alternative names错误
a. 找到并拷贝“openssl.cnf”文件, Linux机器文件位置为"/etc/ssl/openssl.cnf"。
如果无法找到该文件可以从http://web.mit.edu/crypto/openssl.cnf 复制一份。
b. 编辑拷贝的“openssl.cnf”文件
(1) 在 [req ] 节点下取消对req_extensions= v3_req 的注释
(2) 在[v3_req] 节点下添加 subjectAltName 属性
[ v3_req ]
# Extensions to add to a certificate request
basicConstraints = CA:FALSE
keyUsage = nonRepudiation, digitalSignature, keyEncipherment
subjectAltName = @alt_names
[alt_names]
IP.1 = xxx.xxx.xxx.xxx
IP.2 = xxx.xxx.xxx.xxx
DNS.1 = xxx.xxx.com
Ip ,DNS 为服务器(Server)的IP与DNS。
更多相关Subject-Alternative-Name的介绍:https://www.openssl.org/docs/man1.0.2/apps/x509v3_config.html#Subject-Alternative-Name
(3) 在[ CA_default] 节点下取消对copy_extensions= copy 的注释
2) 创建CSR
openssl req -new -key server.key -out server.csr -config {yourpath}/openssl.cnf -extensions v3_req注意:此时需要输入除Common Name (eg, YOUR name) []外与创建CA根证书时相同的信息。此处Common Name 应该输入服务器(Server)的Ip或域名(与在浏览器地址栏需要访问的保持一致)
使用CA根证书签名CSR
openssl x509 -req -in server.csr -CA rootCA.crt -CAkey rootCA.key -CAcreateserial -out server.crt -days 500 -sha256 -extensions v3_req -extfile openssl.cnf
注意: server.crt 的时间期限(-days)不能超过CA根证书的时间期限
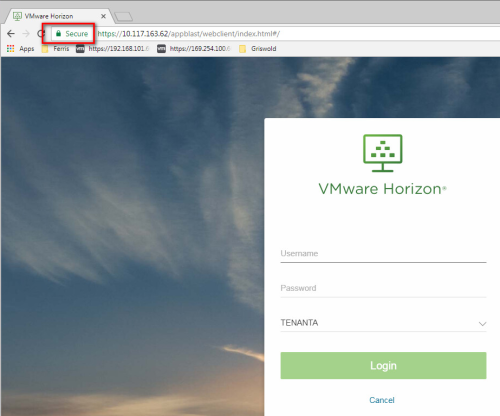
完成以上步骤以后,使用自签证书再次访问服务器时,浏览器将会信任证书。
作者:李少杰,VMware China EUC Customer Success Team
本文出自 “VMware终端用户计算” 博客,请务必保留此出处http://vmwareeuc.blog.51cto.com/8606576/1945888
以上是关于如何使用"OpenSSL"自签证书(Self-Sign Certificate)的主要内容,如果未能解决你的问题,请参考以下文章


