登陆界面的简单编写(通过NSNotificationCenter)
Posted 旭宝爱吃鱼
tags:
篇首语:本文由小常识网(cha138.com)小编为大家整理,主要介绍了登陆界面的简单编写(通过NSNotificationCenter)相关的知识,希望对你有一定的参考价值。
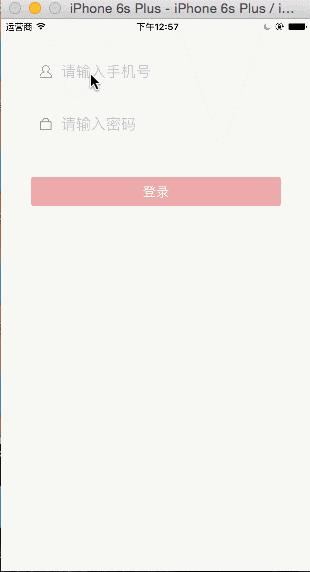
在介绍内容的之前,先看一下实现结果。

通过细节可以发现,只有当手机号与密码都输入的情况登录按钮才会变亮。那么这是怎么实现的呢?
首先我们要知道,这种情况的发生的首要条件便是每时每刻都知道两个TextField的text。那么什么方法可以实现呢,有一个十分老笨的方法。那就是通过Nstimer,每秒都检查TextField的text内容。显然这种方法十分消耗内存,实际开发中是不可能采用的,但是对于新手来说,未必不是一种开发大脑的途径。闲话少说,下面介绍今天的主角NSNotificationCenter。
NSNotificationCenter是一种监听机制。
配合UITextFieldTextDidChangeNotification即可实现时刻监听。
由于本文旨在介绍思想,基本知识点我就不介绍了。想要学习的童鞋可以查看其他博客,如有需要也可以评论本文,我会在看到评论的情况下为大家讲解知识点。
代码如下(只是关键所在,控件大家可以自己多动动手):
//
//  ViewController.m
//  CX-login
//
//  Created by ma c on 16/1/22.
//  Copyright (c) 2016年 xubaoaichiyu. All rights reserved.
//

#import "ViewController.h"
#import "CustomerTextField.h"
#import "CustomerButton.h"
@interface ViewController ()
//提供全局变量 TextField
@property (nonatomic, strong) UITextField* textFiledTemp1;
@property (nonatomic, strong) UITextField* textFiledTemp2;
@property (nonatomic, strong) UIButton* btn;
@end

@implementation ViewController

- (void)viewDidLoad {
    [super viewDidLoad];
    //view背景颜色
    self.view.backgroundColor = [UIColor colorWithRed:247/255.0f green:248/255.0f blue:243/255.0f alpha:1];
    //设置TextFiled
    CustomerTextField* textField1 = [[CustomerTextField alloc]initWithFrame:CGRectMake(40, 50, SCREEN_WIDTH-80, 40) imageName:@"userName" placeholder:@"请输入手机号"];
    [self.view addSubview:textField1];
    self.textFiledTemp1 = textField1;
    //    textField1.keyboardType = UIKeyboardTypeNumberPad;// 键盘type
    CustomerTextField* textField2 = [[CustomerTextField alloc]initWithFrame:CGRectMake(40, 120, SCREEN_WIDTH-80, 40) imageName:@"password" placeholder:@"请输入密码"];
    textField2.secureTextEntry = YES;
    [self.view addSubview:textField2];
    self.textFiledTemp2 = textField2;
    //设置登录Button
    self.btn = [[CustomerButton alloc]initWithFrame:CGRectMake(40, 210, SCREEN_WIDTH-80, 40) backgroundImageName:@"beijing" title:@"登录"];
    self.btn.enabled = NO;
    [self.view addSubview:self.btn];
    [self NotificationCenter];

}

-(void)touchesBegan:(NSSet *)touches withEvent:(UIEvent *)event{
    [self.view endEditing:YES];
}
//通知中心 监听Textfield
-(void)NotificationCenter{

    [[NSNotificationCenter defaultCenter]addObserver:self selector:@selector(textDidChangeNotification:) name:UITextFieldTextDidChangeNotification object:nil];

}
// 实现按钮状态转变
-(void)textDidChangeNotification:(NSNotification*)notifi{
    if ([self.textFiledTemp1.text isEqualToString:@""]||[self.textFiledTemp2.text isEqualToString:@""]) {
        self.btn.enabled = NO;
    }
    else{
        self.btn.enabled = YES;
    }
}

@end
以上是关于登陆界面的简单编写(通过NSNotificationCenter)的主要内容,如果未能解决你的问题,请参考以下文章