jumpserver 堡垒机
Posted Eason_Footprint
tags:
篇首语:本文由小常识网(cha138.com)小编为大家整理,主要介绍了jumpserver 堡垒机相关的知识,希望对你有一定的参考价值。
Jumpserver 是一款由Python编写开源的跳板机(堡垒机)系统,实现了跳板机应有的功能。基于ssh协议来管理,客户端无需安装agent。
特点:
完全开源,GPL授权 Python编写,容易再次开发 实现了跳板机基本功能,认证、授权、审计 集成了Ansible,批量命令等 支持WebTerminal Bootstrap编写,界面美观 自动收集硬件信息 录像回放 命令搜索 实时监控 批量上传下载
jumpserver 3.0 安装
相对于 jumpserver 2.0 版本,在新的版本 3.0 中取消了LDAP授权,取而代之的是ssh进行推送;界面也有所变化,功能更完善,安装更简单,不像 2.0 的版本,难住了好多人。下面通过两台主机来搭建 jumpserver堡垒机!
环境: Centos 6.5 x86_64 关闭 iptables,关闭 selinux jumpserver:192.168.1.200 clients:192.168.1.210 ps:操作只针对 jumpserver,clients 不会进行操作,只是环境需求。
一、安装依赖包 yum -y install epel-release yum clean all && yum makecache yum -y update yum -y install git python-pip mysql-devel gcc automake autoconf python-devel vim sshpass lrzsz readline-devel
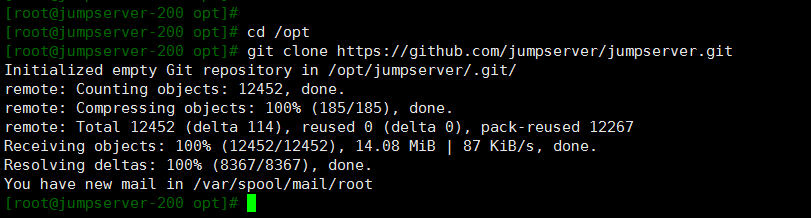
二、下载 jumpserver cd /opt Git clone https://github.com/jumpserver/jumpserver.git 注: 如果下载失败,则去github上面下载zip包,unzip解压缩即可
三、执行快速安装脚本 cd /opt/jumpserver/install
pip install -r requirement.txt
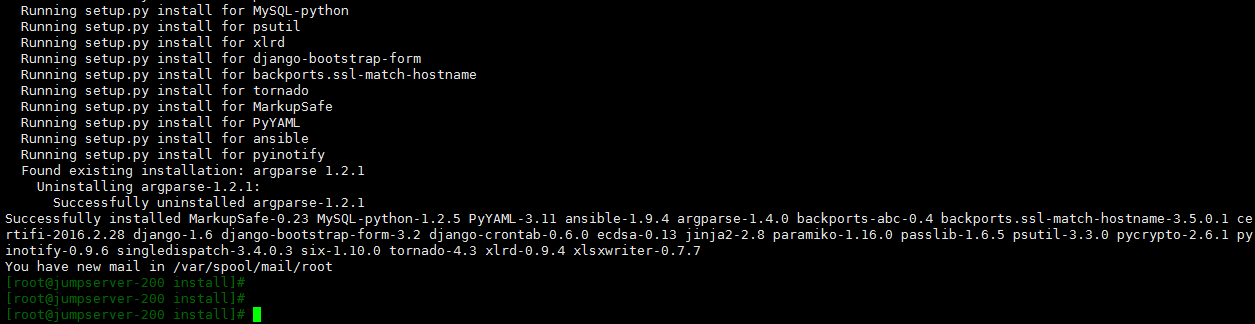
查看安装的包 pip freeze
python install.py 输入jumpserver的地址,默认为:”192.168.1.200”,回车即可。 是否安装MySQL:选择”y”进行安装
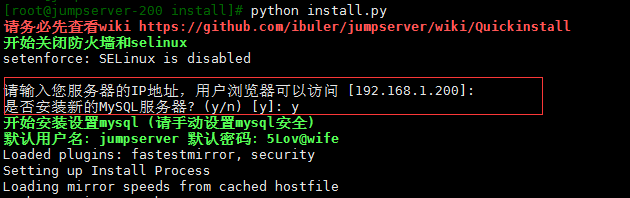
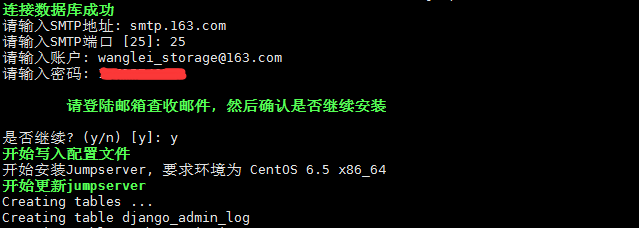
MySQL 启动后会要求用户输入 邮件服务器及账户(后期用来发送用户名、ssh pass、web pass、ssh key)
163邮箱用授权密码,而不是登入密码 ,切记 。
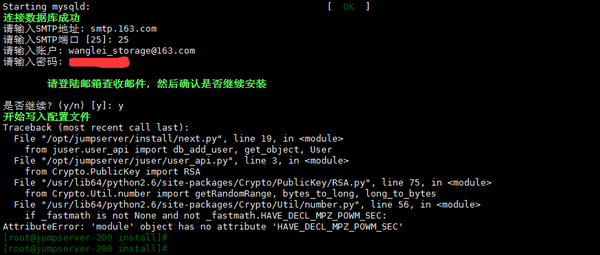
输入smtp信息之后发现报错了,是python的pycrypto模块问题,需要卸载重装: pip uninstall pycrypto easy_install pycrypto

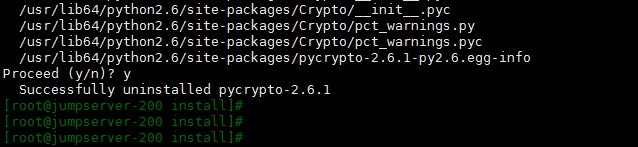


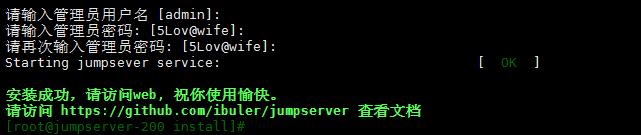
安装之后继续 python install.py 进行安装,并且输入 web管理员用户名和管理员密码,ok
运行 crontab,定期处理失效连接,定期更新资产信息 cd /opt/jumpserver python manage.py crontab add

注: 1)根据提示输入相关信息,完成安装,安装完成后,请访问web,继续查看后续文档 2)如果启动失败,请返回上层目录,手动运行 ./service.sh start 启动 3)如果 ./service.sh start 启动失败 cd /opt/jumpserver python manage.py runserver 0.0.0.0:80 python run_websocket.py 4)如果启动失败,可能是由于80端口和3000端口已经被占用,或者数据库账号密码不对,请检查
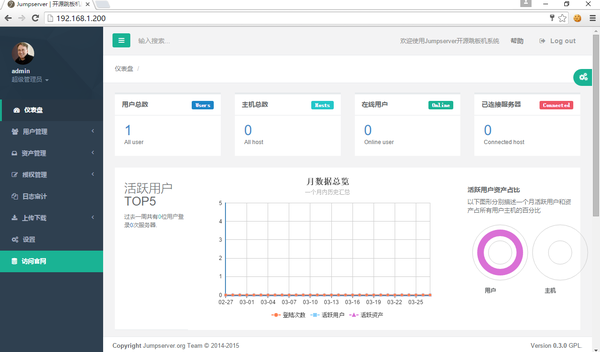
五、Web登录 http://192.168.1.200
注意: 在使用jumpserver过程中,有一步是系统用户推送,要推送成功,client(后端服务器)要满足以下条件: 1)后端服务器需要有python、sudo环境才能使用推送用户,批量命令等功能 2)后端服务器如果开启了selinux,请安装libselinux-python
六、更新代码 cd /opt/jumpserver git pull
环境搭建到这一步就结束啦~
下面开始要仔细看咯
一、用户管理
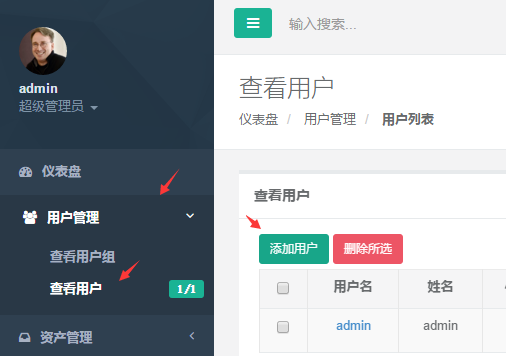
1)添加用户
点击用户管理 —> 查看用户 —> 添加用户
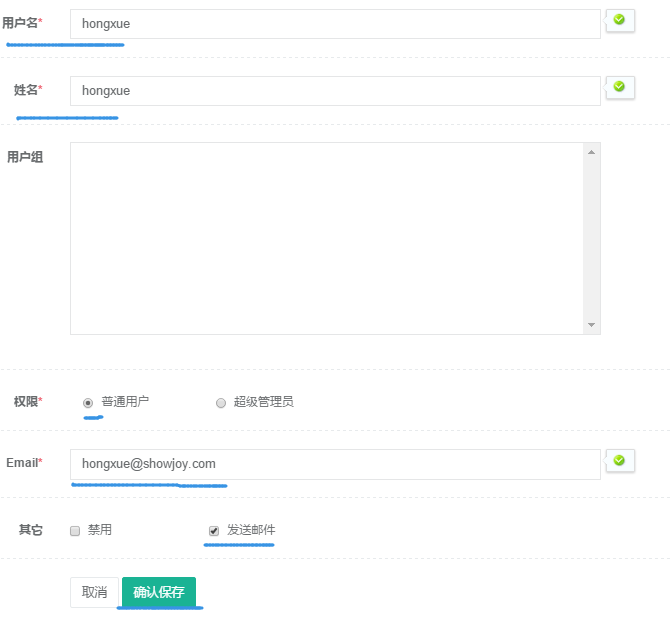
输入要添加的用户名,姓名,权限,Mail,并且发送邮件 —> 保存
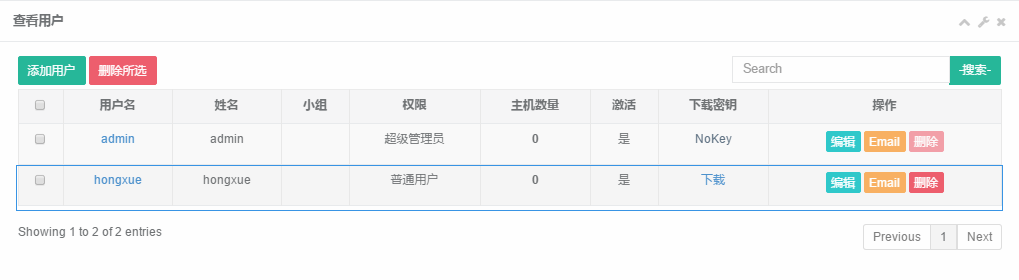
查看添加的用户
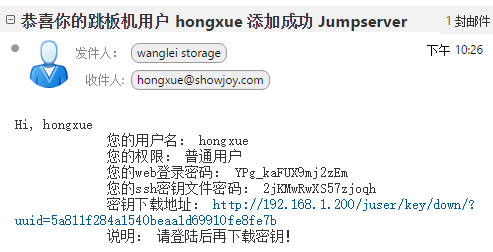
查看用户邮件 邮件中包含了用户名,权限,web密码,ssh 密钥密码,以及密钥下载地址。
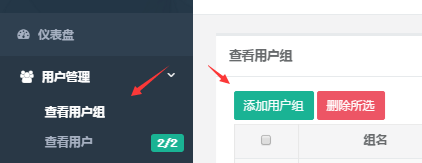
2)添加用户组
点击用户管理 —> 查看用户组 —> 添加用户组
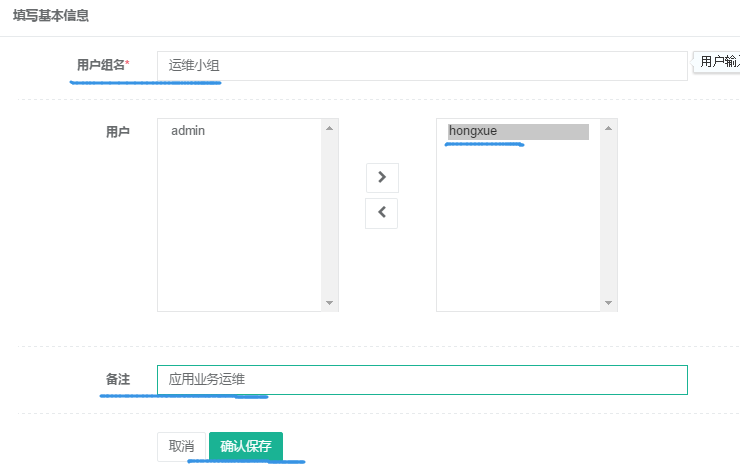
添加新的小组 —> 运维小组
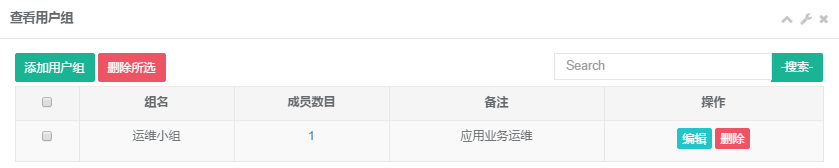
查看刚才添加的组
二、资产管理
1)添加资产组
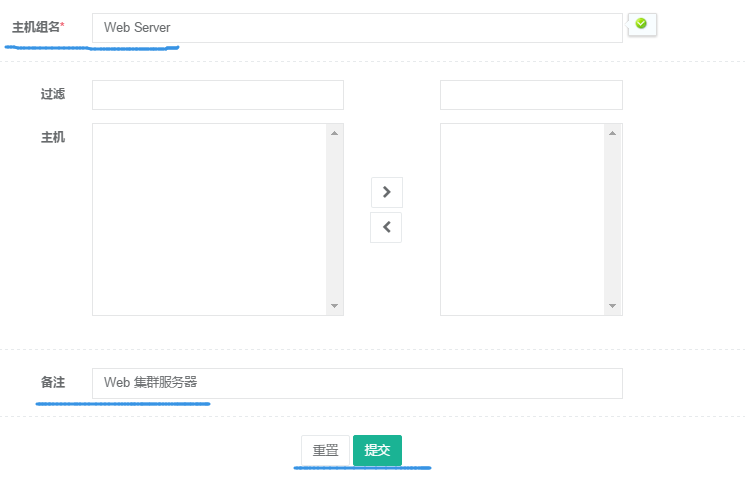
点击资产管理 —> 查看资产组 —> 添加主机组

输入组名称,并且输入描述组用途
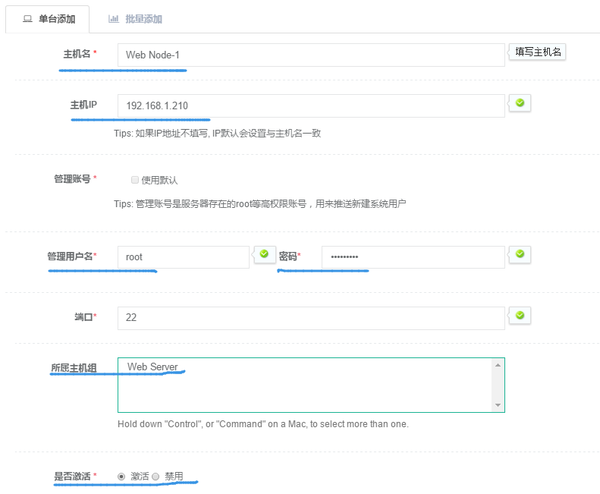
2)添加资产
点击资产管理 —> 查看资产 —> 添加资产
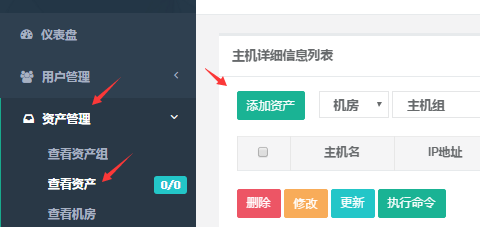
输入主机名,主机IP,管理用户名(管理员用户,主机中必须存在的哦~ 可以是root),端口,资产组 —> 提交保存
3)添加机房
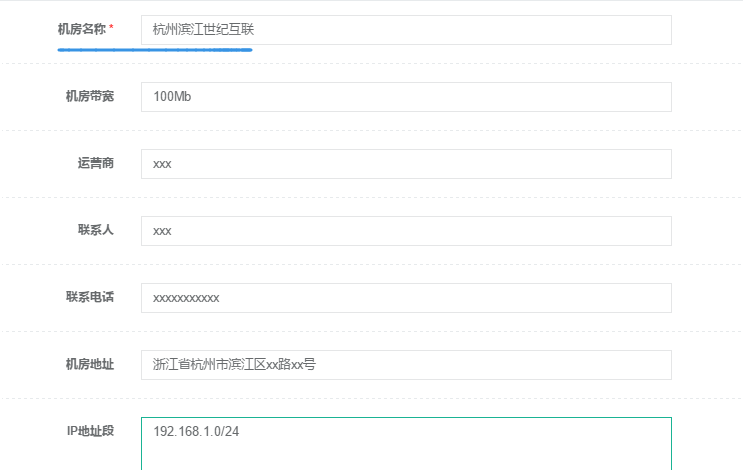
点击资产管理 —> 查看机房 —> 添加机房
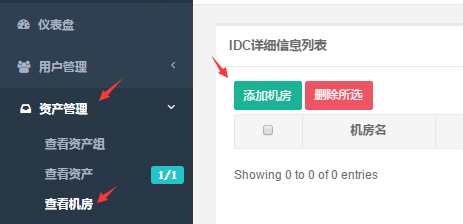
输入机房名称,其他的可以选填 —> 保存
三、权限管理
1)sudo
点击权限管理 —> sudo —> 添加别名
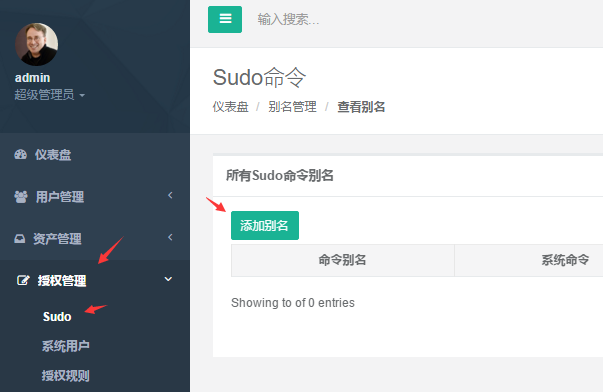
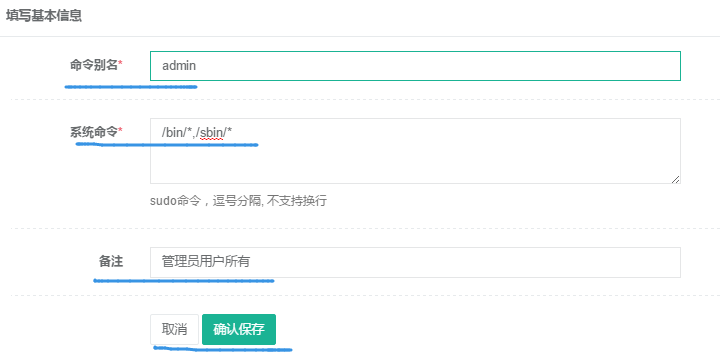
输入别名,系统命令,备注 —> 点击保存
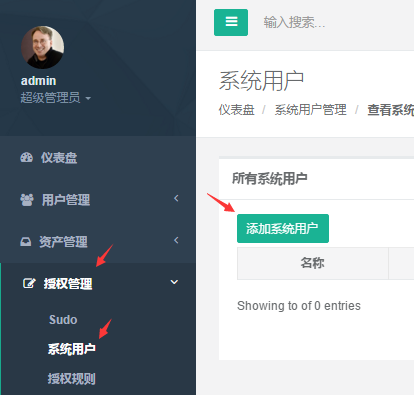
2)添加系统用户
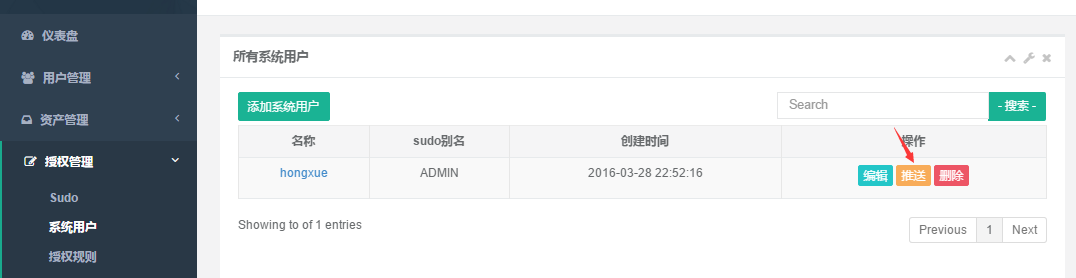
点击授权管理 —> 系统用户 —> 添加系统用户
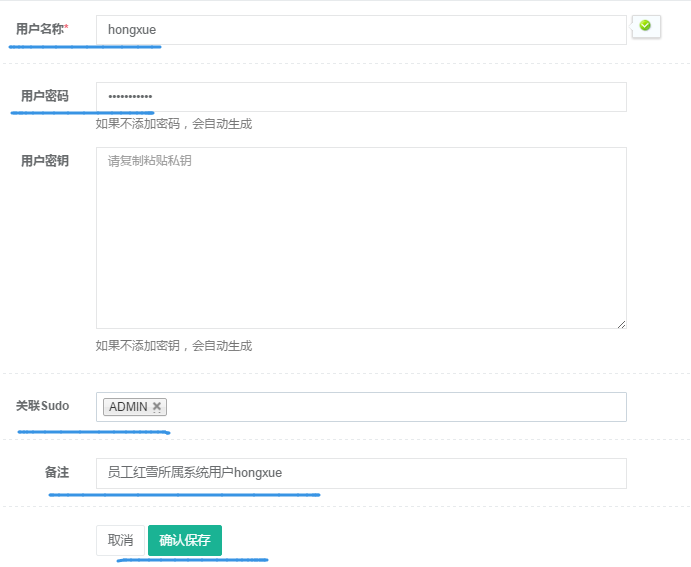
输入用户名,密码,管理的sudo及备注 —> 单击保存
创建好系统之后,单击推送,将用户名、密码、sudo的信息推送到服务器。
选择系统用户,资产组 —> 单击保存
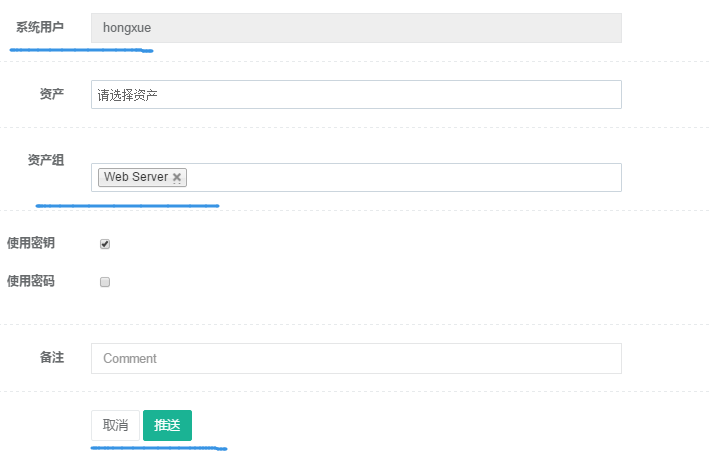
推送成功

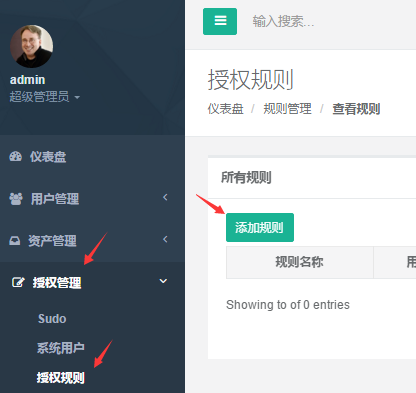
3)授权规则
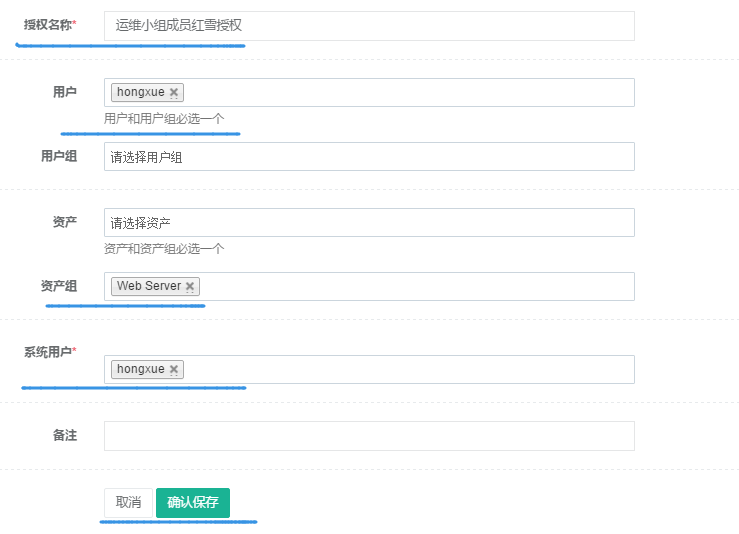
点击授权管理 —> 授权规则 —> 添加规则
输入授权名称,用户/用户组,资产/资产组,系统用户,备注 —> 单击保存
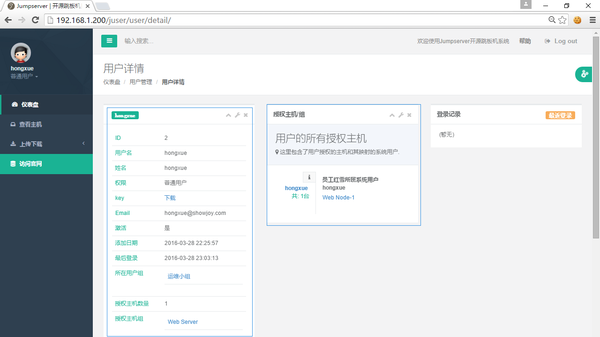
四、登录
这时候创建已经完成,下一步用户”hongxue”通过web和密钥登录堡垒机 192.168.1.200,并实现跳转到服务器 192.168.1.210
1)通过web登录 可以看到用户ID,用户名,权限,key,最后登录,用户组,授权主机数,以及主机信息。
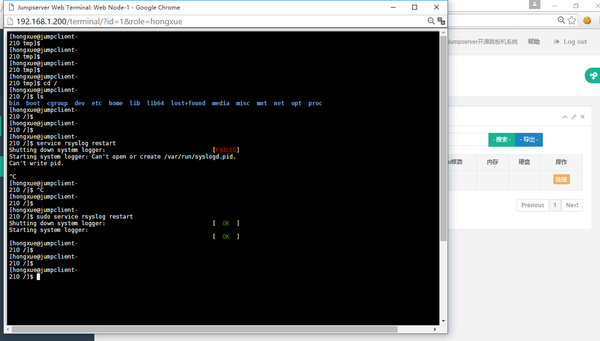
单击查看主机 —> 连接
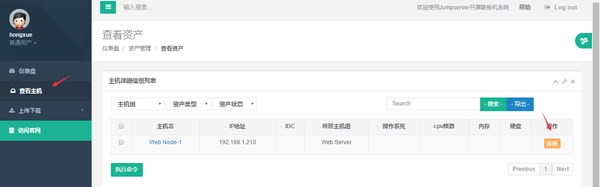
连接成功,可以对该主机进行操作。
2)通过ssh登录
通过邮件中收到的地址,下载key
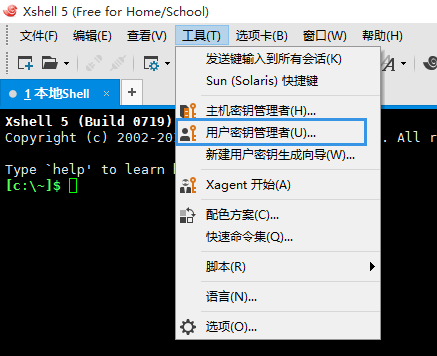
点击工具 —> 用户密钥管理者
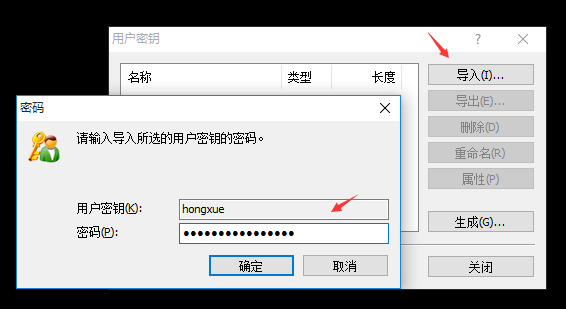
单击导入 —> 输入用户名,密码
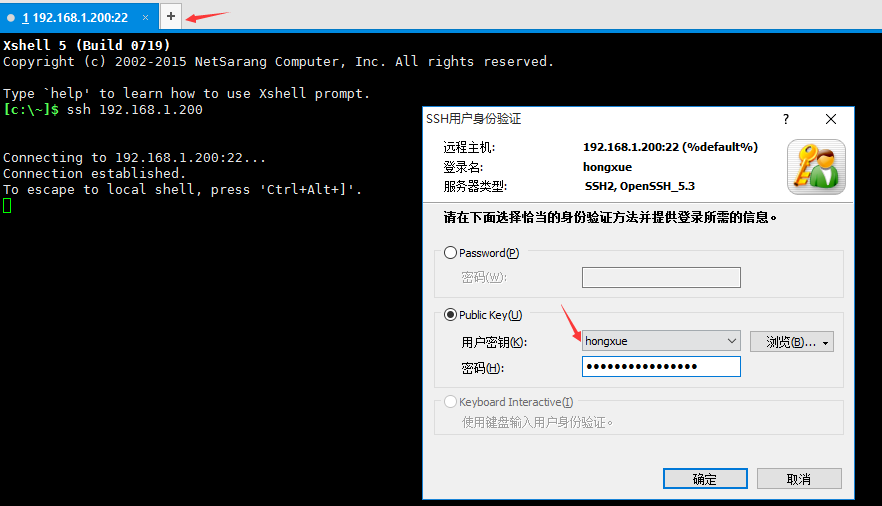
连接 jumpserver 堡垒机 192.168.1.200,输入密钥密码进行登录
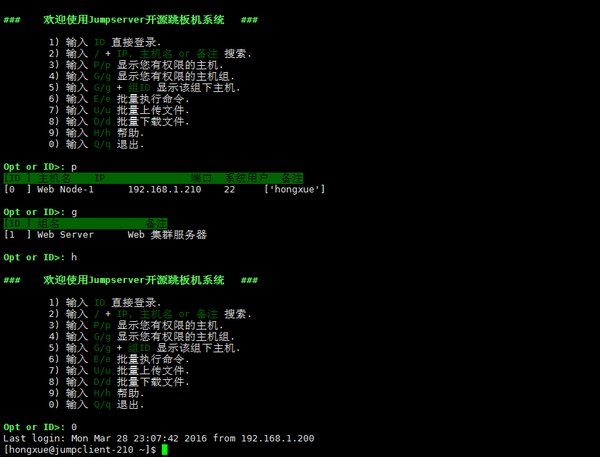
登录成功!! 从授权的列表中连接到服务器 192.168.1.210
!!为了安全,建议配置nginx 反向代理 jumpserver
log_format jumpserver ‘$remote_addr - $remote_user [$time_local] "$request" $status $body_bytes_sent "$request_time" $request_body "$http_referer" "$http_user_agent" "$http_x_forwarded_for" $scheme $http_host‘;

server {
        listen       8080 ssl;
        listen       80;
deny all;
        server_name jumpserver.xxxx.com;
        index index.html index.htm index.php;

        ssl_certificate      ssl/xxxx.com.crt;
        ssl_certificate_key  ssl/xxxx.com.key;
ssl_protocols  TLSv1 TLSv1.1 TLSv1.2;
ssl_ciphers  HIGH:!aNULL:!MD5;
ssl_prefer_server_ciphers on;

if ( $scheme = http ) {
   rewrite ^(.*)$ https://$host:8090$request_uri? permanent;
  }

location / {
  proxy_set_header Connection "";
  proxy_http_version 1.1;
  proxy_pass      http://10.43.12.31:8090;
 }

location ^~ /ws/ {
proxy_pass http://10.43.12.31:8090/ws/;
proxy_set_header X-Real-IP $remote_addr;
proxy_set_header Host $host;
proxy_set_header X-Forwarded-For $proxy_add_x_forwarded_for;
proxy_http_version 1.1;
proxy_set_header Upgrade $http_upgrade;
proxy_set_header Connection "upgrade";
  }

        access_log  /data0/logs/jumpserver.log jumpserver;
        error_log  /data0/logs/jumpserver_error.log debug;
}
以上是关于jumpserver 堡垒机的主要内容,如果未能解决你的问题,请参考以下文章
直播预告|JumpServer开源堡垒机跨年漫谈会,说出你和JumpServer的故事