2.Border Layout 自定义一个Layout来完成布局。
Posted billxyd
tags:
篇首语:本文由小常识网(cha138.com)小编为大家整理,主要介绍了2.Border Layout 自定义一个Layout来完成布局。相关的知识,希望对你有一定的参考价值。
目标:

1.添加控件的函数 void QLayout::addWidget ( QWidget * w )
在这个例子里面我们重载这个函数 void addWidget ( QWidget * w, int position)
2.添加到布局里面的都是QLayoutItem。我们把QLayoutItem和position封装成一个结构体ItemWrapper。
QList <ItemWrapper *> list。 私有变量list来管理布局中控件数量。
阅读官方文档:
To make your own layout manager, implement the functions addItem(), sizeHint(), setGeometry(), itemAt() and takeAt(). You should also implement minimumSize() to ensure your layout isn\'t resized to zero size if there is too little space. To support children whose heights depend on their widths, implement hasHeightForWidth() and heightForWidth().
1.先考虑布局的尺寸问题(布局的长度和宽度问题)
QSize BorderLayout::sizeHint() const 返回布局的理想的长度和宽度。
QSize BorderLayout::minimumSize() const 空间不够时,布局所需的最小的长度和宽度(布局不能少于这个最小的长度和宽度)
我们设计一个 QSize BorderLayout::calculateSize(SizeType sizeType) const函数来计算
enum SizeType { MinimumSize, SizeHint }
QSize BorderLayout::sizeHint() const { return calculateSize(SizeHint ); }
QSize BorderLayout::minimumSize() const { return calculateSize(MinimumSize); }
calculateSize函数中,我们遍历布局中的每个控件,计算出理想尺寸和最小尺寸
QSize BorderLayout::calculateSize(SizeType sizeType) const
{
    QSize totalSize;

    for(int i=0; i<list.size(); i++) {
        ItemWrapper *wrapper = list.at(i);
        QLayoutItem *item = wrapper->item;
        Position position = wrapper->position;
        QSize itemSize;

        if(sizeType == MinimumSize)
            itemSize = item->minimumSize();
        else
            itemSize = item->sizeHint();

        if(position == North || position == South || position == Central) {
            totalSize.rheight() += itemSize.rheight();
        }

        if(position == West || position == East || position == Central) {
            totalSize.rwidth() += itemSize.rwidth();
        }
    }

    return totalSize;
}
2.添加控件的方法,添加控件也就是把控件添加到list中去
void QLayout::addItem ( QLayoutItem * item ) [pure virtual] 这个函数在应用程序中程序员不调用。
void addWidget ( QWidget * w, Position position) 最常用的添加控件方法。我们这里重载该函数,添加一个参数 position
void add(QLayoutItem *item, Position position) 我们实现add函数来添加控件
void BorderLayout::addItem(QLayoutItem *i)
{
    add(i, West);
}

void BorderLayout::addWidget(QWidget *w, Position position)
{
    add(new QWidgetItem (w), position);
}

void BorderLayout::add(QLayoutItem *i, Position position)
{
    list.append(new ItemWrapper(i, position));
}
3.查找和删除控件的方法
QLayoutItem * itemAt(int index) const; 返回索引下的QLayoutItem
QLayoutItem * takeAt(int index); 删除索引下的QLayoutItem 并返回QLayoutItem的值
QLayoutItem * BorderLayout::itemAt(int index) const
{
    ItemWrapper *wrapper = list.value(index);
    if(wrapper)
        return wrapper->item;
    else
        return 0;
}

QLayoutItem * BorderLayout::takeAt(int index)
{
    if(index >= 0 && index < list.size()) {
        ItemWrapper *wrapper = list.takeAt(index);
        return wrapper->item;
    }
    return 0;
}
list中takeat函数删除索引是index的值
4.布局中控件的数量,布局的高度是否依赖其宽度,布局的延伸方向。
Qt::Orientations expandingDirections() const;
bool hasHeightForWidth() const;
int count() const;
Qt::Orientations BorderLayout::expandingDirections() const
{
    return Qt::Horizontal | Qt::Vertical;
}

bool BorderLayout::hasHeightForWidth() const
{
    return false;
}

int BorderLayout::count() const
{
    return list.size();
}
5。我们现在知道有多少控件,每个控件的尺寸,整个布局的尺寸。
但是控件摆放在整个布局中那个位置,如何摆放。这里需要void setGeometry(const QRect &rect)函数。
QLayout::setGeometry(rect). 获得布局的整个矩形大小。
然后设施每个QLayoutItem的setGeometry函数。把每个控件放在指定的位置
void BorderLayout::setGeometry(const QRect &rect)
{
    ItemWrapper *center = 0;

    int northHeight = 0;
    int southHeight = 0;
    int centerHeight = 0;
    int westWidth = 0;
    int eastWidth = 0;

    int i = 0;

    QLayout::setGeometry(rect);

    for(i = 0; i < list.size(); i++) {
        ItemWrapper *wrapper = list.at(i);
        QLayoutItem *item  = wrapper->item;
        Position position = wrapper->position;

        if(position == North) {
            item->setGeometry(QRect(rect.x(), northHeight, rect.width(), item->sizeHint().height()));
            northHeight += item->geometry().height() + spacing();
        }
        else if(position == South) {
            item->setGeometry(QRect(item->geometry().x(), item->geometry().y(), rect.width(),
                              item->sizeHint().height()));
            southHeight += item->geometry().height() + spacing();

            item->setGeometry(QRect(rect.x(), rect.y()+rect.height()-southHeight+spacing(),
                              item->geometry().width(), item->geometry().height()));
        }
        else if(position == Central)
            center = wrapper;
    }

    centerHeight = rect.height() - northHeight - southHeight;

    for(i = 0; i < list.size(); i++) {
        ItemWrapper *wrapper = list.value(i);
        QLayoutItem *item  = wrapper->item;
        Position position = wrapper->position;

        if(position == West) {
            item->setGeometry(QRect(westWidth, northHeight, item->sizeHint().width(), centerHeight));
            westWidth += item->geometry().width() + spacing();
        }
        else if(position == East) {
            item->setGeometry(QRect(item->geometry().x(), item->geometry().y(),
                              item->sizeHint().width(), centerHeight));

            eastWidth += item->geometry().width() + spacing();

            item->setGeometry(QRect(rect.width() - eastWidth + spacing(), northHeight,
                              item->geometry().width(), item->geometry().height()));
        }
    }

    if(center) {
        center->item->setGeometry(QRect(westWidth, northHeight,
                                  rect.width() - westWidth - eastWidth, centerHeight));
    }

}
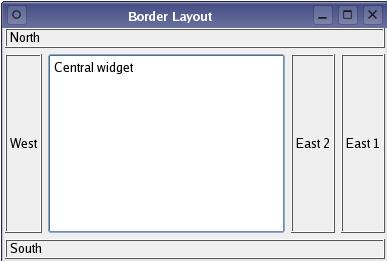
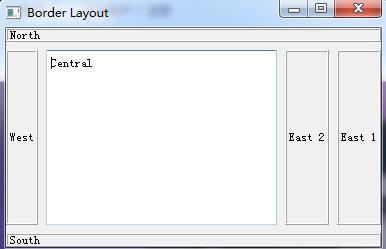
效果图:

源代码: https://github.com/Satius/qt5/tree/master/qtbase/examples/widgets/layouts/borderlayout
以上是关于2.Border Layout 自定义一个Layout来完成布局。的主要内容,如果未能解决你的问题,请参考以下文章