Zabbix 3.2 监控部署
Posted
tags:
篇首语:本文由小常识网(cha138.com)小编为大家整理,主要介绍了Zabbix 3.2 监控部署相关的知识,希望对你有一定的参考价值。
一、准备工作
1.系统环境
系统:CentOS 6.8 X86_64
mysql:5.7.12
Apache:2.4.20
php:7.1.4
Zabbix:3.2.6
2.安装所需环境
[[email protected] ~]# rpm -ivh http://www.lishiming.net/data/attachment/forum/epel-release-6-8_64.noarch.rpm
[[email protected] ~]# yum -y install gcc gd-devel libjpeg-devel libpng-devel libxml2-devel bzip2-devel libcurl-devel libmcrypt-devel net-snmp-devel OpenIPMI-devel
二、安装LAMP环境
1.mysql安装
[[email protected] src]# tar zxvf mysql-5.7.12-linux-glibc2.5-x86_64.tar.gz
[[email protected] src]# mv mysql-5.7.12-linux-glibc2.5-x86_64 /usr/local/mysql
[[email protected] src]# useradd mysql -s /sbin/nologin -M
[[email protected] src]# chown -R mysql.mysql /usr/local/mysql/
[[email protected] src]# cd /usr/local/mysql/
[[email protected] mysql]# cp support-files/my-default.cnf /etc/my.cnf
[[email protected] mysql]# vim /etc/my.cnf
| [mysqld] basedir = /usr/local/mysql datadir = /data/mysql port = 3306 socket = /tmp/mysql.sock pid-file = /data/mysql/mysqld.pid log-error=/var/log/mysqld.err.log |
[[email protected] mysql]# mkdir /data #/data/mysql目录在初始时自动创建
[[email protected] mysql]# ./bin/mysqld --initialize --user=mysql --datadir=/data/mysql #初始化
[[email protected] mysql]# cp support-files/mysql.server /etc/init.d/mysqld
[[email protected] mysql]# chkconfig --add mysqld
[[email protected] mysql]# chkconfig --level 35 mysqld on
[[email protected] mysql]# service mysqld start
[[email protected] mysql]# vim /etc/profile.d/mysql.sh
| #!/bin/bash export PATH=$PATH:/usr/local/mysql/bin:/usr/local/mysql/lib |
[[email protected] mysql]# source /etc/profile.d/mysql.sh
[[email protected] mysql]# mysql -uroot -p‘4qS5&qd%z=Qy‘
mysql> set password = password(‘123123‘); #修改密码
2.安装httpd
[[email protected] src]# wget http://mirror.bit.edu.cn/apache/apr/apr-util-1.5.4.tar.bz2
[[email protected] src]# wget http://mirror.bit.edu.cn/apache/apr/apr-1.5.2.tar.bz2
[[email protected] src]# tar jxvf apr-1.5.2.tar.bz2 && tar jxvf apr-util-1.5.4.tar.bz2
[[email protected] src]# tar jxvf httpd-2.4.20.tar.bz2
[[email protected] src]# mv apr-1.5.2 ./httpd-2.4.20/srclib/apr
[[email protected] src]# mv apr-util-1.5.4 ./httpd-2.4.20/srclib/apr-util
[[email protected] src]# tar jxvf pcre-8.35.tar.bz2
[[email protected] src]# cd pcre-8.35
[[email protected] pcre-8.35]# ./configure && make && make install
[[email protected] src]# cd httpd-2.4.20
[[email protected] src]# mkdir /usr/local/apache2.4
[[email protected] httpd-2.4.20]# ./configure --prefix=/usr/local/apache2.4 --with-included-apr --enable-so --enable-deflate=shared --enable-expires=shared --enable-rewrite=shared
[[email protected] httpd-2.4.20]# make && make install
[[email protected] httpd-2.4.20]# cd /usr/local/apache2.4/
[[email protected] apache2.4]# vim conf/httpd.conf
| ServerName localhost:80 |
[[email protected] apache2.4]# cp bin/apachectl /etc/init.d/httpd
[[email protected] apache2.4]# vim /etc/init.d/httpd
| #chkconfig: 35 85 15 #description: apache |
[[email protected] apache2.4]# chkconfig --add httpd
[[email protected] apache2.4]# chkconfig --level 35 httpd on
[[email protected] apache2.4]# service httpd start
3.安装PHP
[[email protected] src]# wget http://cn2.php.net/distributions/php-7.1.4.tar.gz
[[email protected] src]# tar zxvf php-7.1.4.tar.gz
[[email protected] php-7.1.4]# mkdir /usr/local/php
[[email protected] php-7.1.4]# ./configure --prefix=/usr/local/php --with-apxs2=/usr/local/apache2.4/bin/apxs --with-config-file-path=/usr/local/php/etc --with-mysqli=mysqlnd --with-pdo-mysql=mysqlnd --with-freetype-dir --with-jpeg-dir --with-png-dir --with-zlib --with-curl --with-gettext --enable-ftp --enable-mbstring --enable-bcmath --with-gd --enable-gd-native-ttf --with-openssl --enable-sockets --enable-soap --with-libxml-dir --with-iconv-dir --with-bz2 --disable-ipv6 --enable-calendar --enable-dom --enable-xml --enable-fpm --with-libdir=lib64
[[email protected] php-7.1.4]# make && make install
[[email protected] php-7.1.4]# cd /usr/local/apache2.4/
[[email protected] apache2.4]# vim conf/httpd.conf
| 找到: AddType application/x-gzip .gz .tgz 在该行下添加: AddType application/x-httpd-php .php 找到: <IfModule dir_module> DirectoryIndex index.html </IfModule> 将该行改为 <IfModule dir_module> DirectoryIndex index.html index.htm index.php </IfModule> |
[[email protected] apache2.4]# service httpd restart
三、Zabbix 部署
1.安装zabbix
[[email protected] src]# tar zxvf zabbix-3.2.6.tar.gz
[[email protected] src]# cd zabbix-3.2.6
[[email protected] zabbix-3.2.6]# useradd -s /sbin/nologin -M zabbix
[[email protected] zabbix-3.2.6]# mkdir /usr/local/zabbix
[[email protected] zabbix-3.2.6]# ./configure --prefix=/usr/local/zabbix --enable-server --enable-agent --with-mysql --enable-ipv6 --with-net-snmp --with-libcurl --with-libxml2 --with-openipmi
[[email protected] zabbix-3.2.6]# make && make install
[[email protected] zabbix-3.2.6]# cp -r frontends/php /usr/local/apache2.4/htdocs/zabbix
[[email protected] zabbix-3.2.6]# vim /usr/local/zabbix/etc/zabbix_server.conf
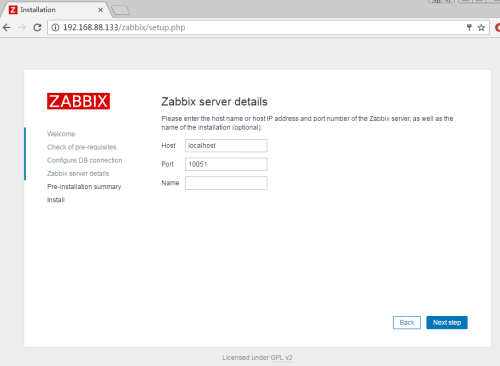
| DBHost=localhost DBName=zabbix DBUser=zabbix DBPassword=zabbix ListenIP=0.0.0.0 |
[[email protected] zabbix-3.2.6]# cp misc/init.d/fedora/core/zabbix_server /etc/init.d/zabbix
[[email protected] zabbix-3.2.6]# chkconfig --add zabbix
[[email protected] zabbix-3.2.6]# chkconfig --level 35 zabbix on
[[email protected] zabbix-3.2.6]# service zabbix start
2.配置数据库
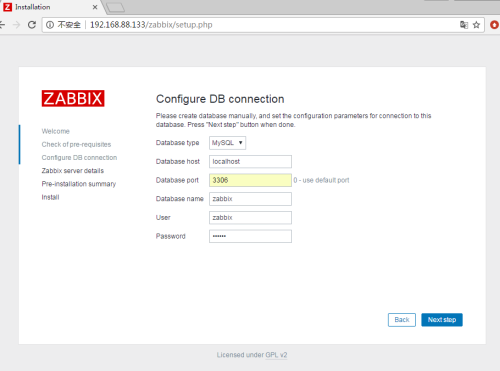
[[email protected] zabbix-3.2.6]# mysql -uroot -p
mysql>create database zabbix character set utf8 collate utf8_bin;
mysql>grant all on zabbix.*to [email protected] identified by ‘zabbix‘;
mysql>flush privileges;
[[email protected] zabbix-3.2.6]# mysql -uzabbix -pzabbix zabbix < database/mysql/schema.sql
[[email protected] zabbix-3.2.6]# mysql -uzabbix -pzabbix zabbix < database/mysql/images.sql
[[email protected] zabbix-3.2.6]# mysql -uzabbix -pzabbix zabbix < database/mysql/data.sql
3.配置PHP
[[email protected] zabbix-3.2.6]# cd ../php-7.1.4
[[email protected] php-7.1.4]# cp php.ini-production /usr/local/php/etc/
[[email protected] php-7.1.4]# vim /etc/php.ini
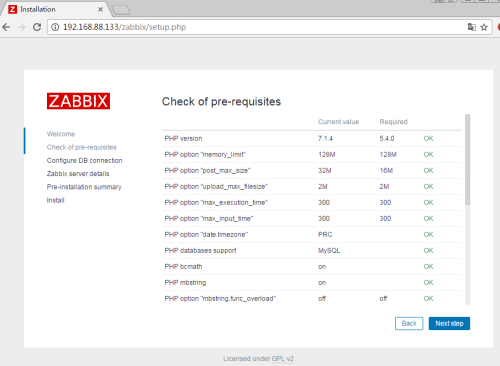
| bcmath.scale = 1 max_execution_time = 300 memory_limit = 128M post_max_size = 16M upload_max_filesize = 2M max_input_time = 300 date.timezone = PRC |
[[email protected] php-7.1.4]# service httpd restart
4.zabbix 网页配置
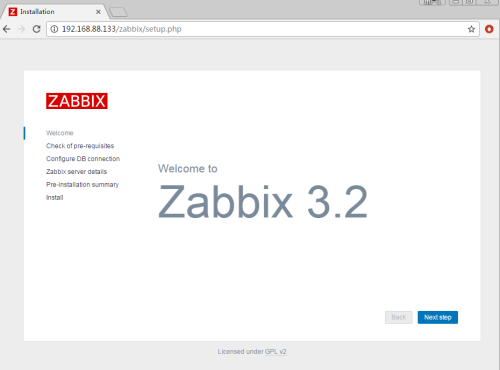
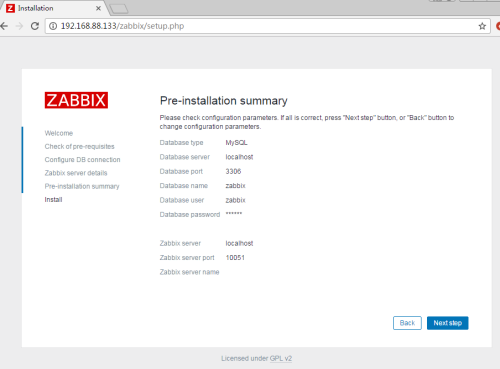
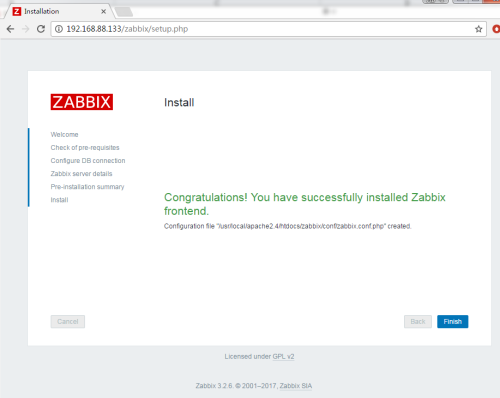
浏览器访问 Zabbix Server ip/zabbix
四、扩展内容
1.PHP 扩展:
| 名称 | 参数 | 选择 |
| bcmath | --enable-bcmath | 必须 |
| mbstring | --enable-mbstring | 必须 |
| sockets | --enable-sockets | 必须 |
| gd | --with-gd | 必须 |
| libxml | --with-libxml-dir | 必须 |
| xmlwriter | --with-libxml-dir | 必须 |
| xmlreader | --with-libxml-dir | 必须 |
| ctype | 默认支持 | 必须 |
| session | 默认支持 | 必须 |
| gettext | 默认支持 | 必须 |
| mysqli | --with-mysqli=mysqlnd | 推荐 |
2.Zabbix 特殊监控选项:
| 名称 | 描述 | 参数 |
| OpenIPMI | IPMI硬件监控 | --with-openipmi |
| libssh2 | SSH支持 | --with-ssh2 |
| fping | ICMP监控 | 外部安装 |
| libcurl | 监控web项 | --with-libcurl |
| libiksemel | 支持jabber告警 | 外部安装 |
| net-snmp | SNMP监控支持 | --with-net-snmp |
| java | java进程监控 | --enable-java |
五、FAQ
1.mysql启动时报一下错误;
/usr/libexec/mysqld: Can‘t find file: ‘./mysql/plugin.frm‘
解决办法:关闭selinux
2.登录zabbix web页面报以下错误;
A non well formed numeric value encountered [zabbix.php:21 → require_once() → ZBase->run() → ZBase->processRequest() → CView->getOutput() → include() → make_status_of_zbx() → CFrontendSetup->checkRequirements() → CFrontendSetup->checkPhpMemoryLimit() → str2mem() in include/func.inc.php:410]
原因:因为PHP 7.1.4 类型强化
解决办法:
[[email protected] sbin]# sed -i ‘/$last = strtolower(substr($val, -1));/a$val = substr($val,0,-1);‘ /usr/local/apache2.4/htdocs/zabbix/include/func.inc.php
3.启动zabbix_server 端口没监听,web页面显示服务没运行,查看日志报以下错误;
Is this process already running? Could not lock PID file [/tmp/zabbix_server.pid]: [11] Resource temporarily unavailable
解决办法:rm -rf /tmp/zabbix_server.pid ,再执行zabbix_server,服务器启动正常。
4.启动报错zabbix 服务报以下错误;
error while loading shared libraries: libmysqlclient.so.20: cannot open shared object file: No such file or directory
解决办法:
[[email protected] sbin]# ln -s /usr/local/mysql/lib/libmysqlclient.so.20 /lib64/libmysqlclient.so.20
或
[[email protected] sbin]# echo "/usr/local/mysql/lib" >> /etc/ld.so.conf
5.zabbix 服务启动正常,日志报错以下内容;
8779:20170512:085715.539 [Z3001] connection to database ‘zabbix‘ failed: [1045] Access denied for user ‘zabbix‘@‘localhost‘ (using password: NO)
8779:20170512:085715.539 database is down: reconnecting in 10 seconds
解决办法:修改 /usr/local/zabbix/etc/zabbix_server.conf 中 ListenIP=0.0.0.0
6.web页面出现乱码
解决办法:
①.在本地找到C:\Windows\Fonts\simkai.ttf,上传到zabbix网站目录fonts目录下.
②.修改zabbix php配置文件
[[email protected] zabbix]# sed -i ‘s/DejaVuSans/simkai/g‘ include/defines.inc.php
以上操作未能解决乱码问题
创建数据库指定字符集
create database zabbix default charset utf8;
或者my.cnf增加
default-character-set = utf8
本文出自 “Scorpions丶毒” 博客,请务必保留此出处http://scorpions.blog.51cto.com/7138036/1929718
以上是关于Zabbix 3.2 监控部署的主要内容,如果未能解决你的问题,请参考以下文章
CentOS 7.x下部署和配置zabbix 3.2.x监控工具
