图片破碎 效果
Posted 撒哈拉的雪
tags:
篇首语:本文由小常识网(cha138.com)小编为大家整理,主要介绍了图片破碎 效果相关的知识,希望对你有一定的参考价值。
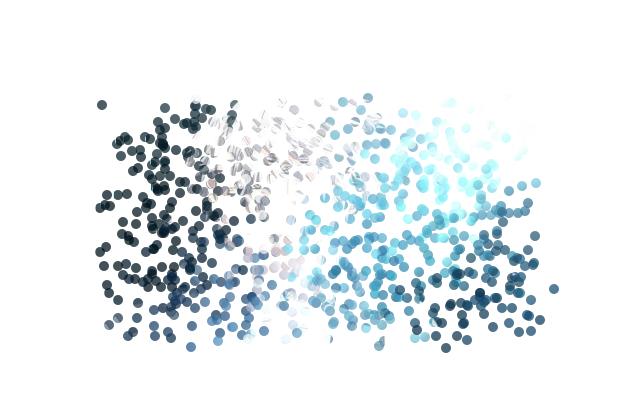
图片先显示 而后化为颗粒 、飞出、消失
效果图:
代码:
<!DOCTYPE>
<html>
<head>
    <meta http-equiv="Content-type" content="text/html; charset=utf-8" />
    <title></title>
    <style type="text/css">
        .boomCont{
            width: 400px;
            height: 220px;
            position: absolute;
            top: 0px;right: 0px;
            bottom: 0px;left: 0px;
            margin: auto;
            /*overflow: hidden;*/
            /*border: 1px solid red;*/
            /*display: flex;*/
        }
        .test-img{
            width: 400px;
            position: absolute;
            /*display: none;*/
            z-index: 10;
        }
        .item-ball{
            position: relative;
            top: 0px;left: 0px;
            float: left;
            background: url("test-img/t1.jpg");
            transition:all 1.8s linear;
            /*background-size:500px 400px;*/
            /*background-color: black;*/
            border-radius: 50%;
        }
        .item-ball:nth-child(1){
            display: none;
        }
    </style>
</head>
<body>
        <div class="boomCont" id="boomCont">
            <div class="item-ball"></div>
            <img class="test-img" src="test-img/t1.jpg" alt="">
        </div>

</body>
<script src="js/jquery-1.11.3.js"></script>
<script type="text/javascript">
    var box=document.getElementById(\'boomCont\'),
         ball=document.getElementsByClassName(\'item-ball\')[0],
         frag=document.createDocumentFragment(),
         dia=10,   //直径
         //中心点坐标
         xC= box.getBoundingClientRect().left+box.getBoundingClientRect().width/ 2,
         yC= box.getBoundingClientRect().top+box.getBoundingClientRect().height/ 2,
         rNum=parseInt(box.getBoundingClientRect().height/dia),
         cNum=parseInt(box.getBoundingClientRect().width/dia) ;
    ball.style.width=dia+\'px\';ball.style.height=dia+\'px\';
    for(var r=0;r<rNum;r++){
        for (var c=0;c<cNum;c++){
            var cl=ball.cloneNode(true);
            ball.style.backgroundPosition=\'-\'+c*dia+\'px \'+\'-\'+r*dia+\'px\';
            frag.appendChild(cl);
        }
    }
    box.appendChild(frag);
    function randNum(min,max){
        return (Math.random()*(max - min)+min);
    }
    function disappear(){
        console.log(xC,yC);
        $(\'.test-img\').fadeOut(1000);
      $(\'.item-ball\').each(function(){
          $(this).animate({
              \'top\':randNum(-110,110)+\'px\',
              \'left\':randNum(-200,200)+\'px\',
              \'transform\':\'scale(\'+randNum(0.3,1.8)+\')\',
              \'opacity\':0
          });
      });
    }
    disappear();

</script>
</html>
以上是关于图片破碎 效果的主要内容,如果未能解决你的问题,请参考以下文章
3.CCFadeOutTRTiles,部落格效果,跳动的方块特效,3D瓷砖晃动特效,破碎的3D瓷砖特效,瓷砖洗牌特效,分多行消失特效,分多列消失特效