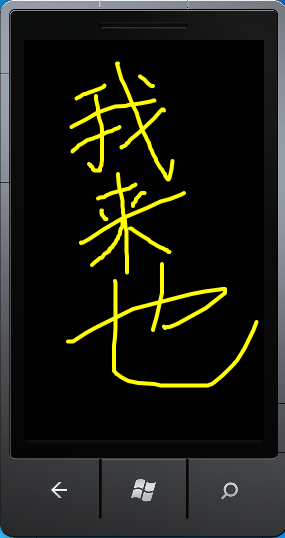
Windows Phone开发(21):做一个简单的绘图板
Posted 谢维开
tags:
篇首语:本文由小常识网(cha138.com)小编为大家整理,主要介绍了Windows Phone开发(21):做一个简单的绘图板相关的知识,希望对你有一定的参考价值。
其实我们今天要说的就是一个控件——InkPresenter,这个控件并不是十分强大,没办法和WPF中的InkCanvas相比,估计在实际开发中也很少可能会用到它,不过,我们还是来了解一下吧,毕竟用起来也不难。
使用该控件没有什么技术含量,注意一下以下几点就是了:
1、必须明确指定InkPresenter的宽度和高度,也就是不能使用自动值和Margin,不然不能收集墨迹,除非里面有子元素;
2、要收集墨迹,要设置Clip属性;
3、可以使用DrawingAttributes类设置墨迹的大小和颜色。
该控件不能像WPF那样自动实现收集墨迹的功能,也就是说只能是我们自己写代码了。
- <Grid>
- <InkPresenter x:Name="MyPresenter"
- HorizontalAlignment="Left"
- VerticalAlignment="Top"
- MouseLeftButtonDown="MyPresenter_MouseLeftButtonDown"
- LostMouseCapture="MyPresenter_LostMouseCapture"
- MouseMove="MyPresenter_MouseMove"
- Background="Transparent"
- Opacity="1" Width="480" Height="750" />
- </Grid>
- using System;
- using System.Collections.Generic;
- using System.Linq;
- using System.Net;
- using System.Windows;
- using System.Windows.Controls;
- using System.Windows.Documents;
- using System.Windows.Input;
- using System.Windows.Media;
- using System.Windows.Media.Animation;
- using System.Windows.Shapes;
- using Microsoft.Phone.Controls;
- // 引入以下命名空间。
- using System.Windows.Ink;
- namespace InkPresentSample
- {
- public partial class MainPage : PhoneApplicationPage
- {
- Stroke CurrentStroke = null;
- // 构造函数
- public MainPage()
- {
- InitializeComponent();
- // 设置剪辑,以便收集墨迹
- RectangleGeometry rg = new RectangleGeometry();
- // 为了使范围准确,应使用控件的最终呈现高度。
- rg.Rect = new Rect(0, 0, MyPresenter.ActualWidth, MyPresenter.ActualHeight);
- MyPresenter.Clip = rg;
- }
- private void MyPresenter_MouseLeftButtonDown(object sender, MouseButtonEventArgs e)
- {
- // 当我们点击时获捉鼠标光标
- MyPresenter.CaptureMouse();
- // 收集当前的光标所在的位置的点
- StylusPointCollection sc = new StylusPointCollection();
- sc.Add(e.StylusDevice.GetStylusPoints(MyPresenter));
- CurrentStroke = new Stroke(sc);
- // 设置笔触的颜色,大小
- CurrentStroke.DrawingAttributes.Color = Colors.Yellow;
- CurrentStroke.DrawingAttributes.Width = 8;
- CurrentStroke.DrawingAttributes.Height = 8;
- // 把新的笔触添加到集合中
- MyPresenter.Strokes.Add(CurrentStroke);
- }
- private void MyPresenter_LostMouseCapture(object sender, MouseEventArgs e)
- {
- // 当释放鼠标时,也同时释放笔触变量的引用
- CurrentStroke = null;
- }
- private void MyPresenter_MouseMove(object sender, MouseEventArgs e)
- {
- if (CurrentStroke != null)
- {
- // 每移动一次鼠标,都收集对应的点。
- CurrentStroke.StylusPoints.Add(e.StylusDevice.GetStylusPoints(MyPresenter));
- }
- }
- }
- }

以上是关于Windows Phone开发(21):做一个简单的绘图板的主要内容,如果未能解决你的问题,请参考以下文章