java是如何实现客服在线聊天功能的?
Posted
tags:
篇首语:本文由小常识网(cha138.com)小编为大家整理,主要介绍了java是如何实现客服在线聊天功能的?相关的知识,希望对你有一定的参考价值。
Java 实现在线客服聊天功能的具体方式会因具体实现技术和业务需求不同而异,以下是一个可能的实现思路:
客户端和服务端之间的通信协议:在实现在线聊天功能的时候,需要考虑客户端和服务端之间的通信协议。可以使用 WebSocket 协议,这是一种全双工通信协议,支持客户端和服务端之间的实时通信。Java 提供了多个 WebSocket 实现,比如 Tyrus、Jetty 和 Netty。
实现服务端:在服务端实现在线聊天功能,需要创建 WebSocket 服务器,并实现消息处理逻辑。在 Java 中,可以使用 Java WebSocket API,该 API 提供了 javax.websocket 包中的类和接口,可以方便地创建 WebSocket 服务器和处理 WebSocket 消息。
在服务端,需要实现 WebSocket 端点(Endpoint),处理客户端连接、断开连接以及收发消息等操作。可以通过扩展 javax.websocket.Endpoint 类,重写 onOpen、onClose 和 onMessage 方法来处理相应的操作。
实现客户端:在客户端实现在线聊天功能,需要创建 WebSocket 客户端,并实现消息处理逻辑。Java 提供了多个 WebSocket 客户端实现,比如 Tyrus、Jetty 和 Netty。
在客户端,可以使用 Java WebSocket API 提供的 javax.websocket 包中的类和接口来实现 WebSocket 客户端。需要使用 javax.websocket.ClientEndpoint 注解来标记客户端类,并使用 javax.websocket.Session 类来处理客户端连接、断开连接以及收发消息等操作。
存储聊天记录:在实现在线聊天功能时,需要考虑如何存储聊天记录。可以使用数据库或者文件等方式存储聊天记录,具体实现可以依据具体业务需求。
以上是一种可能的实现思路,实现在线聊天功能需要考虑很多具体细节,包括客户端和服务端的具体实现、消息处理逻辑、聊天记录存储等。
WebSocket是一种基于TCP协议的双向通信协议,它能够在浏览器和服务器之间建立持久性的连接,实现实时双向通信。使用WebSocket,可以在客户端和服务器之间发送消息,并实现实时聊天的功能。
Servlet是Java Web应用中的一种组件,可以接收HTTP请求并返回响应。在实现在线聊天功能时,可以使用Servlet来处理客户端的请求,并把聊天消息交给WebSocket来处理。
以下是一个简单的示例:
1. 创建WebSocket类
```java
import javax.websocket.*;
import javax.websocket.server.ServerEndpoint;
import java.io.IOException;
import java.util.concurrent.CopyOnWriteArraySet;
@ServerEndpoint("/websocket")
public class ChatWebSocket
private static CopyOnWriteArraySet<ChatWebSocket> webSocketSet = new CopyOnWriteArraySet<>();
private Session session;
@OnOpen
public void onOpen(Session session)
this.session = session;
webSocketSet.add(this);
@OnClose
public void onClose()
webSocketSet.remove(this);
@OnMessage
public void onMessage(String message, Session session) throws IOException
for (ChatWebSocket webSocket : webSocketSet)
if (!webSocket.session.getId().equals(session.getId()))
webSocket.session.getBasicRemote().sendText(message);
```
在上述代码中,我们使用`@ServerEndpoint`注解创建了一个WebSocket端点,指定了其访问路径为`/websocket`。当有客户端连接该端点时,会调用`onOpen()`方法将客户端加入到WebSocket集合中;当客户端断开连接时,会调用`onClose()`方法将其从WebSocket集合中移除;当有客户端发送消息时,会调用`onMessage()`方法将消息转发给所有其他客户端。
2. 创建Servlet类
```java
import javax.servlet.ServletException;
import javax.servlet.annotation.WebServlet;
import javax.servlet.http.HttpServlet;
import javax.servlet.http.HttpServletRequest;
import javax.servlet.http.HttpServletResponse;
import java.io.IOException;
@WebServlet(name = "ChatServlet", urlPatterns = "/chat")
public class ChatServlet extends HttpServlet
@Override
protected void doGet(HttpServletRequest request, HttpServletResponse response)
throws ServletException, IOException
request.getRequestDispatcher("chat.jsp").forward(request, response);
```
在上述代码中,我们使用`@WebServlet`注解创建了一个Servlet,指定了其访问路径为`/chat`。当客户端请求该路径时,会转发到`chat.jsp`页面。
3. 创建JSP页面
```jsp
<!DOCTYPE html>
<html>
<head>
<meta charset="UTF-8">
<title>聊天室</title>
<script type="text/javascript">
var socket = new WebSocket('ws://' + location.host + '/websocket');
socket.onmessage = function(event)
var contentDiv = document.getElementById('content');
contentDiv.innerHTML += event.data + '<br/>';
;
function send()
var messageInput = document.getElementById('message');
var message = messageInput.value.trim();
if (message === '')
return;
socket.send(message);
messageInput.value = '';
</script>
</head>
<body>
<h1>聊天室</h1>
<div id="content"></div>
<input type="text" id="message"/>
<button onclick="send()">发送</button>
</body>
</html>
```
在上述代码中,我们使用JavaScript创建了一个WebSocket对象,并指定了连接地址为`ws://localhost:8080/websocket`。当该连接收到消息时,会将消息添加到页面中;当用户在输入框中输入消息并点击发送按钮时,会通过WebSocket发送消息到服务器。
以上就是使用WebSocket和Servlet实现在线聊天功能的简单示例。需要注意的是,在实际应用中还需要考虑更多的安全性和可靠性问题,并进行更复杂的实现。 参考技术B 如果是web + service模式,可以使用websocket(scoketio),或者sse。
php客服聊天功能(后台)
上一篇随笔是客服的前台,顾客只能与店主聊天,这一篇则是后台,是店主登录而且可以与每一位顾客聊天:
实现的功能:
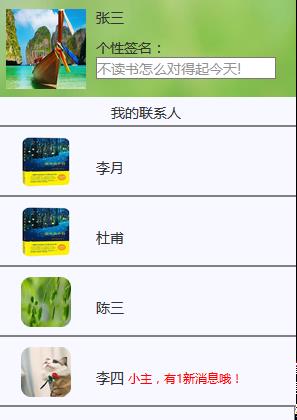
(1)右边的联系人列表:
未联系过的不显示;只显示联系过的;可以清空消息记录;有新消息时会有提醒,当点击后,提醒消失,清空按钮出现;
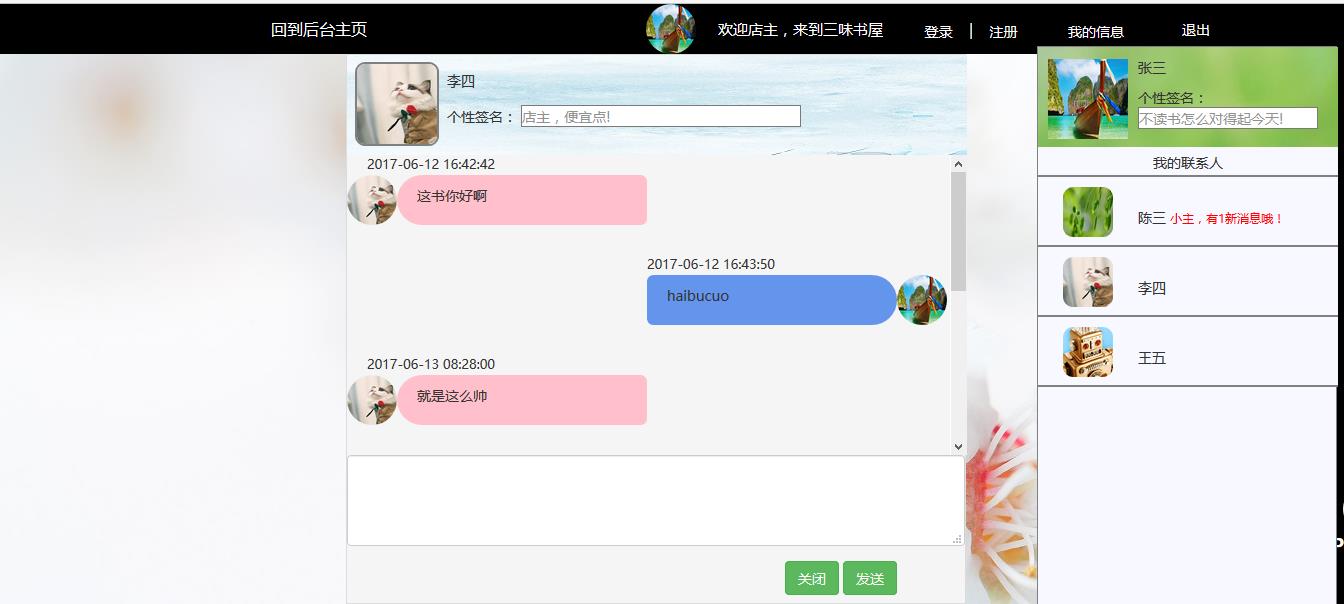
(2)左边的对话框
点击右边的联系人,显示该联系人的头像和他的对话消息(和前台页面一样)
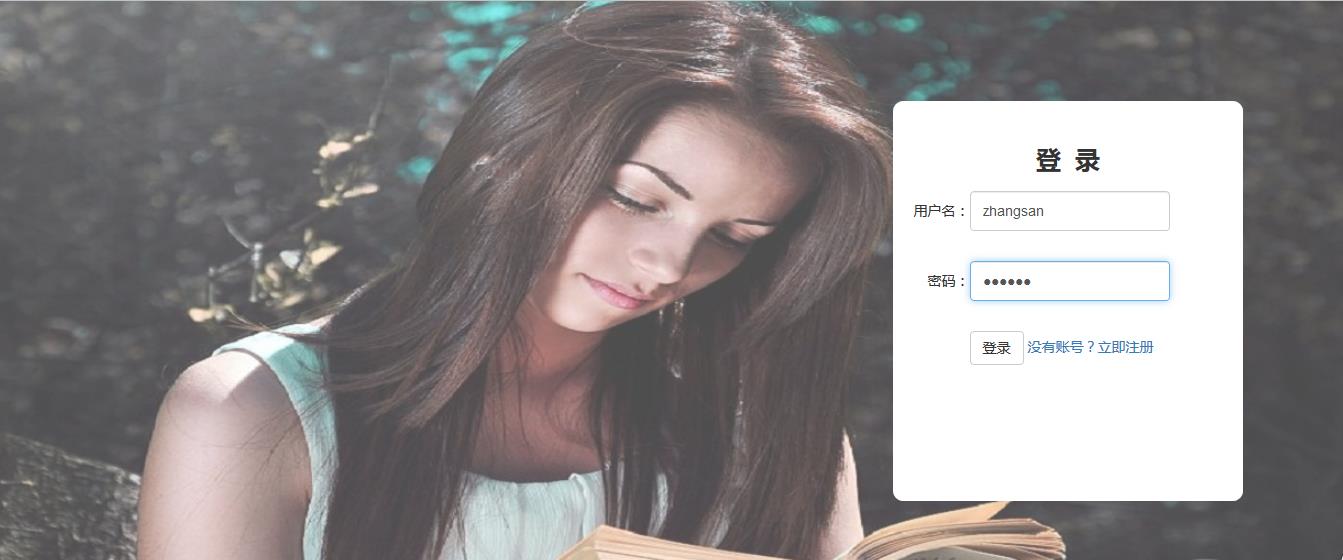
第一步还是登录:
显示列表的实现:
<div class="ff" style="background-color: ghostwhite;"> <div style="height: 100px; width: 300px;background-image: url(../img/1.jpg);">//读取所有给店主发过信息的联系人界面,包括头像和姓名 <?php $uid = $_SESSION["uid"]; $sql = "select * from users where uid=\'{$uid}\'"; $arr = $db->query($sql); foreach($arr as $v) { echo "<div style=\'height:100px;width:100px;float:left;text-align:center;line-height:100px\'> <img src=\'{$v[6]}\' height=\'80px\' width=\'80px\'/></div> <div style=\'height:100px;width:200px;float:left;\'> <div style=\'height:40px;width:200px;text-align:left;line-height:40px\'> {$v[2]} </div> <div style=\'height:60px;width:200px;\'> 个性签名: <input type=\'text\' placeholder=\'不读书怎么对得起今天!\' style=\'width:180px\'> </div> </div>"; } ?> </div> <div style="height: 30px; width: 300px;text-align:center;line-height:30px;border-bottom:2px solid grey;background-color: ghostwhite;"> 我的联系人 </div> <div style="height: 470px; width: 300px;"> <?php $uid = $_SESSION["uid"]; if($uid=="zhangsan") {//读取所有给张三发过信息的联系人,并按发送时间的降序排序$sql2="select * from duihua where jsid=\'{$uid}\' group by uid order by dhtime desc"; $arr2= $db->query($sql2); // var_dump($arr2); foreach($arr2 as $n) { $sql3 = "select * from users where uid=\'{$n[2]}\' ";//从users表中读取中文姓名 $arr3=$db->query($sql3); $sql4 = "select count(*) from duihua where uid=\'{$n[2]}\' and isok=\'0\'";//从对话表中读取不同联系人未读信息的条数, $shumu =$db->strquery($sql4); echo "<div style=\'height:70px; width: 300px;border-bottom:2px solid grey;background-color:ghostwhite\' class=\'guke\' aaa=\'{$n[2]}\'> <div style=\'height:70px; width: 100px; float:left;\'> <div style=\'height:50px;width:50px;margin:10px auto; border-radius:10px;overflow:hidden\'> <img src=\'{$arr3[0][6]}\' height=\'50px\' width=\'50px\'/> </div> </div>"; if($shumu>0){ echo"<div class=\'dh\' yh=\'{$n[2]}\' style=\'height:70px; width: 200px;float:left;line-height:80px\'> {$arr3[0][2]} <span style=\'font-size:12px;color:red\'>小主,有{$shumu}新消息哦!</span> </div> </div>"; } else { echo"<div class=\'dh\' yh=\'{$n[2]}\' style=\'height:70px; width: 200px;float:left;line-height:80px\'> {$arr3[0][2]} </div> </div>"; } } } ?> </div> </div>
实现效果:
第三步:点击该列表可以移动,实现移动:
 $(".ff").mousedown(function(e){
      //设置移动后的默认位置
      var endx=0;
      var endy=0;
      //获取div的初始位置,要注意的是需要转整型,因为获取到值带px
      var left= parseInt($(".ff").css("left"));
      var top = parseInt($(".ff").css("top"));
      //获取鼠标按下时的坐标,区别于下面的es.pageX,es.pageY
      var downx=e.pageX;
      var downy=e.pageY;     //pageY的y要大写,必须大写!!
   //    鼠标按下时给div挂事件
  $(".ff").bind("mousemove",function(es){
      //es.pageX,es.pageY:获取鼠标移动后的坐标
      var endx= es.pageX-downx+left;     //计算div的最终位置
      var endy=es.pageY-downy+top;
      //带上单位
      $(".ff").css("left",endx+"px").css("top",endy+"px")
  });
})

  $(".ff").mouseup(function(){
      //鼠标弹起时给div取消事件
      $(".ff").unbind("mousemove")
  })
第四步:点击不同的用户进入不同用户的界面(以头像作为区别);用session来做(核心):
<script>
    $(".guke").dblclick(function(){
        var aaa=$(this).attr("aaa");
  $.ajax({
            url:"yidu-cl.php",
            data:{yh:aaa},
            type:"POST",
            dataType:"TEXT",
            success: function(data){
                window.location.href="ht-dh.php";
            }
        });
    })

</script>
yidu-cl.php页面:
<?php
session_start();
require "DBDA.class.php";
$db = new DBDA();
$uid=$_SESSION["uid"];

$yh=$_POST["yh"];<br>//存一下
$_SESSION["cuid"]=$yh;
$sql = "update duihua set isok=\'1\' where uid=\'{$yh}\' and jsid=\'{$uid}\'";
echo $sql;
$db->query($sql,0);
?>
对话页面:
<div id="zhongjian">

                <!--对话-->
            <div id="mid">
<!--判断是否已经存了cuid,注意一点,这是前半部分代码;后半部分代码在最后边;不然会报错的!!!!-->
                          <?php
        if(!empty($_SESSION["cuid"]))
        {
      ?>
 <div id="kuangjia" style="background-color: whitesmoke;height: 550px;width: 620px;margin: 0px auto;border: 1px solid gainsboro; ">
        <div id="neirong" style="height: 400px;width: 620px;">
            <div style="height: 100px;width: 620px;background-image: url(../img/bj4.jpg);">
<!--取存的cuid,显示该联系人的头像姓名等信息-->
            <?php
        $cuid = $_SESSION["cuid"];
        $sql3 = "select * from users where uid=\'{$cuid}\'";
        $arr3 = $db->query($sql3);
        foreach($arr3 as $c)
        {
        echo "
        <div style=\'height:100px;float:left;width:100px;float:left;\'>
            <div style=\'border:2px solid grey;height:84px;width:84px;margin:7px auto; border-radius:10px;overflow:hidden\'>
            <img src=\'{$c[6]}\' height=\'80px\' width=\'80px\'/>
            </div>
            </div>
            <div style=\'height:100px;width:500px;float:left;\'>
            <div style=\'height:50px;width:500px;text-align:left;line-height:50px\'>
                {$arr3[0][2]}
            </div>
                <div style=\'height:50px;width:500px;text-align:left;\'>个性签名:
                <input type=\'text\' placeholder=\'店主,便宜点!\' style=\'width:280px\'>
            </div>
            </div>
            ";
        }
        ?>
        </div>
        <!--读取聊天内容-->
        <div style="height: 300px;width: 620px;overflow: auto;overflow-x:hidden ;">
       <?php
                $cuid = $_SESSION["cuid"];

                $sql4 = "select * from users where uid=\'{$cuid}\'";
                $arr4 = $db->query($sql4);

                $sql5="select * from duihua where uid=\'{$cuid}\' or jsid=\'{$cuid}\' order by dhtime";
                $arr5= $db->query($sql5);
                foreach($arr5 as $f)
                {
                //该联系人的信息显示在左侧,和前台相反
                if($f[2]==$cuid)
                {
                echo "<div style=\'height:100px;width:600px;\'>
                <div style=\'height:100px;width:300px;float:left\'>
                    <div style=\'height:20px;width:300px;font-size:13px;padding-left:20px\'>
                            {$f[6]}</div>
                    <div style=\'height:80px;width:50px;float:left\'>
                        <div style=\'height:50px;width:50px;margin:0px auto; border-radius:90px;overflow:hidden;\'>
                            <img src=\'{$arr4[0][6]}\' height=\'50px\' width=\'50px\'/>
                        </div>
                    </div>
                    <div style=\'min-height:40px;width:250px;float:left;background-color:pink; border-bottom-right-radius: 10px;border-top-right-radius: 10px;border-top-left-radius: 40px;border-bottom-left-radius: 40px;\'>
                        <p style=\'padding-left:20px; line-height:40px\'>
                            {$f[4]}</p>
                    </div>
                </div></div>";
                }
                //如果是店主,则显示在右侧
              if($f[2]==\'zhangsan\')
                {
                echo "<div style=\'height:100px;width:600px;margin-right:20px\'>
                <div style=\'height:100px;width:300px; float:right\'>
                    <div style=\'height:20px;width:300px;font-size:13px;padding-right:20px\'>
                            {$f[6]}</div>
                    <div style=\'height:80px;width:50px;float:right\'>
                        <div style=\'height:50px;width:50px;margin:0px auto; border-radius:90px;overflow:hidden;\'>
                            <img src=\'{$v[6]}\' height=\'50px\' width=\'50px\'/>
                        </div>
                    </div>
                    <div style=\'min-height:40px;width:250px;float:right;background-color:cornflowerblue; border-bottom-left-radius: 10px;border-top-left-radius: 10px;border-top-right-radius: 40px;border-bottom-right-radius: 40px;\'>
                        <p style=\'padding-left:20px; line-height:40px\'>
                            {$f[4]}</p>
                    </div>
                </div></div>";
                }
                }
                ?>
        </div>
        </div> <!--id="neirong"-->
    <form role="form">
      <div class="form-group">
        <textarea class="form-control" rows="3" id="words"></textarea>
      </div>
    </form>
    <div id="fs" style="height: 50px; width: 600px;text-align: right; padding-right: 50px;">
    <button type="button" class="btn btn-success guanbi"  bbb="<?php  echo $cuid;  ?>" >关闭</button>
    <button type="button" class="btn btn-success fasong">发送</button>
    </div>
    </div>
<!--是最开始判断是否为空的结尾-->
 <?php
      }
  ?>
        </div>    <!--id=mid-->
</div> <!--id=zhongjian-->
以上是关于java是如何实现客服在线聊天功能的?的主要内容,如果未能解决你的问题,请参考以下文章