lamp脚本一键搭建
Posted
tags:
篇首语:本文由小常识网(cha138.com)小编为大家整理,主要介绍了lamp脚本一键搭建相关的知识,希望对你有一定的参考价值。
使用脚本安装LAMP环境:
(1)安装apache的httpd:
脚本内容:
[[email protected] bin]# cat apache_install.sh
#!/bin/bash
#by linuxfan
rpm -e httpd httpd-manual --nodeps
ls /root/httpd*
if [ $? -eq 0 ];then
tar zxvf /root/httpd-2.2.17.tar.gz -C /usr/src/
cd /usr/src/httpd-2.2.17/
./configure --prefix=/usr/local/httpd --enable-rewrite --enable-so --disable-access 1>/dev/null
make &&make install
fi
[[email protected] bin]#
执行安装:
[[email protected] bin]# sh -x apache_install.sh
验证:
[[email protected] bin]# yum -y install tree
[[email protected] bin]# tree -L 2 /usr/local/httpd/
/usr/local/httpd/
├── bin
│ ├── ab
│ ├── apachectl
│ ├── apr-1-config
│ ├── apu-1-config
│ ├── apxs
│ ├── checkgid
│ ├── dbmmanage
(2)优化httpd:
[[email protected] bin]# cp /usr/local/httpd/bin/apachectl /etc/init.d/httpd ##复制启动文件
[[email protected] bin]# vi /etc/init.d/httpd
:set nu
1 #!/bin/bash
2 # chkconfig: 35 85 15
3 # description: A scripts for apache httpd deamon.
83 echo "httpd is $ARGV ! "
:wq
[[email protected] bin]# chkconfig --add httpd ##添加为系统服务
[[email protected] bin]# chmod +x /etc/init.d/httpd # #授权
[[email protected] bin]# /etc/init.d/httpd start
httpd is start !
[[email protected] bin]# netstat -utpln |grep 80
tcp 0 0 :::80 :::* LISTEN 53516/httpd
(3)安装mysql数据库:
脚本内容:
[[email protected] bin]# cat mysql_install.sh
#!/bin/bash
##第一配置yum,安装ncurses依赖包
yum -y install ncurses-*
#解压cmake,安装基础环境
tar zxvf /root/cmake-2.8.6.tar.gz -C /usr/src/
cd /usr/src/cmake-2.8.6
#配置,编译安装cmake
./configure &&gmake &&gmake install
##解压mysql
tar zxvf /root/mysql-5.5.22.tar.gz -C /usr/src/
cd /usr/src/mysql-5.5.22/
#cmake进行配置mysql
cmake -DCMAKE_INSTALL_PREFIX=/usr/local/mysql #指定安装目录\
-DDEFAULT_CHARSET=utf8 #指定字符集为utf8 \
-DDEFAULT_COLLATION=utf8_general_ci ##指定字符校验 \
-DWITH_EXTRA_CHARSETS=all ##支持额外字符集\
-DSYSCONFDIR=/etc/ ##指定配置文件位置
make &&make install #编译安装
if [ -e /usr/local/mysql ];then
echo "mysql install successfully."
fi
[[email protected] bin]#
安装:
[[email protected] bin]# sh -x mysql_install.sh
。。。。。省略。。。。。
+ echo ‘mysql install successfully.‘
mysql install successfully.
[[email protected] bin]# ls /usr/local/mysql/
bin data include lib mysql-test scripts sql-bench
COPYING docs INSTALL-BINARY man README share support-files
mysql只需要安装,不需要配置和启动。
(4)安装php环境:
a.脚本内容:
[[email protected] bin]# cat php_install.sh
#!/bin/bash
##by linuxfan 20150611
#1.卸载已经安装rpm包
rpm -qa |grep php
if [ $? -eq 0 ];then
rpm -e php php-mysql --nodeps
fi
#2.安装mcrypt支持,安装的顺序必须libmcrypt-->mhash-->mcrypt,每安装都必须ln链接到系统库中,echo "/usr/local/lib/" >>/etc/ld.conf&&ldconfig
##########install mcrypt###########
tar zxvf /root/libmcrypt-2.5.8.tar.gz -C /usr/src/
cd /usr/src/libmcrypt-2.5.8/
./configure &&make &&make install
ln -s /usr/local/lib/libmcrypt.* /usr/lib
tar zxvf /root/mhash-0.9.9.9.tar.gz -C /usr/src/
cd /usr/src/mhash-0.9.9.9/
./configure &&make &&make install
ln -s /usr/local/lib/libmhash* /usr/lib/
tar zxvf /root/mcrypt-2.6.8.tar.gz -C /usr/src/
cd /usr/src/mcrypt-2.6.8/
./configure &&make &&make install
#3.安装php
##############install php #############
yum -y install libxml2-* zlib-*
PHV=php-5.3.28
tar zxvf /root/$PHV.tar.gz -C /usr/src/
cd /usr/src/$PHV/
./configure --prefix=/usr/local/php5 --with-mcrypt --with-apxs2=/usr/local/httpd/bin/apxs --with-mysql=/usr/local/mysql/ \
--with-config-file-path=/usr/local/php5 --enable-mbstring &&make &&make install
if [ -e /usr/local/php5 ]
then
echo "php install success."
fi
[[email protected] bin]#
b.执行安装脚本:
[[email protected] bin]# sh -x php_install.sh
+ echo ‘php install success.‘
php install success.
c. php配置脚本内容:
[[email protected] bin]# cat php_config.sh
#!/bin/bash
##by linuxfan
##############config php############
PHV=php-5.3.28
cp /usr/src/$PHV/php.ini-development /usr/local/php5/php.ini
#修改配置项支持php标记<?php ?>
sed -i ‘s/short_open_tag = Off/short_open_tag = On/g‘ /usr/local/php5/php.ini
##设置默认字符集utf8
echo "default_charset = "utf8" " >>/usr/local/php5/php.ini
###########add module zend############
ZDV=ZendGuardLoader-php-5.3-linux-glibc23-x86_64
tar zxvf /root/$ZDV.tar.gz -C /root/
cp -rf /root/$ZDV/php-5.3.x/ZendGuardLoader.so /usr/local/php5/lib/php/
cat <<END >>/usr/local/php5/php.ini
zend_extension=/usr/local/php5/lib/php/ZendGuardLoader.so
zend_enable=1
END
[[email protected] bin]#
d.执行php配置脚本:
[[email protected] bin]# sh -x php_config.sh
lamp配置脚本内容:
[[email protected] bin]# cat lamp_config.sh
#!/bin/bash
##by scfa 2015-06-30
################# Setting apache with php ################
#1.修改apache的配置文件
APACHE_C=/usr/local/httpd/conf/httpd.conf
##添加ServerName设置FQDN
sed -i ‘/^#ServerName/a ServerName www.linuxfan.cn‘ $APACHE_C
##在第310行后一行添加php应用类型的支持
sed -i ‘310a \ AddType application/x-httpd-php .php‘ $APACHE_C
##修改默认首页,支持index.php
sed -i ‘s/DirectoryIndex index.html/DirectoryIndex index.html index.php/g‘ $APACHE_C
netstat -uptln |grep 80 &>/dev/null
if [ $? -eq 0 ]
then
/usr/local/httpd/bin/apachectl stop && /usr/local/httpd/bin/apachectl start
netstat -uptln |grep 80
echo "apache restart successful"
else
/usr/local/httpd/bin/apachectl start
netstat -utpln |grep 80
fi
[[email protected] bin]#
e.执行lamp配置脚本:
[[email protected] bin]# sh -x lamp_config.sh
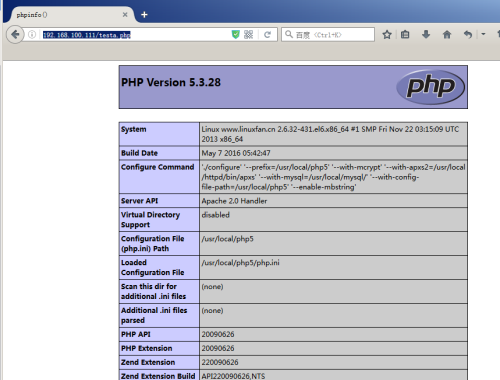
测试页面脚本内容:
[[email protected] bin]# cat webpage.sh
#!/bin/bash
##by scfa 2015-06-30
################# Test Pages for php and mysql ############
DCT=/usr/local/httpd/htdocs/
cat <<END > $DCT/testa.php
<?php
phpinfo();
?>
END
cat <<END > $DCT/testm.php ##由于本地mysql未启用
<?php
\$link=mysql_connect(‘192.168.100.112‘,‘root‘,‘123123‘);
if(\$link) echo "mysql ok!";
mysql_close();
?>
END
H_IP=$(ifconfig eth0 |awk -F ‘[ :]+‘ ‘NR==2 {print $4}‘)
echo "Usage: http://$H_IP/testa.php for test apache with php"
echo "Usage: http://$H_IP/testm.php for test apache with mysql"
[[email protected] bin]#
f.执行脚本:
[[email protected] bin]# sh -x webpage.sh
g.测试:
因为mysql还没有部署,才报的错误。
部署DB:
下载软件:
[[email protected] ~]# wget ftp://192.168.100.100/tools/lamp_install_publis-app-2015-07-16.tar.xz
[[email protected] ~]# tar Jxvf lamp_install_publis-app-2015-07-16.tar.xz
安装mysql数据:
mysql配置脚本内容:
[[email protected] ~]# cd bin/
[[email protected] bin]# cat mysql_config.sh
#!/bin/bash
#1.复制配置文件
cp /usr/src/mysql-5.5.22/support-files/my-medium.cnf /etc/my.cnf
#2.添加系统服务
cp /usr/src/mysql-5.5.22/support-files/mysql.server /etc/init.d/mysqld
chmod +x /etc/init.d/mysqld
chkconfig --add mysqld
chkconfig mysqld on
#3.优化PATH路径,执行命令时方便,单引号双引号都行
grep mysql /etc/profile
if [ $? -eq 0 ];then
echo "PATH is set."
else
echo "export PATH=$PATH:/usr/local/mysql/bin" >>/etc/profile
source /etc/profile ##执行文件
fi
#4.初始化mysql,创建用户,赋权
useradd -M -s /sbin/nologin mysql
chown -R mysql:mysql /usr/local/mysql
/usr/local/mysql/scripts/mysql_install_db \
--basedir=/usr/local/mysql \
--datadir=/usr/local/mysql/data --user=mysql
#5.启动mysql,并设置为开机启动
if [ -e /tmp/mysql.sock ];then
/etc/init.d/mysqld restart
else
/etc/init.d/mysqld start
fi
chkconfig mysqld on
#6.修改密码,并提示密码
mysqladmin -u root password ‘123123‘ &&echo "mysql root password is 123123"
[[email protected] bin]# sh -x mysql_install.sh &&sh -x mysql_config.sh
[[email protected] bin]# source /etc/profile
[[email protected] bin]# mysql -uroot -p123123
Welcome to the MySQL monitor. Commands end with ; or \g.
Your MySQL connection id is 2
Server version: 5.5.22-log Source distribution
Copyright (c) 2000, 2011, Oracle and/or its affiliates. All rights reserved.
Oracle is a registered trademark of Oracle Corporation and/or its
affiliates. Other names may be trademarks of their respective
owners.
Type ‘help;‘ or ‘\h‘ for help. Type ‘\c‘ to clear the current input statement.
mysql>
5.授权访问:
mysql> flush privileges;
mysql> grant all on *.* to ‘root‘@‘192.168.100.111‘ identified by ‘123123‘;
Query OK, 0 rows affected (0.00 sec)
6.项目上线:
(1)简单优化mysql:
a.删除空密码和空用户名的用户:
mysql> delete from mysql.user where user=‘‘;
Query OK, 2 rows affected (0.00 sec)
mysql> delete from mysql.user where password=‘‘;
Query OK, 3 rows affected (0.00 sec)
本文出自 “12289734” 博客,请务必保留此出处http://12299734.blog.51cto.com/12289734/1908240
以上是关于lamp脚本一键搭建的主要内容,如果未能解决你的问题,请参考以下文章


