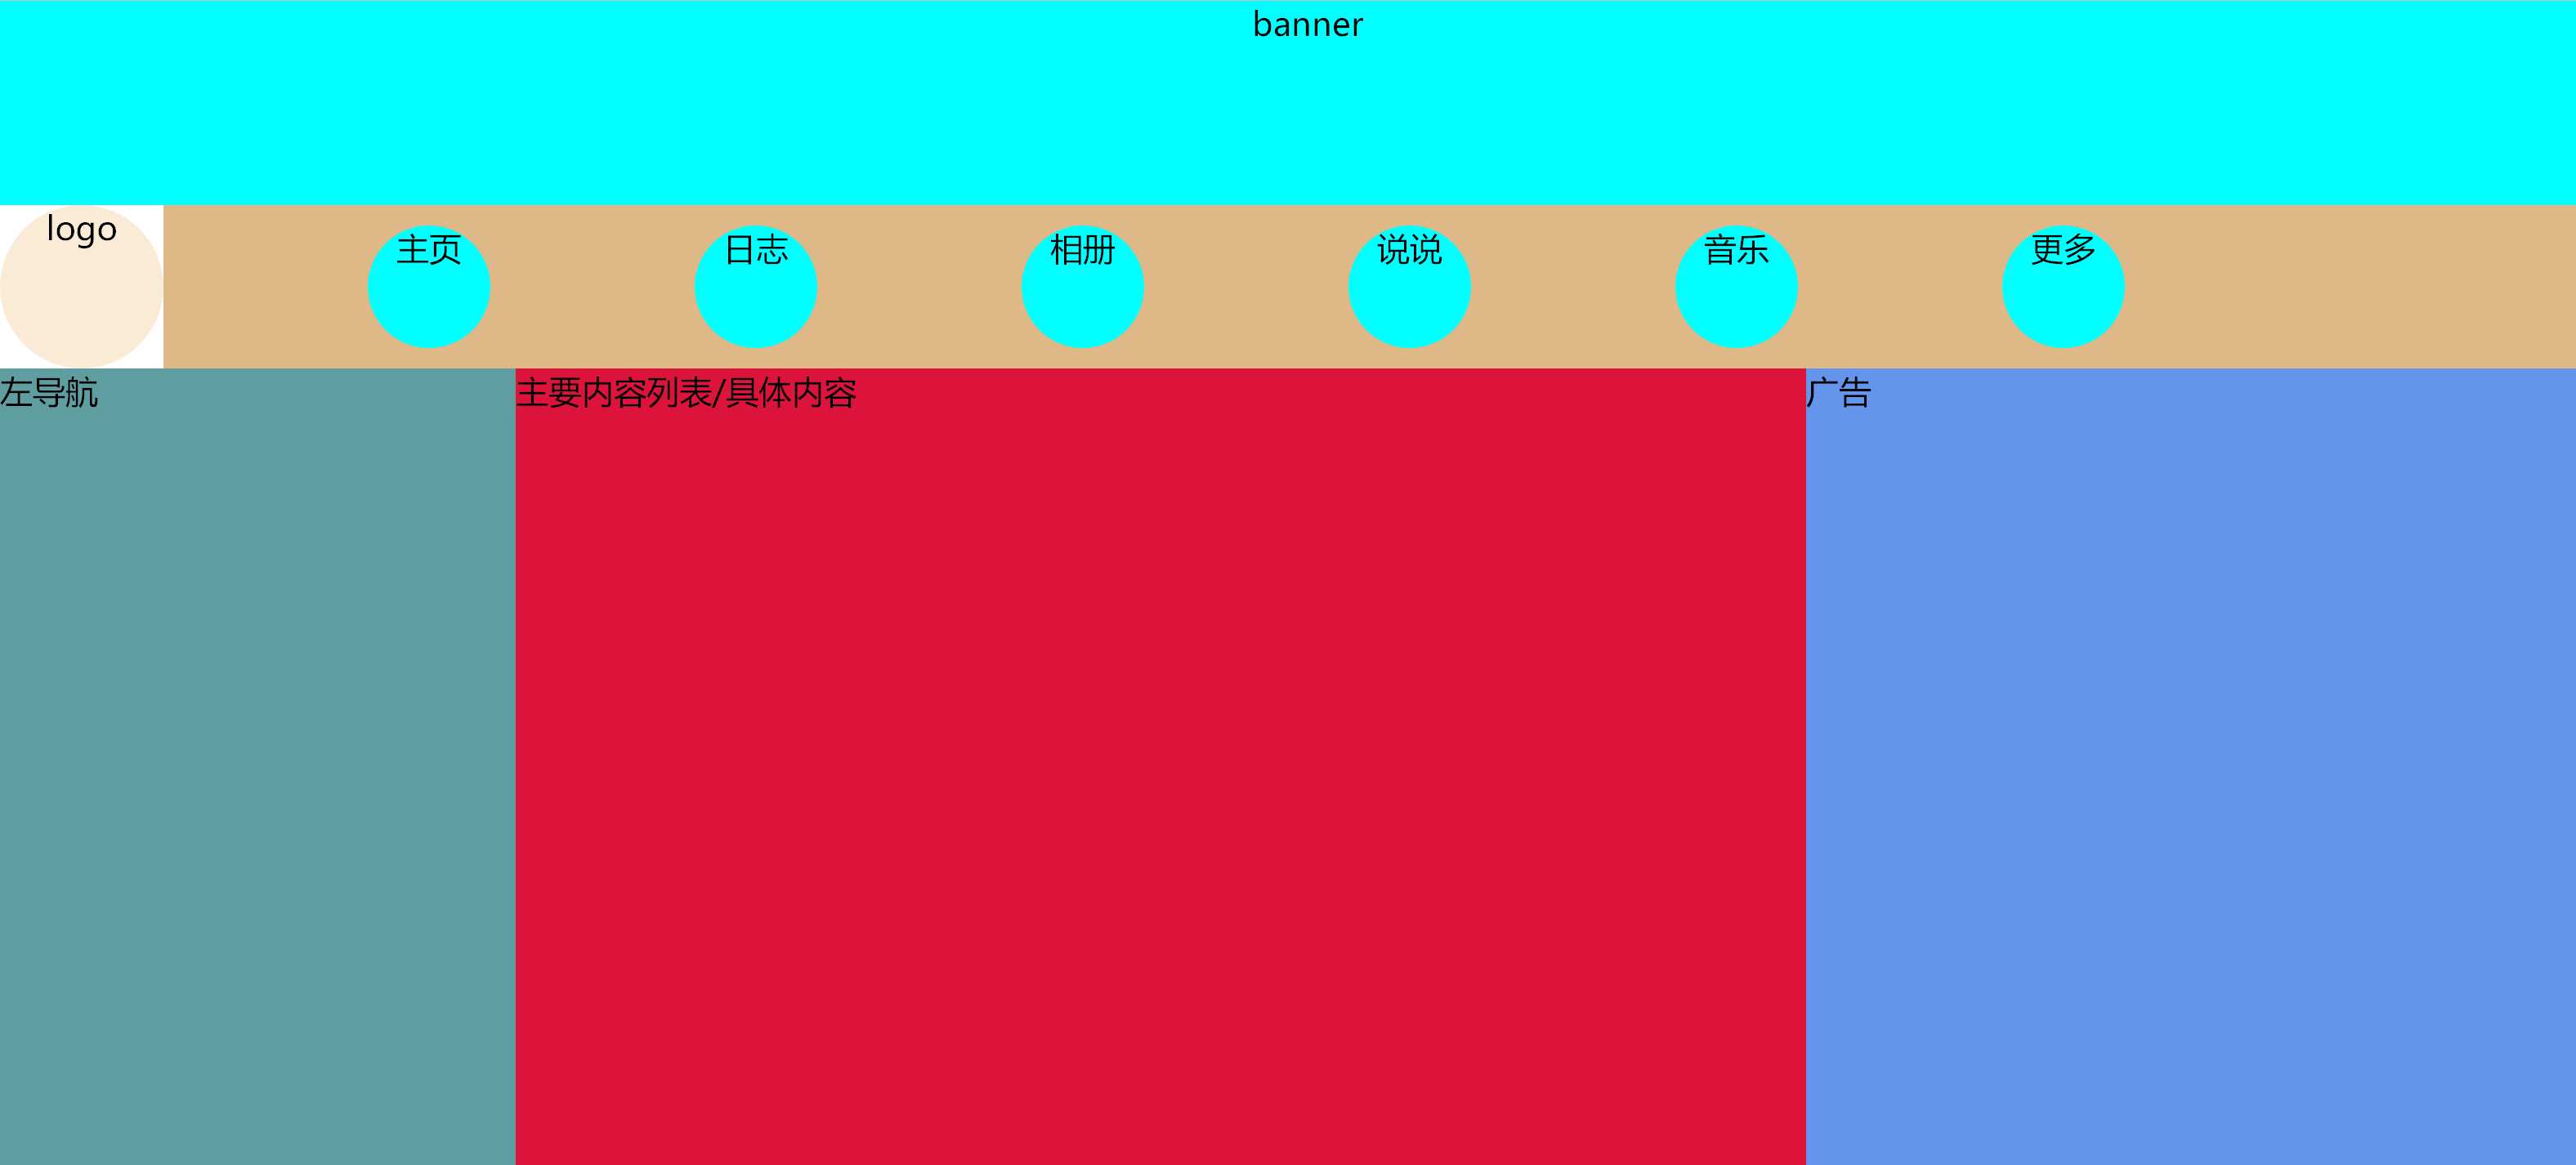
自写网站——第一部
Posted
tags:
篇首语:本文由小常识网(cha138.com)小编为大家整理,主要介绍了自写网站——第一部相关的知识,希望对你有一定的参考价值。
在老师还没有开始培训之前,看书自学了一点点CSS,之后又自己在网上看了一点视频,那时候对CSS概念很模糊,大概是就是知道是给页面做装饰的,大概是因为之前只是简单了解到功能,自己并没有尝试写点正式代码去做样式,是小瞧了CSS的功能了。直到自己写了大概的框架,只是给框架用了一点定位内容,才感觉CSS是个神器。培训老师也没有讲到定位的内容,自己也是了解不多,在中间遇到了很多问题,一步步摸索着去敲代码,一遍又一遍的看效果,也算有点眉目了。
模仿QQ空间写一个主页框架,虽然只是把前期的模块划分出来,然后给各个模块定位,用的代码也非常简单,但是看到效果还算符合预期的时候,还是很有成就感的。总结了一些自己做这个框架的感想,如下:
第一步:把页面简图用铅笔画出来,因为我还不会用axure做界面,就按照自己构想稍稍又铅笔画出来,画得确实有点烂,比做出来的简单界面还丑,所以就不放出来,就放一个最后做出来的板块划分效果图出来,用大块的颜色区分。后面还需要花时间去把axure给弄熟悉。

第二步:按照画出来简图,写html代码,这次充分利用div标签,因为只是划分板块,也就只用了div。在还没有做这个页面之前,并不知道如何去做一个简洁的板块代码,做完之后算是有个“颠覆”的认识了。这会是充分了解到div这个标签对于页面布局的重要性了。做完之后我决定以后自己要做网站之前,不管有多简单,一定要用思维导图把网站框架写出来。
<div class="banner">
banner
</div>
<div class="head" id="nav">
<div class="logo">
logo
</div>
<div class="inNav">
<div id="main"
class="inNav1">
主页
</div>
<div id="dairy"
class="inNav1">
日志
</div>
<div id="album"
class="inNav1">
相册
</div>
<div id="note"
class="inNav1">
说说
</div>
<div id="music"
class="inNav1">
音乐
</div>
<div id="more"
class="inNav1">
更多
</div>
</div>
</div>
<div class="body">
<div class="leftNav">
左导航
</div>
<div class="article">
主要内容列表/具体内容
</div>
<div class="ad">
广告
</div>
</div>
<div class="footer">
<div class="outNav">
友情链接
</div>
<div class="inf">
本人联系方式
</div>
</div>
第三步:做好板块划分之后,就要开始给各个板块在CSS代码中定位。这一步是我花时间最多的地方,因为还没有学到定位的内容,要一步步去看相对定位到底是怎么一回事,float又是怎么一回事。
页面目前实在太简单了,敢拿出来,也是需要勇气的,也就用来看看自己学习成果。后面这个页面持续完善,我再博客上更新。
*{
margin: 0px;
}
.banner{
width: 1280px;
height: 100px;
background-color: aqua;
text-align: center;
vertical-align: middle;
}
.head{
width: 1280px;
height: 80px;
}
.logo{
border-radius: 80px;
height: 80px;
width: 80px;
background-color: antiquewhite;
text-align: center;
position: relative;
float: left;
}
.inNav{
width: 1200px;
height: 80px;
background-color: burlywood;
position: relative;
float: left;
}
#main,#dairy,#album,#note,#music,#more{
position: relative;
top: 10px;
border-radius: 60px;
height: 60px;
width: 60px;
background-color: aqua;
float: left;
margin-left: 100px;
text-align: center;
vertical-align: middle;
}
.body{
width: 100%;
height: 500px;
}
/*.leftNav,.article,.ad{*/
/*position: relative;*/
/*top: 0px;*/
/*float: left;*/
/*}*/
.leftNav{
position: relative;
float: left;
width:20%;
height: 500px;
background-color: cadetblue;
}
.ad{
position: relative;
float: left;
width: 30%;
height: 500px;
background-color: cornflowerblue;
}
.article{
position: relative;
float: left;
width: 50%;
height: 500px;
background-color: crimson;
}
.footer{
width: 100%;
height: 100px;
background-color: lemonchiffon;
}
.outNav,.inf{
position: relative;
float: left;
width: 50%;
以上是关于自写网站——第一部的主要内容,如果未能解决你的问题,请参考以下文章
为啥无法下载?不懂电脑,请简单而言, http://www.xjpress.com/web/ypxz/20070316461.htm