Geoserver2.11矢量切片与OL3中的调用展示
Posted LZU-GIS
tags:
篇首语:本文由小常识网(cha138.com)小编为大家整理,主要介绍了Geoserver2.11矢量切片与OL3中的调用展示相关的知识,希望对你有一定的参考价值。
概述:
本文讲述在Geoserver2.11中如何进行矢量切片以及OL3中的调用展示。
矢量切片简介:
一、提出
GIS的底图一直使用金字塔技术进行切图,使用户能够快速访问指定级别的地图或者影像。但是切图本身是一张图片,无法进行交互。于是又引入了矢量图层用来显示矢量点线面,这通常需要先获取矢量地理数据,然后通过前端将其绘制成不同元素便能通过鼠标进行响应交互了。
这种GIS组织方式在数据量比较小的时候并没有什么大问题,但是在数据量比较大时(例如全国的详细街区数据)存在以下几个问题。
1、同一套数据的展示在不同的需求下可能需要不同的样式(例如,白天和夜间模式)而对于传统栅格切片对此需求必须重新进行切片;
2、由于切片的分辨率固定,分辨率过高切片体积过大,分辨率过低高清屏无法清晰显示。
3、矢量数据的请求如果是按需请求每次都向服务器请求数据加重服务器压力,如果一次请求按需展示,当矢量数据过大时(例如全国的水系数据)对于前端的压力过大。
二、矢量切片的定义
矢量切片是一种利用协议缓冲(Protocol Buffers)技术的紧凑的二进制格式用来传递信息。当渲染地图时矢量切片使用一系列储存的内部数据进行制图。被组织到矢量切片的图层(比如道路、水、区域),每一层都有包含几何图形和可变属性的独立要素(例如姓名、类型等等)。通俗的说,就是将矢量数据以建立金字塔的方式,像栅格切片那样分割成一个一个描述性文件,以GeoJson格式或者以pbf等自定义格式组织,然后在前端根据显示需要按需请求不同的矢量瓦片数据进行Web绘图。
三、常见格式
GeoJson、TopoJson、pbf(Arcgis格式)、KML、 GeoRSS等
四、优势
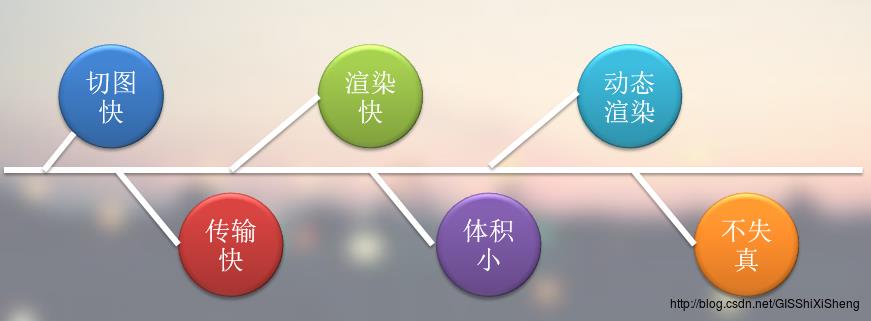
矢量切片的优势
五、栅格切片与矢量切片的对比
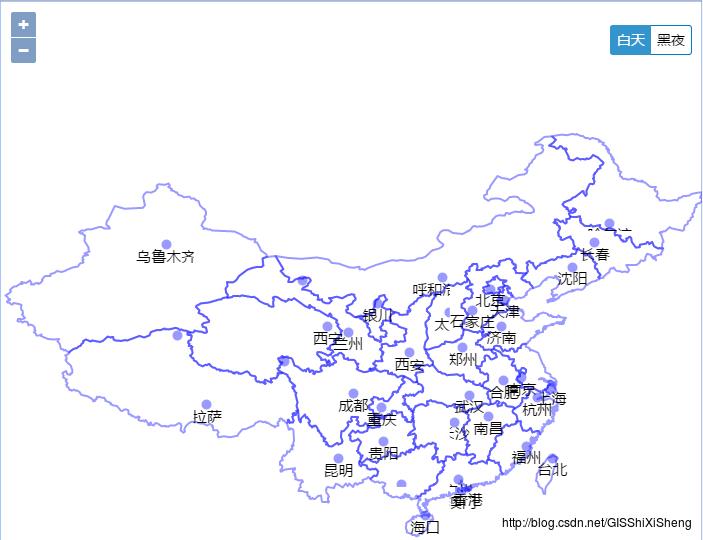
矢量切片

栅格切片
Geoserver中矢量切片的发布:
在geoserver中可发布单个图层,也可发布一个图层组,上述的示例是发布的一个图层组。
1、选择发布图层(组)
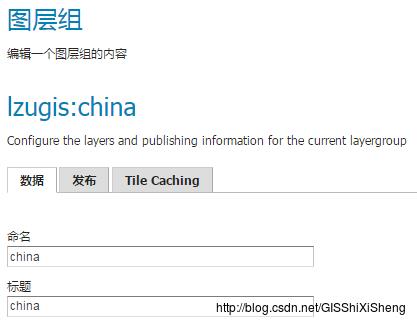
选择发布图层组
2、切换到“Tile Cache”面板,设置切片参数
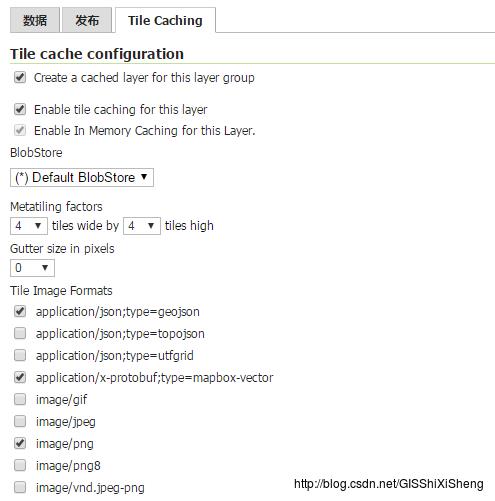
设置切片参数

设置切片网格
注意:
1、切片网格系统默认了几个,也是可以自定义的,具体的设置为GridSets->Create a new gridset。
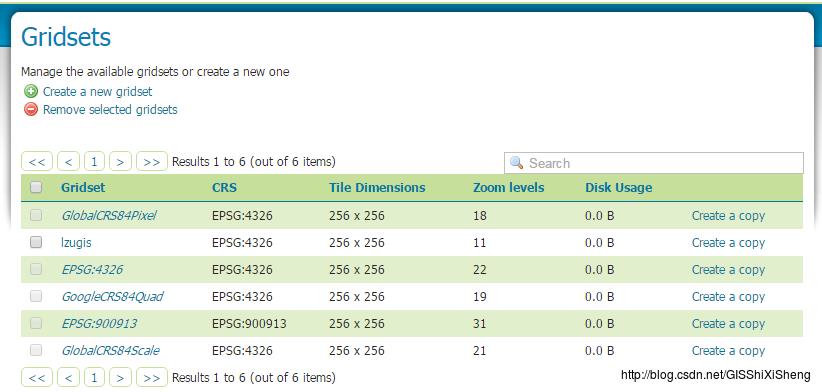
设置切片网格
OL3的调用与展示:
1、代码
<!DOCTYPE html>
<html>
<head>
    <title>GeoJSON切片</title>
    <link rel="stylesheet" href="css/ol.css" type="text/css">
    <script src="js/ol.js"></script>
	<script src="js/jquery-1.8.3.js"></script>
    <style>
		body,html,#map{
			padding:0px;
			margin:0px;
			height:100%;
			overflow:hidden;
			background:#ffffff;
		}
		.ol-mouseposition{
			position:absolute;
			bottom:20px;
			left:45%;
			padding:5px;
			background:#fff;
			border:1px solid #ccc;
			font-size:12px;
		}
		ul{
        	list-style: none;
        	position: absolute;
        	right:10px;
        	top:10px;
        	font-size: 14px;
			z-index:99;
        }
        ul li{
        	line-height: 28px;
        	height: 28px;
        	text-align: center;
        	width:40px;
        	float:left;
			cursor:pointer;
			background: #ffffff;
        }
        ul li.active{
        	background: #007AC2;
        	opacity: 0.8;
        	color:#ffffff;
        }
        ul li.day{
        	border:1px solid #007AC2;
        	border-right: none;
        	border-top-left-radius: 3px;
        	border-bottom-left-radius: 3px;
        }
        ul li.night{
        	border:1px solid #007AC2;
        	border-left: none;
        	border-top-right-radius: 3px;
        	border-bottom-right-radius: 3px;
        }
    </style>
</head>
<body>
	<ul id="lyrstyle">
		<li class="day active">白天</li>
		<li class="night">黑夜</li>
	</ul>
    <div id="map" class="map" tabindex="0"></div>
    <script>
		var projection4326 = new ol.proj.Projection({
			code: 'EPSG:4326',
			units: 'degrees',
		});
		var lyr = "lzugis:china";
		var dayStyle = function(feature,resolution){
			var stroke = new ol.style.Stroke({color: "rgba(0,0,255,0.4)", width: 2});
			var fill = new ol.style.Fill({color:"rgba(0,0,255,0)"});
			var lyr = feature.f.split(".")[0];
			if(lyr=="province"){
				return new ol.style.Style({
					fill: fill,
					stroke: stroke
				});
			}
			else{
				var name = feature.get("name");
				return new ol.style.Style({
					image: new ol.style.Circle({
						radius: 5,
						fill: new ol.style.Fill({
							color: 'rgba(0,0,255,0.4)'
						})
					}),
					text: new ol.style.Text({ //文本样式
						font: '15px Calibri,sans-serif',
						fill: new ol.style.Fill({
							color: '#000000'
						}),
						text:name,
						offsetX:0,
						offsetY:12
					})
				});
			}
		};
		var nightStyle = function(feature,resolution){
			var stroke = new ol.style.Stroke({color: "rgba(255,255,255,0.4)", width: 2});
			var fill = new ol.style.Fill({color:"rgba(0,0,0,0.8)"});
			var lyr = feature.f.split(".")[0];
			if(lyr=="province"){
				return new ol.style.Style({
					fill: fill,
					stroke: stroke
				});
			}
			else{
				var name = feature.get("name");
				return new ol.style.Style({
					image: new ol.style.Circle({
						radius: 5,
						fill: new ol.style.Fill({
							color: 'rgba(255,255,255,1)'
						})
					}),
					text: new ol.style.Text({ //文本样式
						font: '15px Calibri,sans-serif',
						fill: new ol.style.Fill({
							color: '#ffffff'
						}),
						text:name,
						offsetX:0,
						offsetY:12
					})
				});
			}
		};
		// 行政区划图层
		var vector = new ol.layer.VectorTile({
			// 矢量切片的数据源
			source: new ol.source.VectorTile({
				projection: projection4326,
				format: new ol.format.GeoJSON(),
				tileGrid: ol.tilegrid.createXYZ({
					extent: ol.proj.get('EPSG:4326').getExtent(),
					maxZoom: 22
				}),
				tilePixelRatio: 1,
				// 矢量切片服务地址
				tileUrlFunction: function(tileCoord){
					return 'http://127.0.0.1:8088/geoserver/gwc/service/tms/1.0.0/'
						+lyr+'@EPSG%3A4326@geojson/'+(tileCoord[0]-1)
						+ '/'+tileCoord[1] + '/' + (Math.pow(2,tileCoord[0]-1)+tileCoord[2]) + '.geojson';
				}
			}),
			style:dayStyle
		});
		var tiled = new ol.layer.Tile({
			visible: true,
			source: new ol.source.TileWMS({
				url: 'http://localhost:8088/geoserver/lzugis/wms',
				params: {'FORMAT': 'image/png',
					'VERSION': '1.1.1',
					tiled: true,
					STYLES: '',
					LAYERS: 'lzugis:province',
					tilesOrigin: 73.4510046356223 + "," + 18.1632471876417
				}
			})
		  });
        var map = new ol.Map({
            layers: [
				//tiled,
				vector
			],
            target: 'map',
            controls: ol.control.defaults().extend([
                new ol.control.MousePosition({
					className:"ol-mouseposition",
					coordinateFormat: ol.coordinate.createStringXY(5)
				})
            ]),
            view: new ol.View({
                projection: projection4326,
				minZoom:4,
				maxZoom:18,
                center: [103.2921875, 38.581640625],
                zoom: 4
            })
        });

		$("#lyrstyle li.day").on("click",function(){
			$("#lyrstyle li").removeClass("active");
			$(this).addClass("active");
			vector.setStyle(dayStyle);
			var zoom = map.getView().getZoom();
			map.getView().setZoom(zoom-1);
			$("#map").css("background","#ffffff");
		});
		$("#lyrstyle li.night").on("click",function(){
			$("#lyrstyle li").removeClass("active");
			$(this).addClass("active");
			vector.setStyle(nightStyle);
			var zoom = map.getView().getZoom();
			map.getView().setZoom(zoom+1);
			$("#map").css("background","rgba(0,0,0,0.8)");
		});
    </script>
</body>
</html>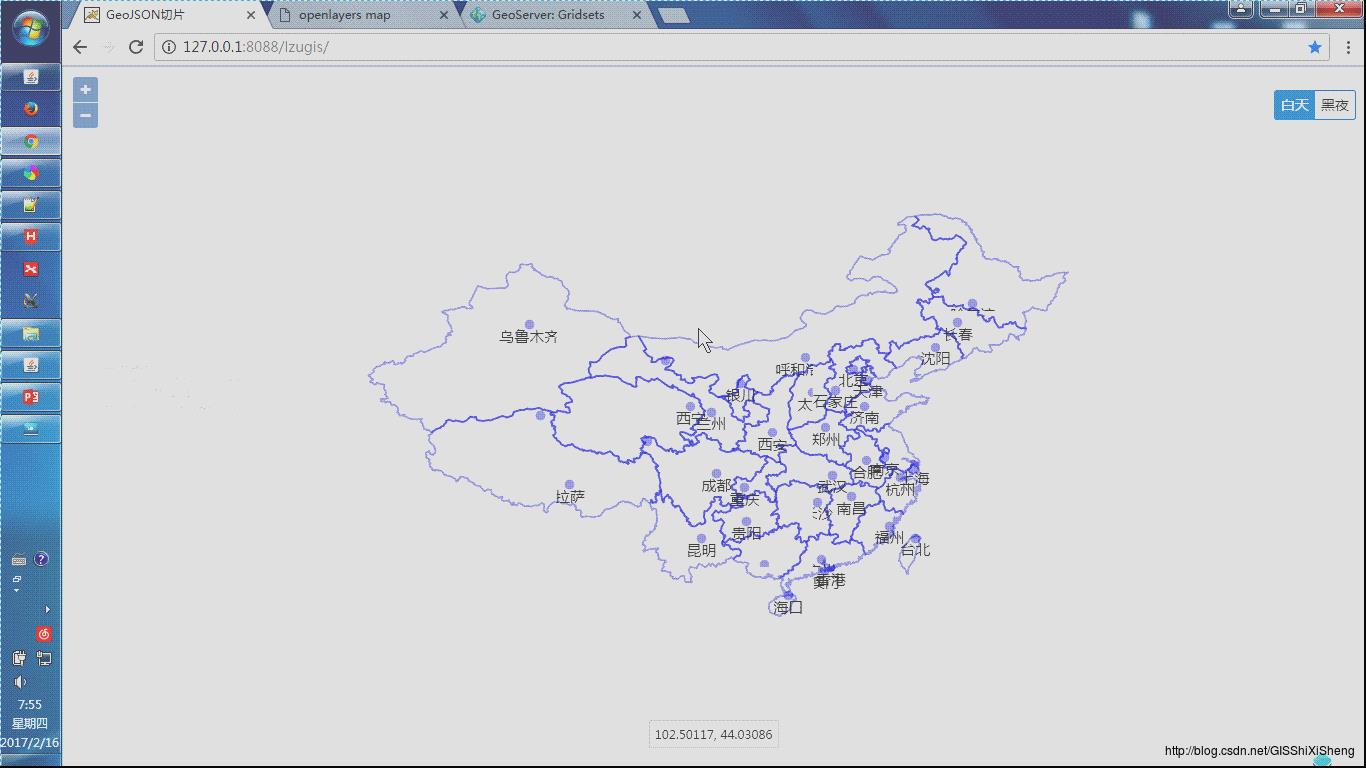
从上图看出,可以很方便的对地图的风格样式进行重新定义。
---------------------------------------------------------------------------------------------------------------
技术博客
http://blog.csdn.NET/gisshixisheng
在线教程
http://edu.csdn.Net/course/detail/799
Github
https://github.com/lzugis/
联系方式
q q:1004740957
e-mail:niujp08@qq.com
公众号:lzugis15
Q Q 群:452117357(webgis)
337469080(Android)
以上是关于Geoserver2.11矢量切片与OL3中的调用展示的主要内容,如果未能解决你的问题,请参考以下文章