Machine Learn机器学习及其基础概念简介
tags:
篇首语:本文由小常识网(cha138.com)小编为大家整理,主要介绍了Machine Learn机器学习及其基础概念简介相关的知识,希望对你有一定的参考价值。
Python开发工具:Anaconda+Sublime
作者:白宁超
2016年12月23日21:24:51
摘要:随着机器学习和深度学习的热潮,各种图书层出不穷。然而多数是基础理论知识介绍,缺乏实现的深入理解。本系列文章是作者结合视频学习和书籍基础的笔记所得。本系列文章将采用理论结合实践方式编写。首先介绍机器学习和深度学习的范畴,然后介绍关于训练集、测试集等介绍。接着分别介绍机器学习常用算法,分别是监督学习之分类(决策树、临近取样、支持向量机、神经网络算法)监督学习之回归(线性回归、非线性回归)非监督学习(K-means聚类、Hierarchical聚类)。本文采用各个算法理论知识介绍,然后结合python具体实现源码和案例分析的方式(本文原创编著,转载注明出处:Python开发工具:Anaconda+Sublime(1))
目录
- 【Machine Learning】Python开发工具:Anaconda+Sublime(1)
- 【Machine Learning】机器学习及其基础概念简介(2)
- 【Machine Learning】决策树在商品购买力能力预测案例中的算法实现(3)
- 【Machine Learning】KNN算法虹膜图片识别实战(4)
1 Anaconda和Sublime配置
1 安装Anaconda集成环境,Anaconda下载,安装下一步一路安装结束。(无需环境变量配置),配置完成后,查看是否成功。

2 打开cmd进入dos命令下,输入conda list 查看集成的python包
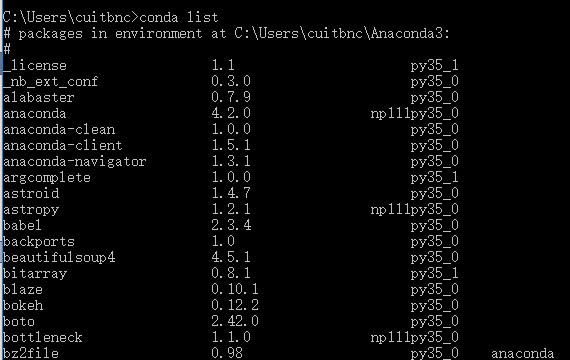
3 如果想添加新的python包,打开Anaconda官网:https://anaconda.org/search进行查找,比如想找到机器学习工具包scikit-learn

4 可以将Anaconda集成到PyDev、Pycharm、Eclipse、VS等编译环境即可,本文介绍集成到sublime中,首先进入官网下载sublime
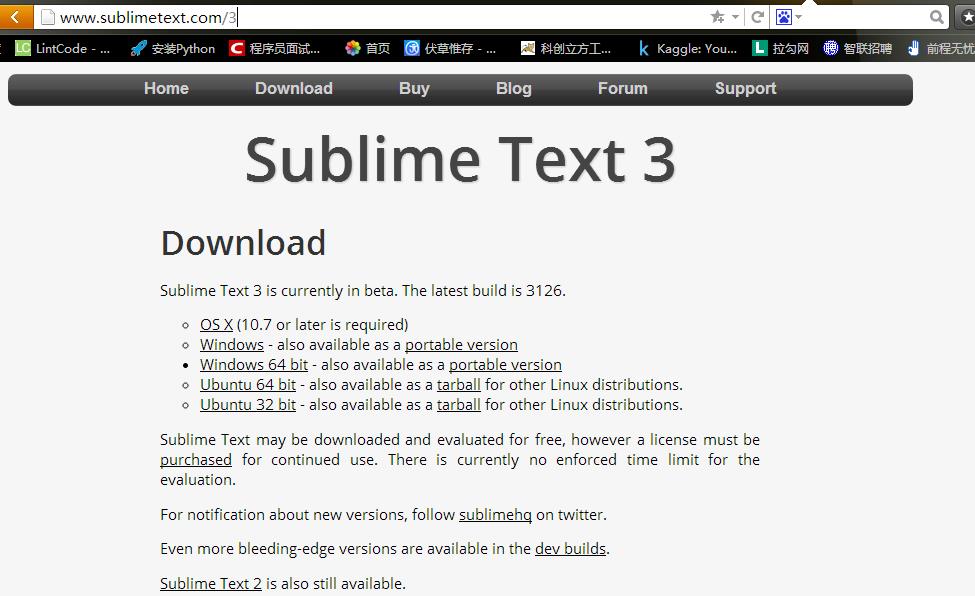
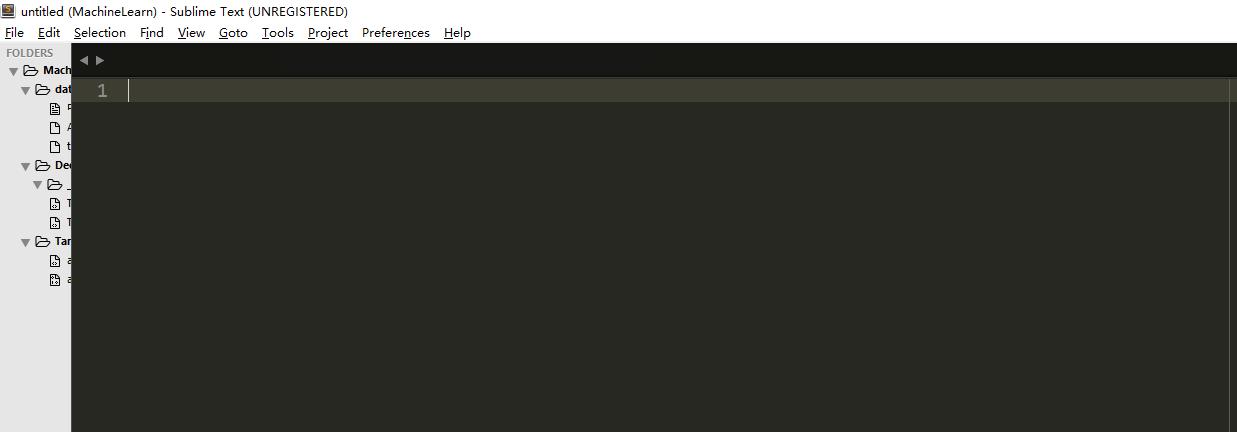
5 直接进行下一步安装,一路到底。成功后显示:
6 安装Package Control: https://packagecontrol.io/installation
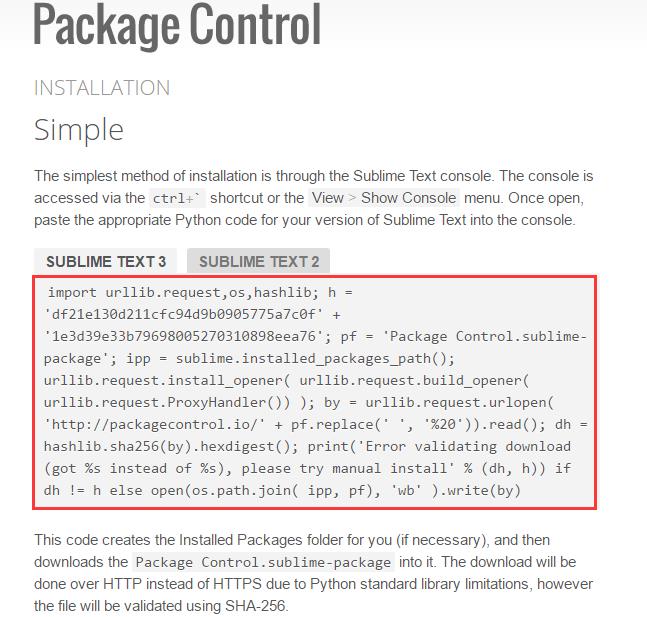
7 复制6中标记红色的文本内容(如下),然后右击红色小框,选择Console,将代码如下所示的放入文本框中,按Enter即可。
import urllib.request,os,hashlib; h = \'df21e130d211cfc94d9b0905775a7c0f\' + \'1e3d39e33b79698005270310898eea76\'; pf = \'Package Control.sublime-package\'; ipp = sublime.installed_packages_path(); urllib.request.install_opener( urllib.request.build_opener( urllib.request.ProxyHandler()) ); by = urllib.request.urlopen( \'http://packagecontrol.io/\' + pf.replace(\' \', \'%20\')).read(); dh = hashlib.sha256(by).hexdigest(); print(\'Error validating download (got %s instead of %s), please try manual install\' % (dh, h)) if dh != h else open(os.path.join( ipp, pf), \'wb\' ).write(by)

解决方法:
Package Control.sublime-settings]修改方法:Preferences > Package Settings > Package Control > Settings - User
"channels":
    [
        "http://cst.stu.126.net/u/json/cms/channel_v3.json",
        //"https://packagecontrol.io/channel_v3.json",
        //"https://web.archive.org/web/20160103232808/https://packagecontrol.io/channel_v3.json",
        //"https://gist.githubusercontent.com/nick1m/660ed046a096dae0b0ab/raw/e6e9e23a0bb48b44537f61025fbc359f8d586eb4/channel_v3.json"
    ]
激活版本:Help >Enter LICENSE
----- BEGIN LICENSE -----
sgbteam
Single User License
EA7E-1153259
8891CBB9 F1513E4F 1A3405C1 A865D53F
115F202E 7B91AB2D 0D2A40ED 352B269B
76E84F0B CD69BFC7 59F2DFEF E267328F
215652A3 E88F9D8F 4C38E3BA 5B2DAAE4
969624E7 DC9CD4D5 717FB40C 1B9738CF
20B3C4F1 E917B5B3 87C38D9C ACCE7DD8
5F7EF854 86B9743C FADC04AA FB0DA5C0
F913BE58 42FEA319 F954EFDD AE881E0B
------ END LICENSE ------
8 完成7步骤后,按ctrl+shift+p打开如下窗口,并点击标红处,然后对应插件的下载和安装
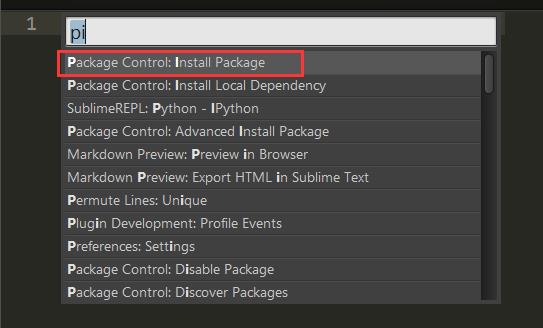
9 下图输入框安装如下插件:
ConvertToUTF8 :解决中文问题
Colorsublime - Themes:Colorsublime 的主题集合
SublimeREPL:Python运行
SideBarEnhancements:侧栏增强功能
Alignment:自动对齐,ctrl+alt+a
Anaconda:python插件集合,禁用PEP8提示:Sublime > Preferences > Package Settings > Anaconda > Settings – User: {"anaconda_linting": false}
SublimeLinter-pep8
根据需要自行添加插件

10 主题配置:打开 Preferences > Settings (若报错,注意下图红色标记内容color_scheme整行替换)
{
    "auto_indent": true,
    "bold_folder_labels": true,
    "color_scheme": "Packages/Color Scheme - Default/Monokai.tmTheme",
    "draw_white_space": "all",
    "font_size": 20,
    "font_face": "Consolas",
    "highlight_line": true,
    "ignored_packages":
    [
    ],
    "preview_on_click": false,
    "rulers":
    [
        100
    ],
    "save_on_focus_lost": true,
    "scroll_past_end": true,
    "show_encoding": true,
    "show_full_path": true,
    "show_line_endings": true,
    "smart_indent": true,
    "tab_size": 4,
    "translate_tabs_to_spaces": true,
    "trim_automatic_white_space": true,
    "trim_trailing_white_space_on_save": true,
    "use_tab_stops": true,
    "word_wrap": true,
    "wrap_width": 80
}
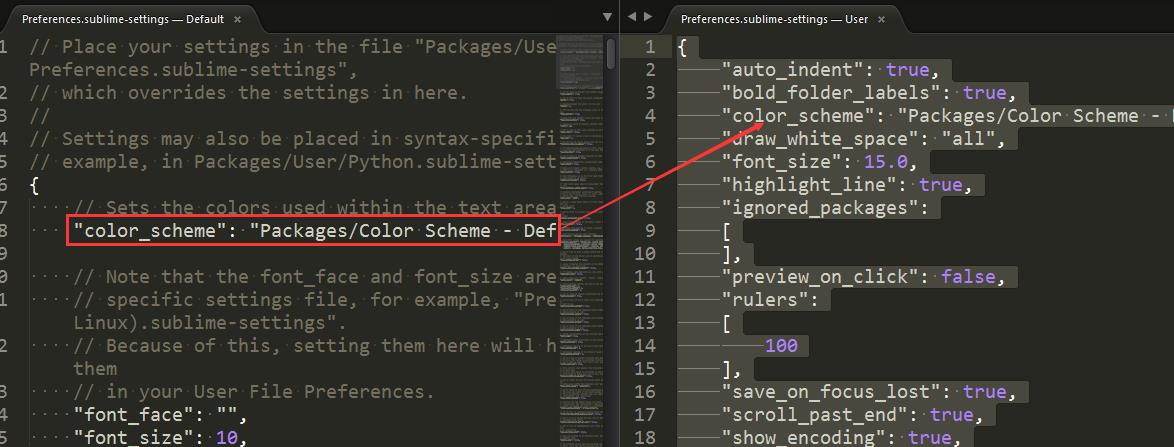
11 自定义快捷键盘配置:打开Preferences > Key Bindings输入如下代码,F5运行程序,F6切换IDEL工具,ctrl+d自定义删除行,其他快捷键是通用的,网上很多快捷键的资料,这里不赘述。
[
    {
    "keys": ["f5"],
    "caption": "SublimeREPL: Python - RUN current file",
    "command": "run_existing_window_command",
    "args": {
        "id": "repl_python_run",
        "file": "config/Python/Main.sublime-menu"
    }
}, {
    "keys": ["f6"],
    "caption": "SublimeREPL: Python",
    "command": "run_existing_window_command",
    "args": {
        "id": "repl_python",
        "file": "config/Python/Main.sublime-menu"
    }
},{
    "keys": ["ctrl+d"],
    "command":"run_macro_file",
    "args": {"file":"res://Packages/Default/Delete Line.sublime-macro"}
}
]
12 分屏:ALT+shift+1单屏,ALT+shift+2左右分屏,ALT+shift+8上下分屏,

13 如果没有自动提示,可以如下配置,打开Preferences >Package Settings >Anaconda >Setting Default输入:Administrator改为你计算机的名字
"python_interpreter": "C:/Users/Administrator/Anaconda3/python.exe"
打开Preferences >Package Settings >Anaconda >Setting Users输入:Administrator改为你计算机的名字
{
    "python_interpreter":"C:/Users/Administrator/Anaconda3/python.exe",
    "suppress_word_completions":true,
    "suppress_explicit_completions":true,
    "complete_parameter":true,
}
到此,完成全部配置工作
2 Anaconda
- Anaconda理论介绍
- Anaconda简介及安装教程
- Windows下Anaconda的安装和简单使用
- 官网anaconda配置教程
- ANACONDA DISTRIBUTION
- 简单⾼效地进⾏科学计算 : Python和Anaconda
3 php+Sublime开发
官网下载:http://www.sublimetext.com/3
安装基本控件包:https://packagecontrol.io/installation
Ctrl+Shift+P 打开Package Control来安装插件:
ConvertToUTF8
Bracket Highlighter:括号补全
DocBlockr:文档注释
Emmet:自动生成html
SideBar Enhancements:边栏
{ "keys": ["ctrl+shift+c"], "command": "copy_path" },
//chrome
{ "keys": ["f5"], "command": "side_bar_files_open_with",
"args": {
"paths": [],
"application": "C:\\\\Users\\\\Administrator\\\\AppData\\\\Local\\\\Google\\\\Chrome\\\\Application\\\\chrome.exe",
"extensions":".*"
}
}
Themr:主题
javascript Completions:js检查
SublimeCodeIntel:代码补全
SublimeLinter:代码检查
Alignment:自动对齐
PHP代码语法正确性验证插件 SublimeLinter
SublimeLinter SublimeLinter-php
安装完插件以后去配置一下插件相关配置,在 Sublime Text 3菜单打开:Preferences -> Package Setting -> SublimeLinter -> Setting User,把如下内容填充进去:
{

    "user": {

        "debug": false,

        "delay": 0.25,

        "error_color": "D02000",

        "gutter_theme": "Packages/SublimeLinter/gutter-themes/Default/Default.gutter-theme",

        "gutter_theme_excludes": [],

        "lint_mode": "background",

        "linters": {

            "annotations": {

                "@disable": false,

                "args": [],

                "errors": [

                    "FIXME"

                ],

                "excludes": [],

                "warnings": [

                    "NOTE",

                    "README",

                    "TODO",

                    "XXX",

                    "@todo"

                ]

            },

            "php": {

                "@disable": false,

                "args": [],

                "excludes": []

            },

            "summitlinter": {

                "@disable": false,

                "args": [],

                "excludes": [],

                "globals": "",

                "ignore": "channel",

                "limit": null,

                "only": ""

            }

        },

        "mark_style": "outline",

        "no_column_highlights_line": false,

        "passive_warnings": false,

        "paths": {

            "linux": [],

            "osx": [],

            "windows": [

                "C:\\\\wamp\\\\bin\\\\php\\\\php5.5.12"

            ]

        },

        "python_paths": {

            "linux": [],

            "osx": [],

            "windows": []

        },

        "rc_search_limit": 3,

        "shell_timeout": 10,

        "show_errors_on_save": false,

        "show_marks_in_minimap": true,

        "sublimelinter": "save-only",

        "sublimelinter_executable_map": {

            "php": "C:\\\\wamp\\\\bin\\\\php\\\\php5.5.12\\\\php.exe"

        },

        "syntax_map": {

            "html (django)": "html",

            "html (rails)": "html",

            "html 5": "html",

            "javascript (babel)": "javascript",

            "magicpython": "python",

            "php": "php",

            "python django": "python",

            "pythonimproved": "python"

        },

        "warning_color": "DDB700",

        "wrap_find": true

    }

}
主题配置:打开 Preferences > Settings
{
    "auto_indent": true,
    "bold_folder_labels": true,
    "color_scheme": "Packages/Color Scheme - Default/Monokai.tmTheme",
    "draw_white_space": "all",
    "font_size": 15.0,
    "highlight_line": true,
    "ignored_packages":
    [
    ],
    "preview_on_click": false,
    "rulers":
    [
        100
    ],
    "save_on_focus_lost": true,
    "scroll_past_end": true,
    "show_encoding": true,
    "show_full_path": true,
    "show_line_endings": true,
    "smart_indent": true,
    "tab_size": 4,
    "translate_tabs_to_spaces": true,
    "trim_automatic_white_space": true,
    "trim_trailing_white_space_on_save": true,
    "use_tab_stops": true,
    "word_wrap": true,
    "wrap_width": 80
}
sublime配置php
1 下载并安装WampServer集成环境
2 按win+R输入sysdm.cpl打开系统属性,配置环境变量C:\\wamp\\bin\\php\\php5.5.12
3 cmd命令窗体,输入命令php -h查看是否会提示php的命令使用方法
4 创建php编译系统,运行Sublime Text,选择Tool——>Build System——>New Build System,在新弹出的窗体中,
把默认内容
({ "shell_cmd": "make"}替换成
{ "cmd": ["php", "$file"], "file_regex": "php$", "selector": "source.php" }
保存在默认的目录下即可,注意修改文件名为 php.sublime-build 。
重启sublime text,就可以用Ctrl+B来编译.php文件了;
4 Sublime
- ublime安装教程
- Sublime Text 全程指南
- sublime3快捷键
- sublime插件
- sublime20个强大插件
- 如何优雅地使用Sublime Text
- sublime插件官方网站
- sublime+anaconda
以上是关于Machine Learn机器学习及其基础概念简介的主要内容,如果未能解决你的问题,请参考以下文章