Cacti搭建以及部分常用插件安装
Posted
tags:
篇首语:本文由小常识网(cha138.com)小编为大家整理,主要介绍了Cacti搭建以及部分常用插件安装相关的知识,希望对你有一定的参考价值。
一、Cacti简介
Cacti是一款实用php语言开发的性能与流量监测工具,监测的对象可以是Linux也可以是Windows服务器,也可以是路由器、交换机等网络设备,主要基于SNMP(Simple Network Management Protocol 简单网络管理协议)来搜集CPU占用、内存占用、运行进程数、磁盘空间、网卡流量等各种数据。
实际上Cacti本身只是一个Web界面的管理套件,通过调用Net-snmp工具来采集监测数据,并结合绘图工具RRDtool(Round Robin Database Tool 轮询数据库工具)记录数据并绘制图片,最终以Web的形式展示给管理员用户。
Cacti提供了优秀的整合和协调能力,充分利用LAMP基础平台、SNMP协议工具、RRDtool数据引擎,不仅配置简单、直观,而且支持插件和数据模板,使用时非常灵活,便于进一步扩展监测功能。
| 主机 | 操作系统 | IP地址 | 主要软件 |
| Cacti服务端 | Centos 6.5 | 192.168.1.101 | cacti-0.8.8h、monitor-v1.2-1、realtime-v0.5-2、rrdtool-1.6.0、settings-v0.7-1、squid-3.4.6、thold-v0.5.0、httpd.2.2.15-54-x86_64、mysql5.1.73-7.el6-x86_x64、php5.3.3-48.el6_8-x86_x64、net-snmp-utils-1:5.5-57.el6_8.1-x86_x64、net-snmp-1:5.5-57.el6_8.1-x86_x64 |
| 客户端主机 | Centos 6.5 | 192.168.1.103 | net-snmp-1:5.5-57.el6_8.1-x86_x64 |
| 客户端主机 | Windows 7 | 192.168.1.110 |
二、服务器端配置
1、部署LAMP平台
(1)安装LAMP平台所需软件包以及所需库文件
[[email protected] ~]# yum -y install net-snmp net-snmp-utils
[[email protected] ~]# yum -y install cairo-devel zlib libxml2 libxml2-devel glib2 glib2-devel libpng libpng-devel freetype freetype-devel libart_lgpl pango pango-devel php-pear perl-CPAN gd php-gd
[[email protected] ~]# yum -y install mysql mysql-server mysql-devel php php-mysql httpd
(2)安装完以上文件后我们要修改一下Apache的配置
[[email protected] ~]# vim /etc/httpd/conf/httpd.conf
进入到Apache的配置文件中,如果我们使用yum安装httpd需要找到276行并将其头部的“#”去掉(如果没有去掉这个个#启动httpd服务器时将会报错:httpd: Could not reliably determine the server‘s fully qualified domain name, using 211.98.71.195 for ServerName)。
#ServerName www.example.com:80
DirectoryIndex index.php index.html index.html.var ←在该行中添加index.php使其支持php
注:不同版本中所位于行可能不同,我们找到ServerName即可更改。
(3)修改完配置文件我们启动服务并测试Apache是否与PHP整合成功
[[email protected] ~]# service httpd start
正在启动 httpd: [确定]
[[email protected] ~]# chkconfig httpd on ←将httpd服务设置为开机自启
我们可以在配置文件中看出网页文件存放的默认目录为:DocumentRoot "/var/www/html"
[[email protected] ~]# chkconfig snmpd on ←为snmpd服务设置开机自启
找到网页存放的根目录后我们需要在网页文件的根目录下创建一个测试文件
[[email protected] ~]# vim /var/www/html/test.php
<?php
phpinfo();
?>
接下来我们需要测试一下是否可以访问我们刚刚创建好的测试页面
出现以上内容表示Apache和PHP整合成功了
(4)整个成功后我们需要安装绘图工具RRDtool
[[email protected] ~]# tar xf rrdtool-1.6.0.tar.gz ←将绘图工具解压
[[email protected] ~]# cd rrdtool-1.6.0
[[email protected] rrdtool-1.6.0]# ./configure --prefix=/usr/local/rrdtool-1.6.0
[[email protected] rrdtool-1.6.0]# make && make install ←我们可以编译完成之后再进行安装,这样可以避免出错
(5)部署Cacti、设置数据库链接
[[email protected] ~]# tar xf cacti-0.8.8h.tar.gz
[[email protected] ~]# mv cacti-0.8.8h/ /var/www/html/cacti ←将其移动到网页的根目录
[[email protected] ~]# useradd cacti
[[email protected] ~]# chown -R cacti.cacti /var/www/html/cacti/ ←给刚创建的用户权限
[[email protected] ~]# service mysqld restart
[[email protected] ~]# chkconfig mysqld on
[[email protected] ~]# mysql ←由于没有给数据库设置密码我们直接输入MySQL用默认的root用户登录
mysql> create database cacti default character set utf8; ←创建名为cacti的数据库
mysql> grant all on cacti.* to [email protected] identified by ‘cacti‘; ← 授权cacti用户访问数据库
[[email protected] ~]# cd /var/www/html/cacti/
[[email protected] cacti]# mysql -u cacti -p cacti < cacti.sql
Enter password: ←在此处输入我们上面授权cacti用户的密码,本次试验中输入“cacti”
注:在本次实验中我们导入的cacti.sql是cacti安装包里的自带的一个sql文本, 导入这个文本我们就可以看到下面的安装步骤了,如果我们有其他的cacti服务器我们可以将里面的数据全部导出来再将其导入到新的cacti中,这样就不用我们手动添加了,曾经本人不知道有这样的方法,手动添加了好几千个端口,用时好几天。
(6)调整cacti配置文件为以下内容
[[email protected] cacti]# vim include/config.php
<?php
$database_type = "mysql";
$database_default = "cacti";
$database_hostname = "localhost";
$database_username = "cacti";
$database_password = "cacti";
$database_port = "3306";
$database_ssl = false;
$url_path = "/";
?>
三、Cacti初始化安装
(1)调整httpd配置
[[email protected] cacti]# vim /etc/httpd/conf/httpd.conf
DocumentRoot "/var/www/html/cacti" ←修改httpd网页文件目录为/var/www/html/cacti,本次试验中位于292行
<Directory "/var/www/html/cacti"> ←这是修改访问网页的权限,我们上面讲网页文件目录更改了,所以这里也要修改
[[email protected] cacti]# service httpd restart
停止 httpd: [确定]
正在启动 httpd:Syntax error on line 292 of /etc/httpd/conf/httpd.conf:
DocumentRoot ‘/var/www/html/cacti‘ is not a directory, or is not readable
[失败]
注:重启httpd失败是因为selinux机制有限制,我们在本次实验环境中将其关掉
[[email protected] cacti]# setenforce 0 ←临时关闭selinux机制
[[email protected] cacti]# vim /etc/sysconfig/selinux
将"SELINUX=enforcing"改为“SELINUX=disabled” ←永久关闭selinux机制
[[email protected] cacti]# vim /etc/php.ini
date.timezone = Asia/Shanghai ←在php.ini的最下面添加,否则安装cacti的时候会报有关时区的错误详情请看下面的常见错误整理
[[email protected] cacti]# service httpd restart
停止 httpd: [确定]
正在启动 httpd: [确定]
(2)初始化cacti
1)访问cacti服务器地址在本次实验中应访问192.168.1.101(下图中ip为106是自动获取ip,由于笔者是在公司搭建环境,虚拟机中的ip在重启电脑后变更,所以大家把图中的192.168.1.106当做192.168.1.101即可)
2)开始安装cacti
3)选择新的安装
4)注意上图中绿色部分表示已经成功找到目录,红色部分表示未找到,上图中已经将其修改为正确rrdtool路径点击完成即可
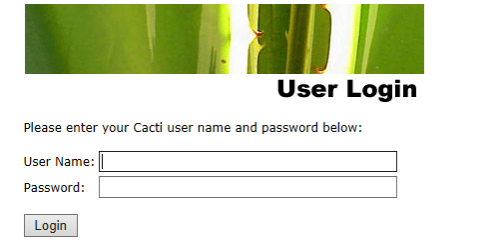
5)在此输入cacti的默认登录用户名和密码均为“admin”
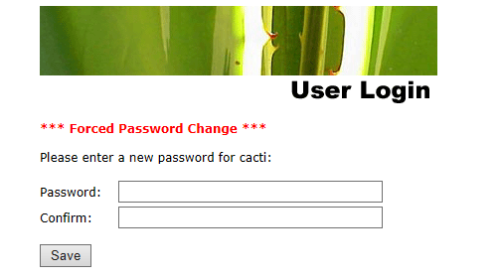
6)第一次登录我们要设置一个新的密码
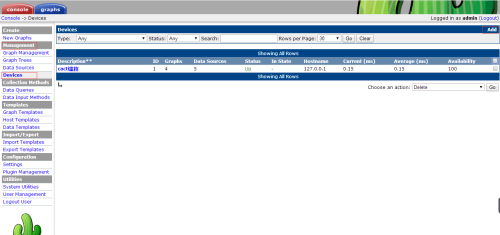
7)cacti创建好了,下面我们就要添加主机了
8)配置客户端(被监控主机)
[[email protected] ~]# yum -y install net-snmp
[[email protected] ~]# vim /etc/snmp/snmpd.conf ←进入到snmpd的配置文件进行调整
com2sec notConfigUser 192.168.1.103 public
将默认的default改为cacti服务器的IP地址
access notConfigGroup "" any noauth exact all none none
将默认的systemview改为all
view all included .1 80
找到第85行将开头的“#”去掉
[[email protected] ~]# service snmpd start ←启动snmp服务
[[email protected] ~]# chkconfig snmpd on
9)测试cacti服务器是否可以收集到数据并添加计划任务
[[email protected] ~]#snmpwalk -c public -v 1 192.168.1.103
SNMPv2-MIB::sysDescr.0 = STRING: Linux bogon 2.6.32-431.el6.x86_64 #1 SMP Fri Nov 22 03:15:09 UTC 2013 x86_64
SNMPv2-MIB::sysObjectID.0 = OID: NET-SNMP-MIB::netSnmpAgentOIDs.10
DISMAN-EVENT-MIB::sysUpTimeInstance = Timeticks: (183362) 0:30:33.62
SNMPv2-MIB::sysContact.0 = STRING: Root <[email protected]> (configure /etc/snmp/snmp.local.conf)
SNMPv2-MIB::sysName.0 = STRING: bogon
SNMPv2-MIB::sysLocation.0 = STRING: Unknown (edit /etc/snmp/snmpd.conf)
SNMPv2-MIB::sysORLastChange.0 = Timeticks: (2) 0:00:00.02
SNMPv2-MIB::sysORID.1 = OID: SNMP-MPD-MIB::snmpMPDMIBObjects.3.1.1
SNMPv2-MIB::sysORID.2 = OID: SNMP-USER-BASED-SM-MIB::usmMIBCompliance
SNMPv2-MIB::sysORID.3 = OID: SNMP-FRAMEWORK-MIB::snmpFrameworkMIBCompliance
SNMPv2-MIB::sysORID.4 = OID: SNMPv2-MIB::snmpMIB
SNMPv2-MIB::sysORID.5 = OID: TCP-MIB::tcpMIB
SNMPv2-MIB::sysORID.6 = OID: IP-MIB::ip
SNMPv2-MIB::sysORID.7 = OID: UDP-MIB::udpMIB
SNMPv2-MIB::sysORID.8 = OID: SNMP-VIEW-BASED-ACM-MIB::vacmBasicGroup
SNMPv2-MIB::sysORDescr.1 = STRING: The MIB for Message Processing and Dispatching.
SNMPv2-MIB::sysORDescr.2 = STRING: The MIB for Message Processing and Dispatching.
SNMPv2-MIB::sysORDescr.3 = STRING: The SNMP Management Architecture MIB.
SNMPv2-MIB::sysORDescr.4 = STRING: The MIB module for SNMPv2 entities
SNMPv2-MIB::sysORDescr.5 = STRING: The MIB module for managing TCP implementations
SNMPv2-MIB::sysORDescr.6 = STRING: The MIB module for managing IP and ICMP implementations
SNMPv2-MIB::sysORDescr.7 = STRING: The MIB module for managing UDP implementations
SNMPv2-MIB::sysORDescr.8 = STRING: View-based Access Control Model for SNMP.
SNMPv2-MIB::sysORUpTime.1 = Timeticks: (2) 0:00:00.02
SNMPv2-MIB::sysORUpTime.2 = Timeticks: (2) 0:00:00.02
SNMPv2-MIB::sysORUpTime.3 = Timeticks: (2) 0:00:00.02
SNMPv2-MIB::sysORUpTime.4 = Timeticks: (2) 0:00:00.02
SNMPv2-MIB::sysORUpTime.5 = Timeticks: (2) 0:00:00.02
SNMPv2-MIB::sysORUpTime.6 = Timeticks: (2) 0:00:00.02
SNMPv2-MIB::sysORUpTime.7 = Timeticks: (2) 0:00:00.02
SNMPv2-MIB::sysORUpTime.8 = Timeticks: (2) 0:00:00.02
出现如上类似字符串表示服务器已经可以获取来自被监控端的数据。
添加计划任务,每五分钟采集一次数据
[[email protected] ~]# crontab -u cacti -e
*/5 * * * * /usr/bin/php /var/www/html/cacti/poller.php > /dev/null
10)将linux客户端添加到服务器
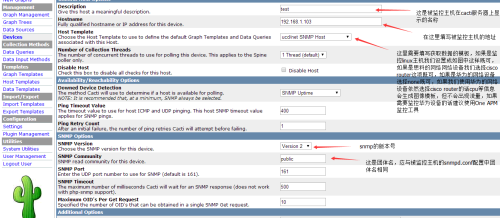
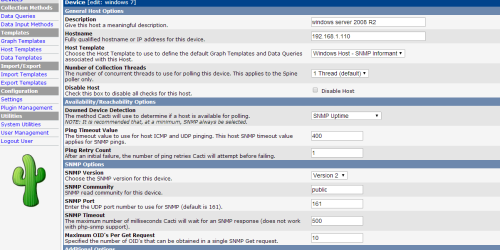
依次点击console → Management → Devices 点击右上角的Add
填好如上信息之后点击右下角的create完成创建
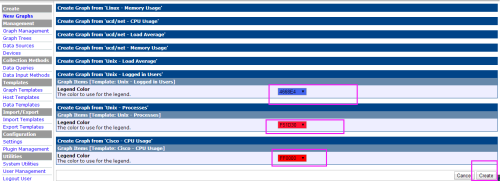
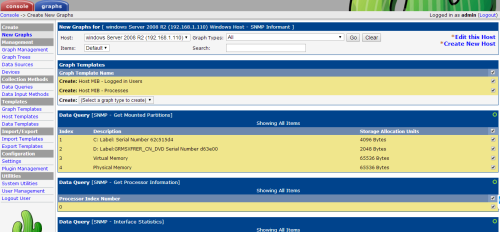
添加设备完成后依次点击 Console -> Graphs -> New Graphs → host 选择主机 → 下图中黄色部分是需要添加的图像,需要用到哪个就添加哪个,本次实验中所有图像都添加,选择图像完成后点击右下角的create,进行下一步
图中圈起来的部分是图像的颜色,这个根据自己的喜好,选择哪个都可以,选择完成后点击create完成创建
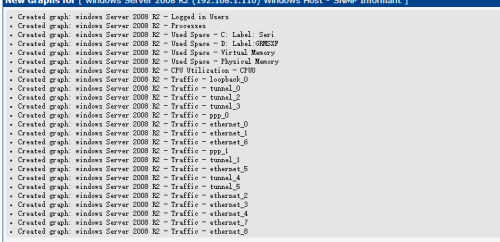
创建完成后会出现如图信息
图像添加完成后还需要将该设备添加到图像树才可以在Graphs中显示出来Console -> Graph Trees -> (Edit)-> add
添加完成之后点击save保存
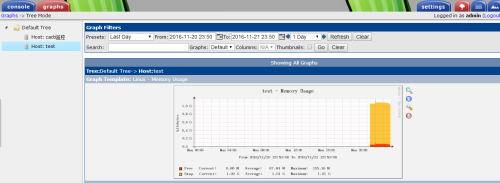
保存之后就可以在graph中看到图像了
11)将windows客户端添加到服务器
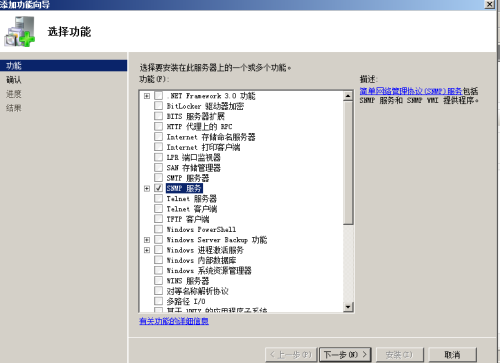
进入windows server 2008 r2系统中点击 服务器管理器 → 功能 → 添加功能
选中snmp服务点击下一步
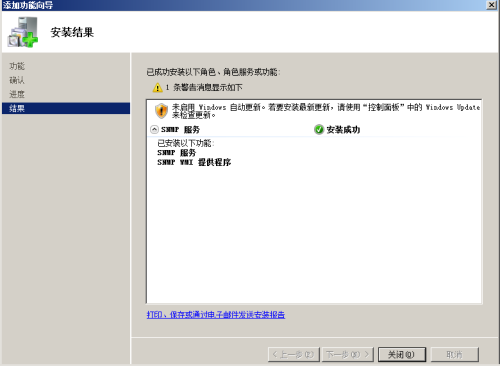
按照提示安装完成后点击关闭
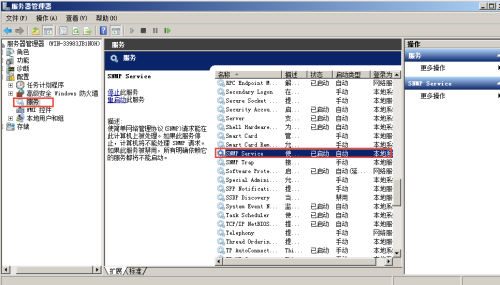
服务管理器依次点击 配置 → 服务 → SNMP Server 双击打开
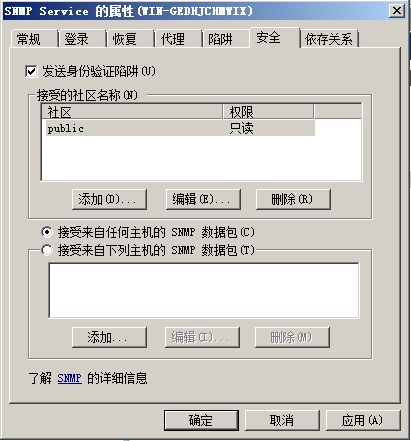
在此添加社区public,并设置接受来自任何主机的SNMP数据包,点击确定
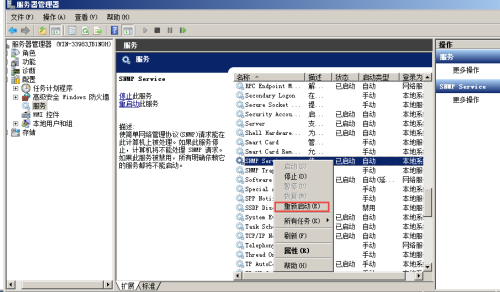
右键点击SNMP Server 重新启动SNMP服务
我们需要下载一个软件:informant-std-16.zip 点击下载
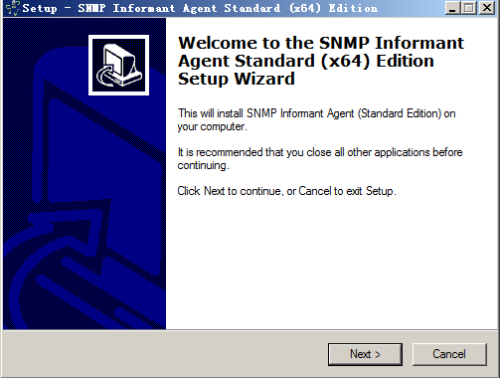
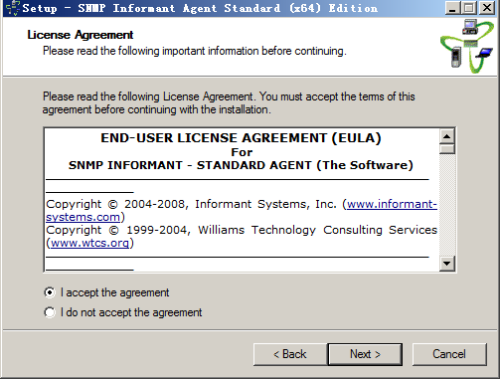
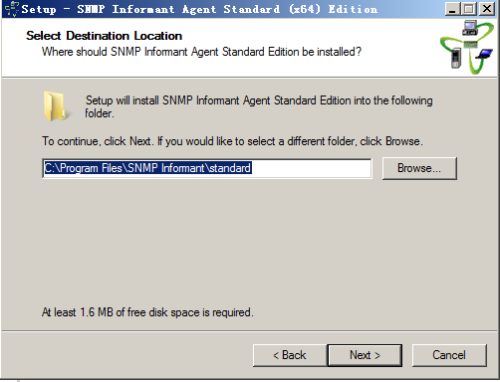
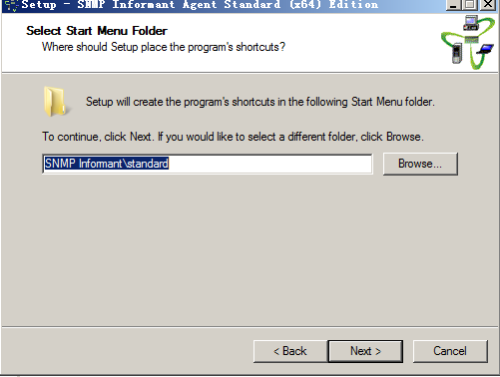
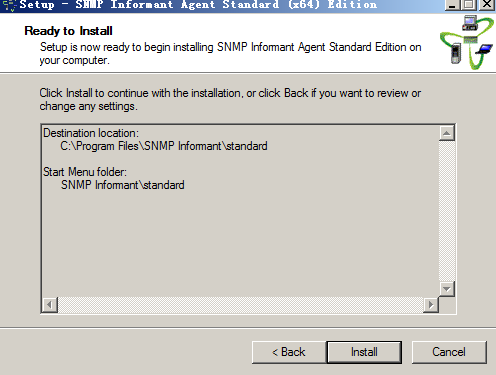
下载软件后将其解压并点击informant-std-16进行安装,安装软件的时候按照图中的步骤安装即可
11)接下来我们要配置服务器端
我们要下载一个压缩包,这个压缩包中包含六个windows服务器模版:Cacti_SNMP_Informant_Standard_Metrics_v13.zip 点击下载
将下载好的压缩包解压,进入到template下将该文件夹下的六个.xml模板按照下图所示上传到cacti服务器中
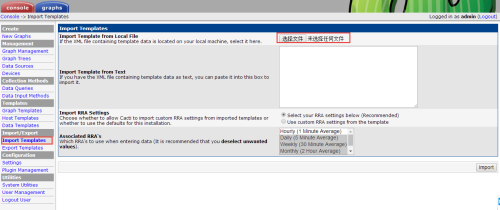
点击Import Templates → 选择文件 找到刚刚解压的文件进入到 template下,依次上传六个文件
注:每次只能上传一个文件,需要上传六次
选好文件后点击import即可上传模板完成
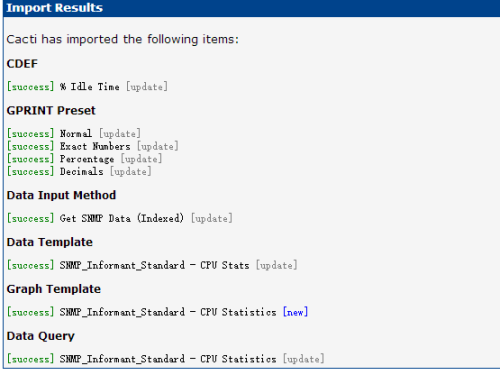
出现如下信息表示已经上传完成,按照同样的方法上传其余五个模板,在此不做过多演示
添加完成后可以在console → Templates → Graph Templates下看到
接下来我们就可以添加图像了,添加图像的步骤和linux添加基本相同
现在我们就可以在Graphs中看到Windows主机了
12)在cacti中添加华为交换机
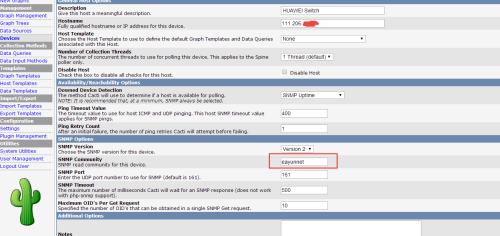
添加华为交换机的时候和添加linux主机没有区别,由于现在手上没有华为设备暂时无法演示如何在交换机上设置SNMP Community,可以参考链接:点击查看华为设备如何设置SNMP Community
将华为的交换机添加到默认树中
新建图像
添加华为交换机之后默认是不会显示端口号的,我们需要进行添加
修改监控查询区域的长度 点击查看参考链接
Console -> Settings -> Visual -> Maximum Field Length: 默认15,修改为30。
修改流量监控的数据模板
console–Graph Templates–Interface – Traffic Graph Template -> Title (–title) 将|host_description| - Traffic
修改为
|host_description| - Traffic– |query_ifName|
在后面的框框里面加上了 – |query_ifName| 这部分内容,以前这里是没有的!
13)添加常用插件
[[email protected] ~]# tar xf realtime-v0.5-2.tgz
//MV 插件包到 cacti/plugins/下
[[email protected] ~]# mv realtime/ /var/www/html/cacti/plugins/
//install、enable plugins:realtime
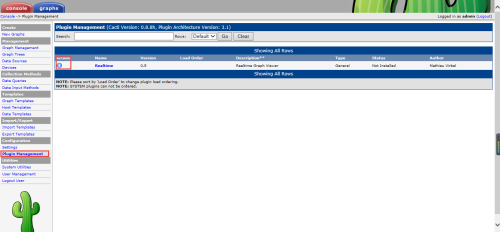
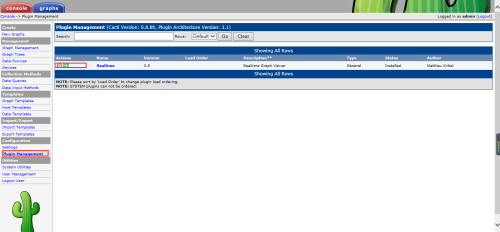
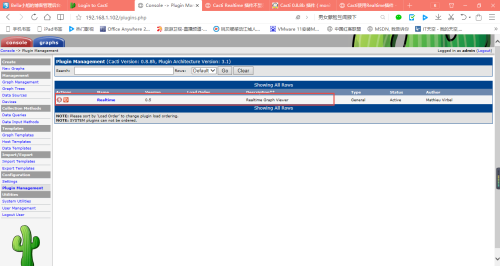
登录Cacti,进入[Console]-[configuration]-[Plugin Management],对plugin:realtime进行Install 和 Enable。
//给admin用户授权
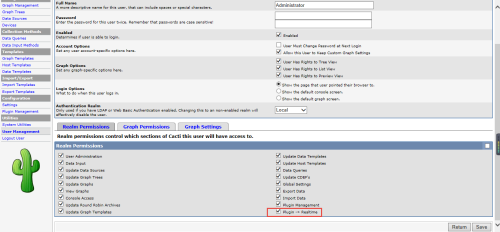
登录Cacti,进行[Console]-[Utilities]-[User Management],点admin用户,在[Realm Permissions]中我,勾选“Plugin->Realtime”。
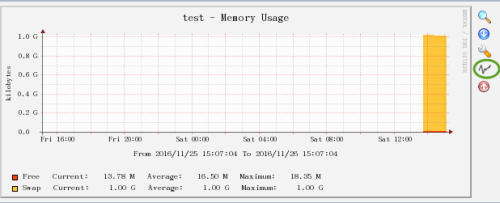
经过上面的调整之后我们的图像旁边已经出现了一个realtime的图标
但是点击进去报错了
注:这是由于没有Cache目录以及权限等。
//设置Cache目录及权限
在realtime插件包中的README中写到:Create a folder somewhere on your system that is accessible to the apache user for writing.
在官网的文档中对于Installation中也写到:You need to also create a folder somewhere on you system that is accessible to the apache user for writing.This folder should bo different than other transient folders used by plugins as it will b periodically pruned by this plugin.
所以,还要做如下操作
[r[email protected] ~]# mkdir /var/www/html/cacti/cache ←创建cache目录
[[email protected] ~]# chmod 777 -R /var/www/html/cacti/cache ←设置cache目录的访问权限
最后我们还要在Cacti Web上设置Cache目录的路径
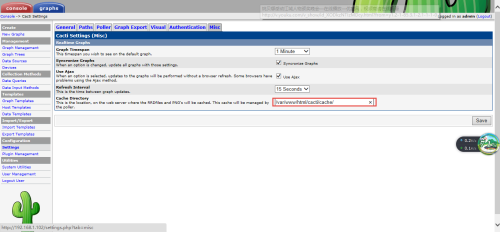
进入[console]-[configuration]-[settings]-[Misc],设置“Cache Diredtiory”为“/var/www/cacti/cache/”
添加Cache目录完成后点击右下角的Save保存测试
通过测试我们可以看出不在报错,说明已经可以正常使用了
其它cacti插件这里不做过多演示,请大家点击此处查看
14)使用cacti实现邮件报警
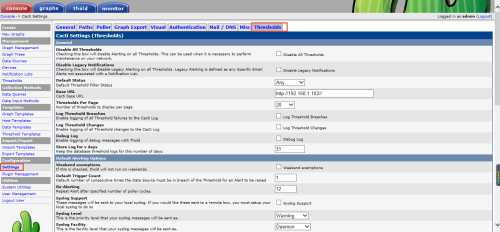
设置邮件报警之前需要确认thold组件已经添加无误,如果未安装请点击上方链接进行添加
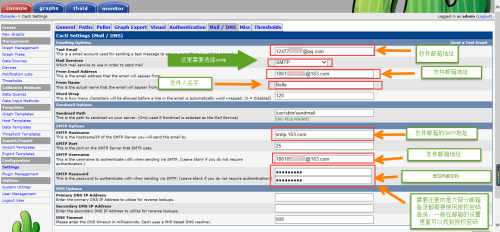
点击console → configuration → settings → Mail/DNS
填好以上信息后点击右上角的Send a test Email发送测试邮件
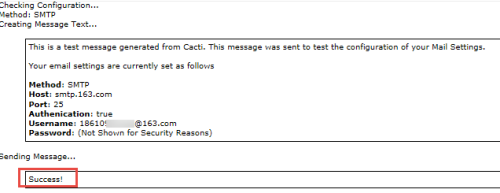
邮件接收成功
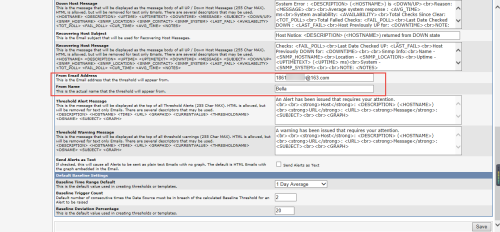
设置发件邮箱,这样就可以正常的发收报警邮件了
添加邮件报警完成了,接下来我们要添加阈值报警
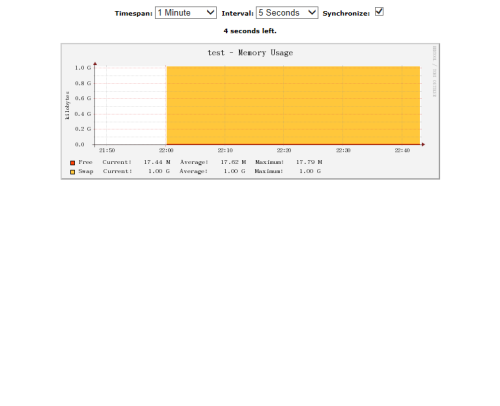
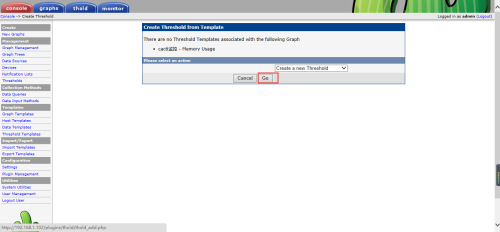
找到需要添加阈值报警的图像如图红框所示依次点击 graphs → 需要添加阈值的图像 → threshold图标
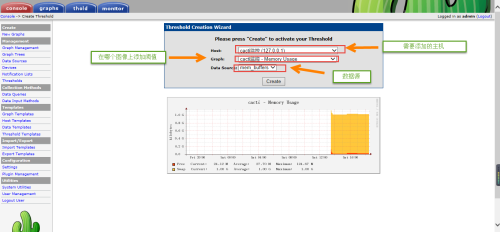
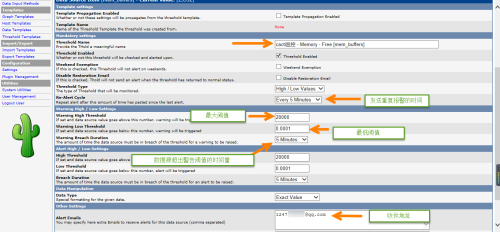
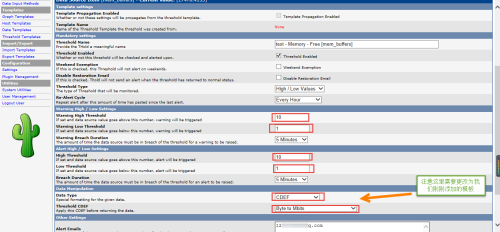
按照下图步骤进行添加
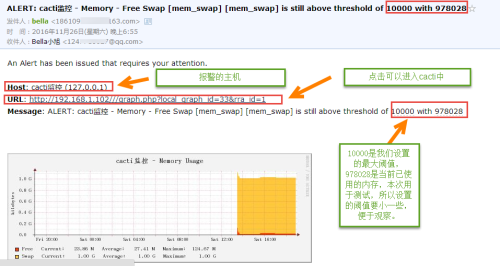
本次阈值用于测试,所以比已用内存大小要小,输入完成后点击右下角Save保存
看上图已经收到邮件啦
我们还可以将阈值单位转换成MB,这样就可以更直观的显示了
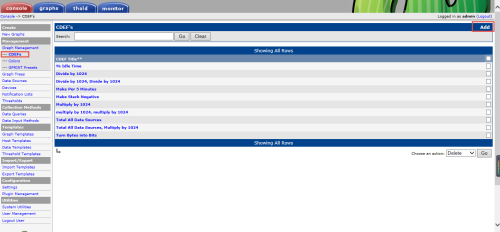
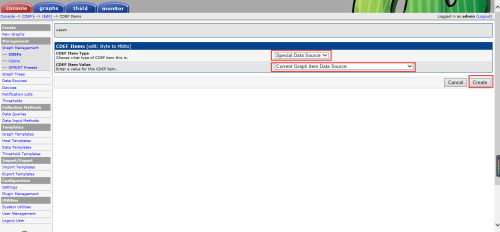
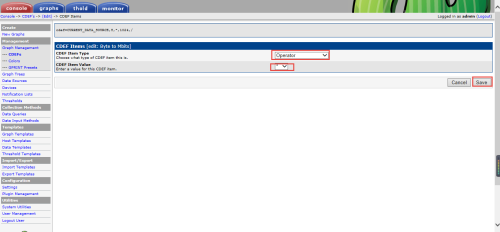
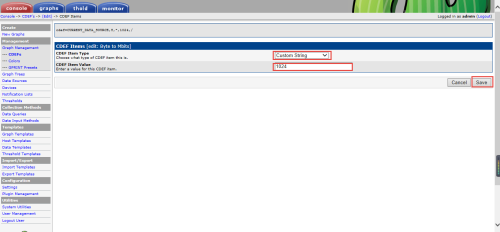
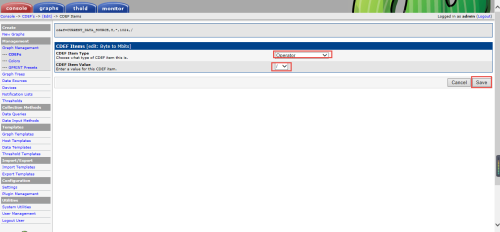
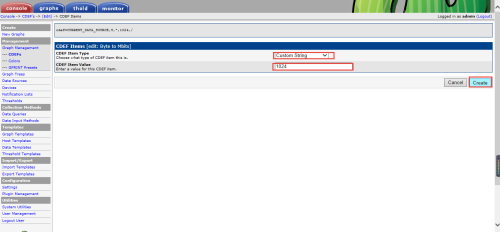
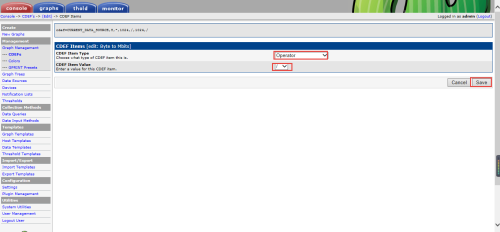
按照图像顺序点击console → Management → Graph Management → ——CDEFs → add
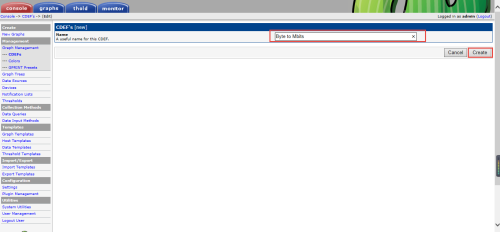
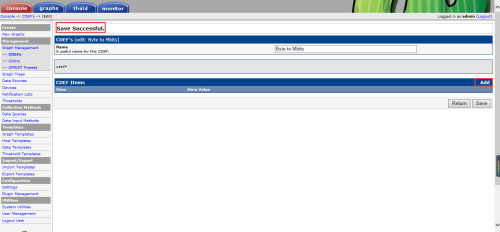
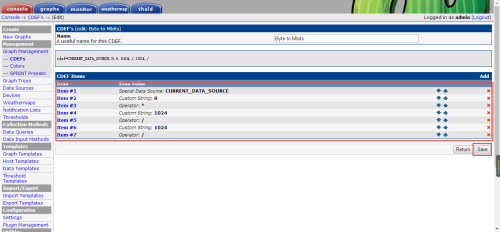
按照图上步骤操作
现在我们就创建完成了
使用新的单位添加一个新的主机吧!
Send a Test EmailSend a Test EmailSend a Test Em
15)以下是安装cacti时出现的常见错误
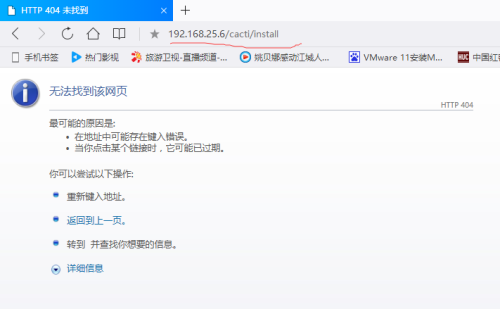
报错:404报错
解决方法:检查/cacti/install路径发现自动查找路径不正确,应访问http://192.168.25.6/install/
错误如下图
解决方法:这是由于时区造成的错误,在/etc/php.ini的最后一行添加date.timezone = Asia/Shanghai重启httpd服务即可
错误如下图
解决方法:sql语句有问题,检查cacti.sql文件找出问题并修改。
错误如下图
解决方法:重新编译安装php添加参数./configure --enable-sockets即可,点击查看原文
报错:collect2: ld returned 1 exit status make: *** [libphp5.la] 错误 1
解决方法:make clean删除上次编译的结果
报错如图
解决方法:安装libxml2 yum -y install libxml2 libxml2-devel
报错:
There was a problem importing one of the Python modules
required to run yum. The error leading to this problem was:
libxml2.so.2: cannot open shared object file: No such file or directory
Please install a package which provides this module, or
verify that the module is installed correctly.
It‘s possible that the above module doesn‘t match the
current version of Python, which is:
2.6.6 (r266:84292, Nov 22 2013, 12:16:22)
[GCC 4.4.7 20120313 (Red Hat 4.4.7-4)]
If you cannot solve this problem yourself, please go to
the yum faq at:
http://yum.baseurl.org/wiki/Faq
解决方法:有网友说是因为yum和python的版本不匹配造成的,但是本次实验中是因为强行卸载了libxml2造成的
错误:编译安装rrdtool的时候出现如下图错误:
解决方法:出现如下错误是因为没有安装必要的库“pango*”使用yum安装即可:yum -y install pango*
报错:yum安装pango*的时候出现如下图错误:
解决方法:需要先卸载libXrender 、libX11 。
然后再通过yum安装刚刚卸载的两个包,由于版本不同无法和其它程序进行匹配。
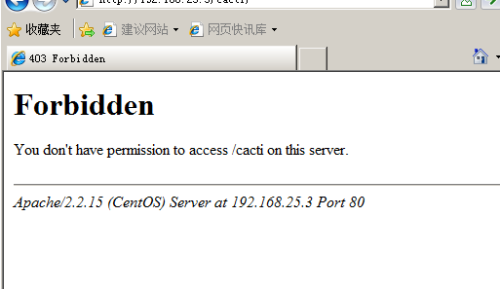
错误:访问cacti安装页面时出现如下图错误
解决方法:关闭或调整selinux机制即可
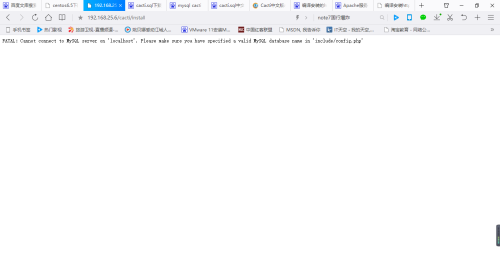
报错:访问cacti安装页面的时候出现如下图错误:
解决方法:检查cacti主目录下include/config.php中是否存在错误,一般是由于用户名或权限错误。
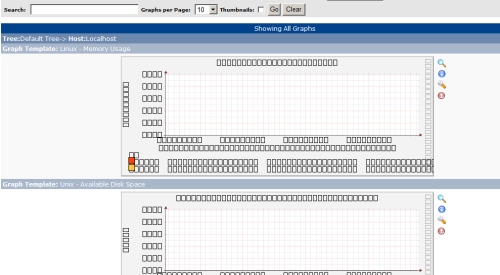
错误:cacti图像乱码
解决方法:这是由于没有安装字体导致图像无法显示,使用yum安装即可:yum -y install cjkuni-ukai-fonts 点击查看原链接
错误:安装cacti-spine时出现如下图错误
解决方法请点击该链接:http://www.linuxidc.com/Linux/2013-11/92797.htm
错误:使用cacti监控自身服务器无法采集到数据
解决方法法:更改"/etc/snmp/snmpd.conf中的com2sec notConfigUser default public"为下图所示,切记不要在这儿输入本机的ip地址,输入127.0.0.1即可
本文出自 “linux” 博客,请务必保留此出处http://bella41981.blog.51cto.com/10603572/1876934
以上是关于Cacti搭建以及部分常用插件安装的主要内容,如果未能解决你的问题,请参考以下文章


