Tesseract-OCR的Training简明教程
Posted bladestone
tags:
篇首语:本文由小常识网(cha138.com)小编为大家整理,主要介绍了Tesseract-OCR的Training简明教程相关的知识,希望对你有一定的参考价值。
引言: Tesseract虽然功能强大,但是依然由于图片本身诸多的干扰因素和识别能力,存在诸多的识别率不高和信息不准确的问题,Training的过程则可以提升起识别的准确率, 本文将介绍如何train tesseract-ocr。
1. 关于Training
Tesseract虽然很强,且可以处理各类的文字转换,但是我们的目标图片并非如我们所期没有各类的干扰因素;在实际的情况下,各类的干扰因素将导致我们的识别准确率和效果大幅度下降;针对这类问题,Tesseract提供了Training的各类工具和过程,以期提升其识别率和正确率,提供可定制化的灵活性。
- 如何来提升输出的质量(Improve the quality of output), https://github.com/tesseract-ocr/tesseract/wiki/ImproveQuality
- Traing的介绍 https://github.com/tesseract-ocr/tesseract/wiki/Training-Tesseract#introduction
- Testdata https://github.com/tesseract-ocr/tessdata
- Training Tesseract https://github.com/tesseract-ocr/tesseract/wiki/Training-Tesseract-3.00%E2%80%933.02
2. jTessEditorBox
jTessEditorBox是第三方提供了一个关于自定义用户识别结合的工具,非常的好用强大,其本身是基于Java开发而成的,需要依赖JRE的运行环境,推荐使用JDK8 u40+以上版本,具体信息可以参考其官网信息。
这里做一个小说明: 直接从其官网下载非常慢,且非常容易断线,故直接使用了baidu的离线下载,秒级下载成功;然后绕道从百度云盘上下载。
3. 安装好tesseract
这里假定已经安装好了tesseract,如果安装有问题,可以参考我之前写的一篇文字,关于如何安装tesseract的简明教程。
4. 创建用户自定义的原始图片文件
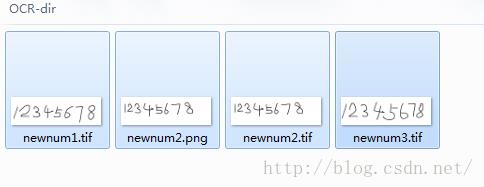
这里笔者自行使用window自带的工具,创建以下4个图片,分别写了简单的数字:

5. 运行jTessEditorbox工具,merge图片
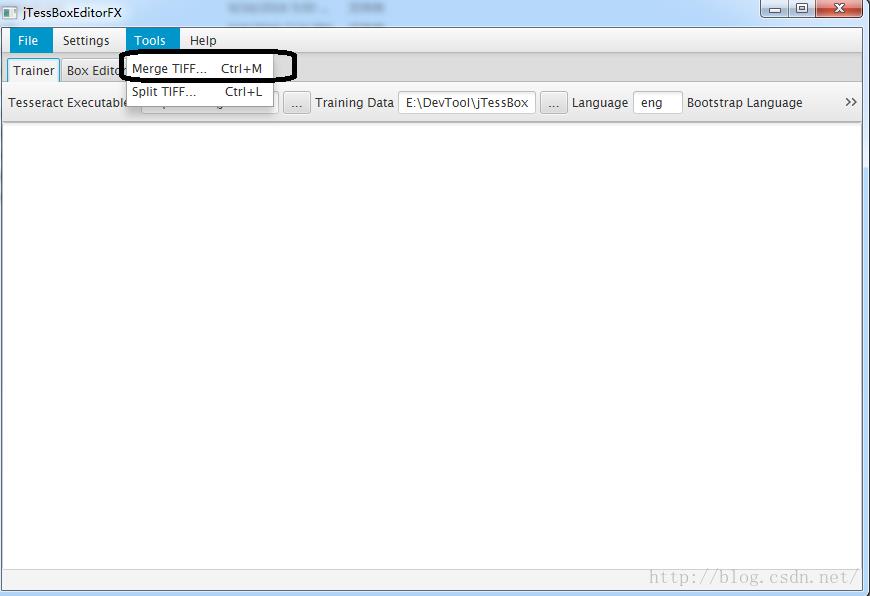
点击打开Tool菜单,点击merge,选择多个文件,另存在一个合成之后的文件:

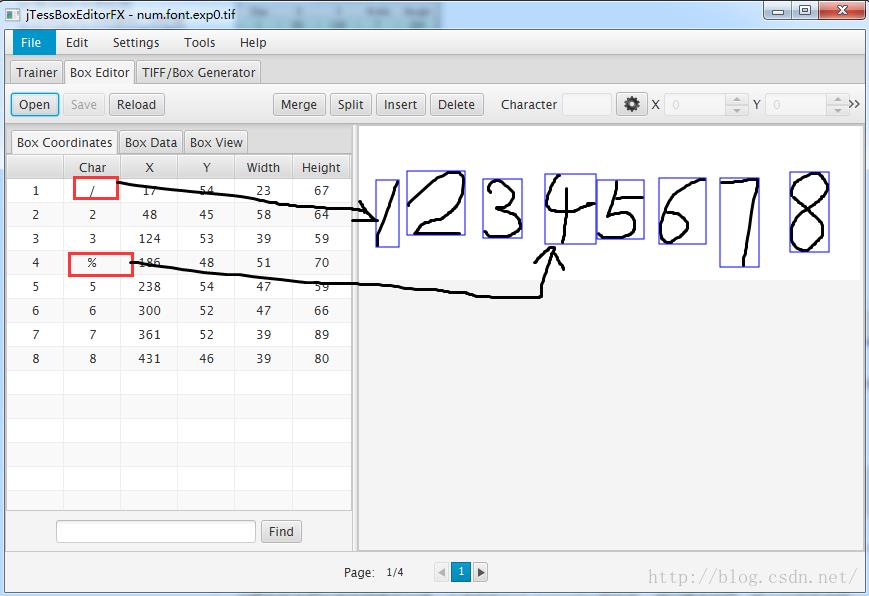
在生成另外一个merged文件之后,进行编辑和错误信息的纠偏:

另存文件或者保存文件之后,保存到当下目录。
6.. 运行tesseract命令,生成box文件
>>>> tesseract num.font.exp0.tif num.font.exp0 batch.nochop makebox
E:\\testdir>tesseract num.font.exp0.tif num.font.exp0 batch.nochop makebox
Tesseract Open Source OCR Engine v3.05.00dev with Leptonica
Page 1
Page 2
Page 3
Page 4
注:Make Box File 文件名有一定的格式,不能随便乱取名字,命令格式为:
tesseract [lang].[fontname].exp[num].tif [lang].[fontname].exp[num] batch.nochop makebox 7. 定义字体特征文件。Tesseract-OCR3.01以上的版本在训练之前需要创建一个名称为font_properties的字体特征文件。font_properties不含有BOM头,文件内容格式如下:
<fontname> <italic> <bold> <fixed> <serif> <fraktur>
其中fontname为字体名称,必须与[lang].[fontname].exp[num].box中的名称保持一致。<italic> 、<bold> 、<fixed> 、<serif>、 <fraktur>的取值为1或0,表示字体是否具有这些属性。
这里在样本图片所在目录下创建一个名称为font_properties的文件,用记事本打开,输入以下下内容:
font 0 0 0 0 08. 生成语言文件。在样本图片所在目录下创建一个批处理文件 num_batch.bat,输入如下内容:
rem 执行改批处理前先要目录下创建font_properties文件

echo Run Tesseract for Training..
tesseract.exe num.font.exp0.tif num.font.exp0 nobatch box.train

echo Compute the Character Set..
unicharset_extractor.exe num.font.exp0.box
mftraining -F font_properties -U unicharset -O num.unicharset num.font.exp0.tr

echo Clustering..
cntraining.exe num.font.exp0.tr

echo Rename Files..
rename normproto num.normproto
rename inttemp num.inttemp
rename pffmtable num.pffmtable
rename shapetable num.shapetable

echo Create Tessdata..
combine_tessdata.exe num.E:\\testdir>num_batch.bat
E:\\testdir>rem 执行改批处理前先要目录下创建font_properties文件
E:\\testdir>echo Run Tesseract for Training..
Run Tesseract for Training..
E:\\testdir>tesseract.exe num.font.exp0.tif num.font.exp0 nobatch box.train
Tesseract Open Source OCR Engine v3.05.00dev with Leptonica
Page 1
APPLY_BOXES:
Boxes read from boxfile: 8
Found 8 good blobs.
Generated training data for 2 words
Page 2
APPLY_BOXES:
Boxes read from boxfile: 8
Found 8 good blobs.
Generated training data for 2 words
Page 3
APPLY_BOXES:
Boxes read from boxfile: 8
Found 8 good blobs.
Generated training data for 2 words
Page 4
APPLY_BOXES:
Boxes read from boxfile: 8
Found 8 good blobs.
Generated training data for 1 words
E:\\testdir>echo Compute the Character Set..
Compute the Character Set..
E:\\testdir>unicharset_extractor.exe num.font.exp0.box
Extracting unicharset from num.font.exp0.box
Wrote unicharset file ./unicharset.
E:\\testdir>mftraining -F font_properties -U unicharset -O num.unicharset num.font.exp0.tr
Warning: No shape table file present: shapetable
Reading num.font.exp0.tr ...
Flat shape table summary: Number of shapes = 8 max unichars = 1 number with multiple unich
Warning: no protos/configs for Joined in CreateIntTemplates()
Warning: no protos/configs for |Broken|0|1 in CreateIntTemplates()
Done!
E:\\testdir>echo Clustering..
Clustering..
E:\\testdir>cntraining.exe num.font.exp0.tr
Reading num.font.exp0.tr ...
Clustering ...
Writing normproto ...
E:\\testdir>echo Rename Files..
Rename Files..
E:\\testdir>rename normproto num.normproto
E:\\testdir>rename inttemp num.inttemp
E:\\testdir>rename pffmtable num.pffmtable
E:\\testdir>rename shapetable num.shapetable
E:\\testdir>echo Create Tessdata..
Create Tessdata..
E:\\testdir>combine_tessdata.exe num.
Combining tessdata files
TessdataManager combined tesseract data files.
Offset for type 0 (num.config ) is -1
Offset for type 1 (num.unicharset ) is 140
Offset for type 2 (num.unicharambigs ) is -1
Offset for type 3 (num.inttemp ) is 710
Offset for type 4 (num.pffmtable ) is 130474
Offset for type 5 (num.normproto ) is 130573
Offset for type 6 (num.punc-dawg ) is -1
Offset for type 7 (num.word-dawg ) is -1
Offset for type 8 (num.number-dawg ) is -1
Offset for type 9 (num.freq-dawg ) is -1
Offset for type 10 (num.fixed-length-dawgs ) is -1
Offset for type 11 (num.cube-unicharset ) is -1
Offset for type 12 (num.cube-word-dawg ) is -1
Offset for type 13 (num.shapetable ) is 131715
Offset for type 14 (num.bigram-dawg ) is -1
Offset for type 15 (num.unambig-dawg ) is -1
Offset for type 16 (num.params-model ) is -1
Output num.traineddata created successfully.num.traineddata便是最终生成的语言文件,将生成的num.traineddata拷贝到Tesseract-OCR-->tessdata目录下。可以用它来进行字符识别了。
9. 基于新的字符集合,进行字符识别验证
验证新的测试集合
创建新的测试图片,我们还是使用输入数字,重新做了一个图片:

打开命令行,我们进行OCR转换:
E:\\testdir>tesseract newtestnum.png newresulttest -l num
Tesseract Open Source OCR Engine v3.05.00dev with Leptonica
Warning in fopenReadFromMemory: work-around: writing to a temp file

E:\\testdir> 我们查看一下我们的识别结果集合:
12357 684FAQ
1. 在windows下安装成功之后,进行tesseract的操作,碰到如下错误信息:
E:\\testdir>tesseract ttest1.png test1 -l eng
Error opening data file \\Program Files (x86)\\Tesseract-OCR\\tessdata/eng.traineddata
Please make sure the TESSDATA_PREFIX environment variable is set to the parent directory of your "tessdata" directory.
Failed loading language 'eng'
Tesseract couldn't load any languages!
Could not initialize tesseract. 解决办法: 找到testData所在的目录,默认情况下是在tesseract安装的目录,在环境变量中设置TESSDATA_PREFIX的环境变量为testdata所在的目录即可。 重新运行命令即可正常使用。
参考资料
- JTessBoxEditor http://vietocr.sourceforge.net/training.html Tesseract 训练工具
- Tesseract Guide https://github.com/tesseract-ocr/tesseract/wiki 使用指南
- Train Tesseract http://blog.csdn.net/yasi_xi/article/details/8763385 训练指南
以上是关于Tesseract-OCR的Training简明教程的主要内容,如果未能解决你的问题,请参考以下文章