SSH
Posted 零星一点
tags:
篇首语:本文由小常识网(cha138.com)小编为大家整理,主要介绍了SSH相关的知识,希望对你有一定的参考价值。
SSH:顾名思义(spring,struts2,hirbernate)
Struts(表示层)+Spring(业务层)+Hibernate(持久层)
Struts是一个表示层框架,主要作用是界面展示,接收请求,分发请求。在MVC框架中,Struts属于VC层次,负责界面表现,负责MVC关系的分发。(View:沿用JSP,HTTP,Form,Tag,Resourse ;Controller:ActionServlet,struts-config.xml,Action) Hibernate: Hibernate是一个持久层框架,它只负责与关系数据库的操作。
Spring: Spring是一个业务层框架,是一个整合的框架,能够很好地黏合表示层与持久层。
前提条件:(引入三大框架的jar包)
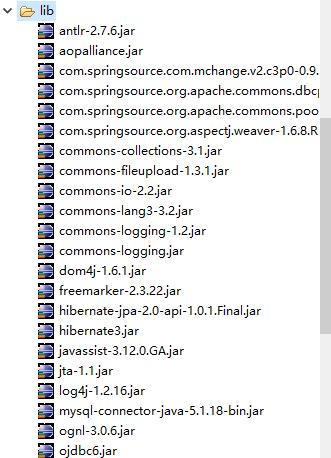
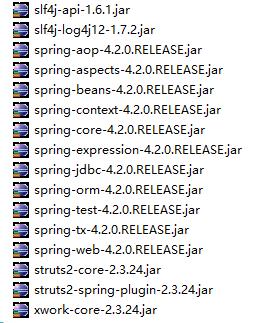
第一步:搭建分层(以购买股票为案例)
1.搭建beans层,构建实体类,以及hirbernate的小配置文件(.hbm.xml)
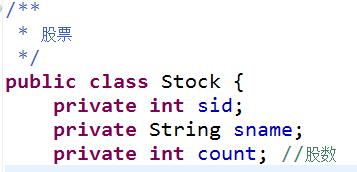
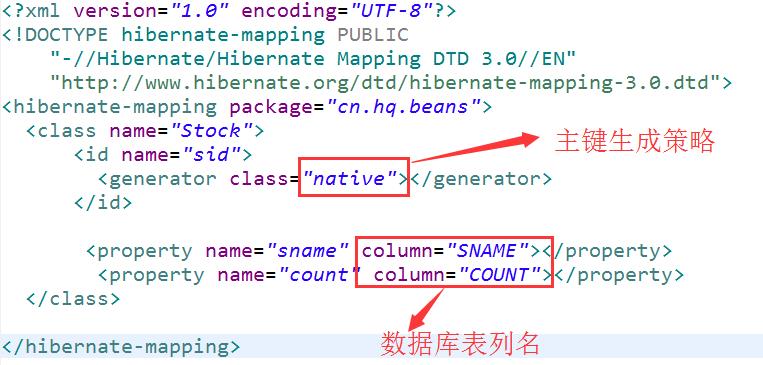
2.搭建dao层以及dao的实现


3.构建service进行业务的处理以及dao的植入
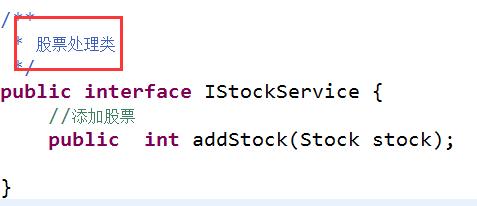
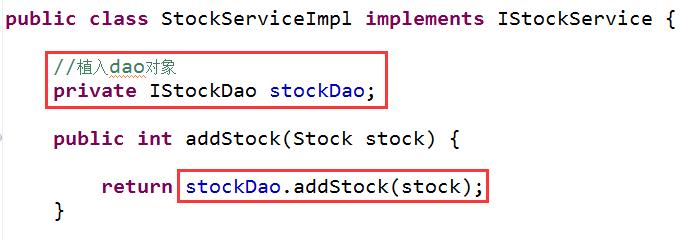
第二步:构架配置文件applicationContext.xml(关联hirbernate以及struts的配置)
|
1
2
3
4
5
6
7
8
9
10
11
12
13
14
15
16
17
18
19
20
21
22
23
24
25
26
27
28
29
30
31
32
|
<?xml version="1.0" encoding="UTF-8"?><beans xmlns="http://www.springframework.org/schema/beans" xmlns:xsi="http://www.w3.org/2001/XMLSchema-instance" xmlns:context="http://www.springframework.org/schema/context" xmlns:aop="http://www.springframework.org/schema/aop" xmlns:tx="http://www.springframework.org/schema/tx" xsi:schemaLocation=" http://www.springframework.org/schema/beans http://www.springframework.org/schema/beans/spring-beans.xsd http://www.springframework.org/schema/context http://www.springframework.org/schema/context/spring-context.xsd http://www.springframework.org/schema/aop http://www.springframework.org/schema/aop/spring-aop.xsd http://www.springframework.org/schema/tx http://www.springframework.org/schema/tx/spring-tx.xsd"> <!-- 配置dao --> <bean id="stockdao" class="cn.hq.dao.impl.StockDaoImpl"> <property name="sessionFactory" ref="sessionFactory"></property> </bean> <!-- 配置service --> <bean id="service" class="cn.hq.service.impl.StockServiceImpl"> <property name="stockDao" ref="stockdao"></property> </bean> <!-- 配置jdbc连接 --> <context:property-placeholder location="classpath:jdb.properties"/> <!-- 配置数据源 --> <bean id="dataSource" class="com.mchange.v2.c3p0.ComboPooledDataSource"> <property name="driverClass" value="${jdbc.driver}"></property> <property name="jdbcUrl" value="${jdbc.url}"></property> <property name="user" value="${jdbc.user}"></property> <property name="password" value="${jdbc.password}"></property> </bean> |
|
1
2
3
4
5
6
7
8
9
10
11
12
13
14
15
16
17
18
|
<!--hirbernate SessionFactory配置 --> <bean class="org.springframework.orm.hibernate3.LocalSessionFactoryBean" id="sessionFactory"> <!-- 数据源 --> <property ref="dataSource" name="dataSource"></property> <!--各种hibernate属性 --> <property name="hibernateProperties"> <props> <!-- 方言 --> <prop key="hibernate.dialect">org.hibernate.dialect.Oracle10gDialect</prop> <prop key="hibernate.show_sql">true</prop> <prop key="hibernate.format_sql">true</prop> <prop key="hibernate.current_session_context_class">org.springframework.orm.hibernate3.SpringSessionContext</prop> </props> </property> <!-- 引入小配置 --> <!-- <property name="mappingResources" value="cn/hq/beans/Stock.hbm.xml"></property> --> <property name="mappingDirectoryLocations" value="classpath:cn/hq/beans"></property></bean> |
|
1
2
3
4
5
6
7
8
9
10
11
12
13
14
15
16
17
18
19
20
21
22
23
|
<!-- struts2 配置action scope 范围--><bean class="cn.hq.action.AddStockAction" id="addStock" scope="prototype"> <property ref="service" name="service"></property></bean><!-- 事务配置 --><!-- 注册事务管理器 --><bean class="org.springframework.orm.hibernate3.HibernateTransactionManager" id="transactionManager"> <property ref="sessionFactory" name="sessionFactory"></property></bean><tx:advice id="txAdive" transaction-manager="transactionManager"> <tx:attributes> <!-- 指定方法的事务隔离机制以及传播行为 --> <tx:method name="addStock" propagation="REQUIRED" isolation="DEFAULT"></tx:method> </tx:attributes></tx:advice><aop:config> <aop:pointcut id="stockpointcut" expression="execution(* *..service.*.*(..))"></aop:pointcut> <aop:advisor pointcut-ref="stockpointcut" advice-ref="txAdive"></aop:advisor></aop:config> |
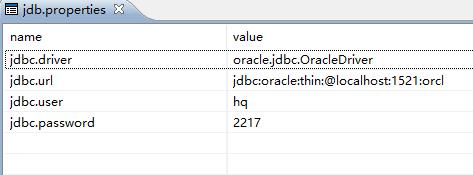
构建jdb.properties,连接数据库。
测试类:
首先测试hirbernate整合

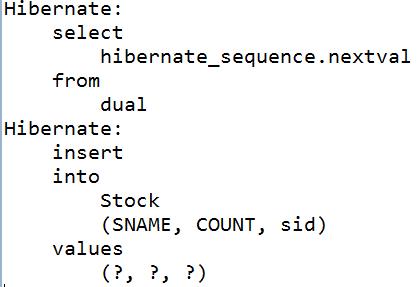
struts2整合:
前提: 必须在Web应用启动时,创建Spring的ApplicationContext实例
步骤: 采用ContextLoaderListener来创建ApplicationContext: contextConfigLocation /WEB-INF/spring-config/applicationContext.xml org.springframework.web.context.ContextLoaderListener
构建action类
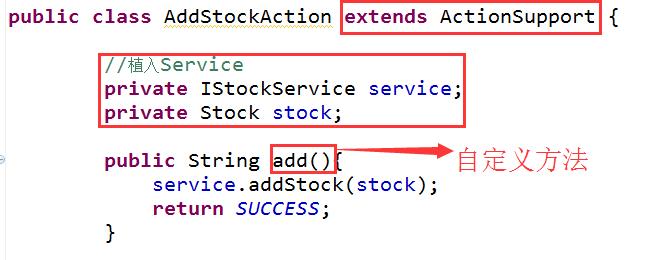
struts.xml配置文件:
|
1
2
3
4
5
6
7
8
9
10
11
|
<!DOCTYPE struts PUBLIC "-//Apache Software Foundation//DTD Struts Configuration 2.3//EN" "http://struts.apache.org/dtds/struts-2.3.dtd"> <struts> <package name="default" extends="struts-default"> <!-- 定义action节点 指定action 指定方法 --> <action name="addaction" class="cn.hq.action.AddStockAction" method="add"> <result name="success">/index.jsp</result> </action> </package> </struts> |
applicationContext.xml中配置:

web.xml的配置:
|
1
2
3
4
5
6
7
8
9
10
11
12
13
14
15
16
17
18
19
20
21
22
23
24
25
26
27
28
29
30
31
|
<!--?xml version="1.0" encoding="UTF-8"?--><web-app xsi:schemalocation="http://java.sun.com/xml/ns/javaee http://java.sun.com/xml/ns/javaee/web-app_2_5.xsd" xmlns:xsi="http://www.w3.org/2001/XMLSchema-instance" xmlns="http://java.sun.com/xml/ns/javaee" version="2.5"> <display-name></display-name> <!--指定配置文件的位置和名称 --> <context-param> <param-name>contextConfigLocation</param-name> <param-value>classpath:applicationContext.xml</param-value> </context-param> <!-- 监听器:作用是在整个网站运行的时候,获取到ServletContext(application)初始化的时候,自动 注入Spring容器 --> <listener> <listener-class>org.springframework.web.context.ContextLoaderListener</listener-class> </listener> <filter> <filter-name>struts</filter-name> <filter-class>org.apache.struts2.dispatcher.ng.filter.StrutsPrepareAndExecuteFilter</filter-class> </filter> <filter-mapping> <filter-name>struts</filter-name> <url-pattern>/*</url-pattern> </filter-mapping> <welcome-file-list> <welcome-file>index.jsp</welcome-file> </welcome-file-list></web-app> |
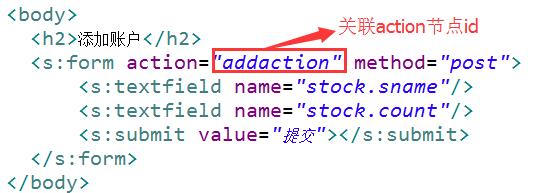
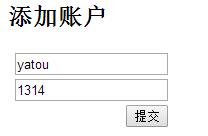
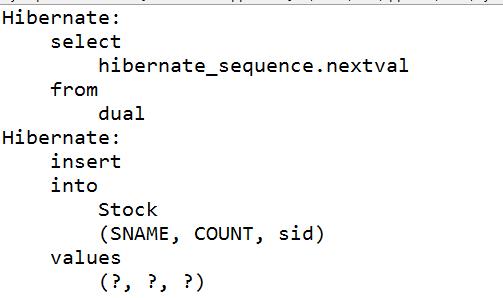
测试页面:
add.jsp


以上是关于SSH的主要内容,如果未能解决你的问题,请参考以下文章